Primary Palette

Primary Palette:  Three Powerful Plant-Sourced Pigments

Last year, in preparation for my Waste Not Urine blog and workshop I wrote a lot about Japanese Indigo and how regular application of diluted urine can significantly improve growth rate and lead to more frequent harvesting.  I talked about the multi-step process of pigment extraction, and the historically significant role that urine played in the dyeing process.  Here, I want to share more about my experience about making paints with this pigment, while also introducing two more seemingly innocuous plants that yield bright and relatively light-fast pigments that can then be blended into an array of homemade binders for surprisingly high quality, artist-grade paints. 

Weld lake, Madder root lake and Indigo pigment, along with eggshell lime, are blended with a casein binder to create the paints used to illuminate this floret pattern on plywood.

Paint: Pigment and Binder

The simplest paints are a combination of just two parts: a pigment and a binder.   Pigments are the colorant; they’re the small bits of colored material that are suspended in the binder.  Binders are the liquid into which the pigment is blended.  Binders are adhesive liquids that dry to form thin layers that ‘lock’ in pigments to form a continuous sheet of color.   These days, modern chemistry gives us access to a massive array of binders for many different applications.  However, what we’re most interested in here are a few binders that can be readily made with locally-available materials at home: 

  • Egg Tempera: Sourced from the yolks of hen’s eggs and thinned with water.  Egg tempera is a quick drying binder that forms a relatively tough, water resistant paint with a velvety sheen.  Egg Tempera was a ubiquitous medium among painters that preceded the European Renaissance.  
  • Glair: Is the yellow, translucent liquid that drains from standing, whipped egg whites.  It is a relatively weak, thin and easily-spoiled binder, but, as an amateur artist it remains one of the easiest to make and work with.  Glair was commonly used as an adhesive for gilding, and also as the binder for paints used in the margins of medieval-era  illuminated manuscripts.  
  • Hide Glue: A very strong, heat-resettable glue that is still prized for its application in woodworking projects, when diluted with water makes a binder for soft distemper paints.  Historically most commonly used as a size, or as an ingredient in gesso when preparing paper, canvas and panels for paint.  Made from animal hide scraps and bones leftover from butchery and the tanning processes.  
  • Casein: A syrupy glue made from a protein found in curdled cow’s milk.  Made when curds are rinsed and dried, then reconstituted in water with an alkali.  Like hide glue, casein is a strong glue that works as a paint binder when diluted with water.   As an alternative to egg tempera, casein is a slower-drying binder with a water-resistant matte finish. 
Homemade Binders: Casein, Egg Tempera and Glair

Some of the oldest paints in history are combinations of these binders of animal origin and an earth pigment.  Earth pigments are finely crushed stones and clays that yield permanently lightfast colors ranging from greens and yellows, oranges, reds and browns.   Historically, brilliant lightfast primary colors were made from a range of minerals and (sometimes very toxic) metal salts like cinnabar and Egyptian blue.   In modern times, many of these enduring brightly colored pigments are essentially out of production, replaced by synthetic forms of fossil fuel origin.  Luckily for us, as artists interested in locally-available, sustainably-sourced pigments, we have options in plant-sourced pigments.   

Plant-Sourced Pigments

There are an abundance of plant-sourced pigments, but relatively few that are considered lightfast.   Anthocyanins in beets, red cabbage, blueberries, elderberries and pokeberry for example, boast brilliant blues and pinks when crushed and sieved.  However, color from fruit and vegetable juices are fleeting, often turning brown or fading away completely in a matter of months.  

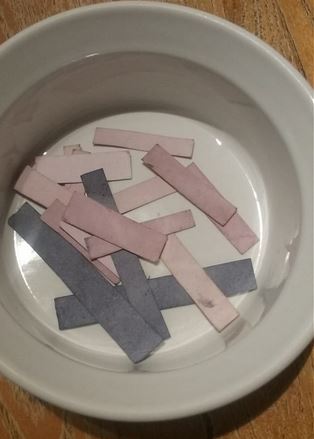
Anthocyanins are a poor pigment for lasting artwork, but they work remarkably well as natural pH indicator strips.

Many plant derived pigments are durable. Lasting brown inks can be rendered from black walnut hulls. Charred grape vines (or other carbonaceous materials) can be ground into deep blacks.  For bright primary colors, we can rely on millennia of experimentation, chiefly among dyers, that has led to the discovery of more durable and lightfast yellows, reds and blues. 

Weld (Reseda luteola)

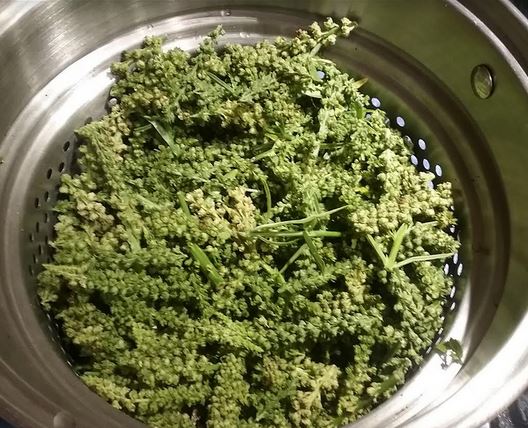
Weld flowers and stems, in the dye pot

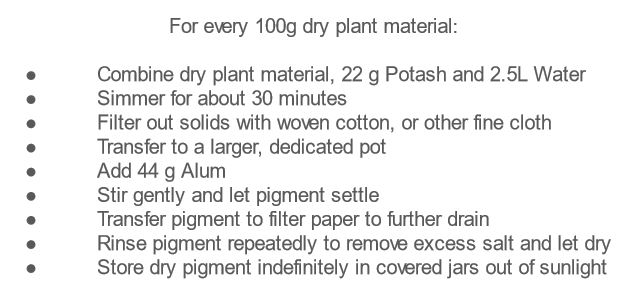
Weld is a ‘weedy’ biennial native to Europe and Western Asia, recognizable by its spiky form and slender cone-shaped flowerhead.  Weld is said to yield better pigments when grown on dry, sandy or alkaline soils; it prefers poor soils.  Weld propagates easily by seed.  Historically cultivated as a dye plant, weld is rich in the flavonoid Luteolin.  A deep, clear yellow dye can be obtained when the stalks, leaves and seeds are simmered in water and potash.  Dry Lake pigment can be obtained from the liquid dye by binding and flocculating these compounds with alum (potassium aluminum sulfate) or quicklime (calcium oxide). 

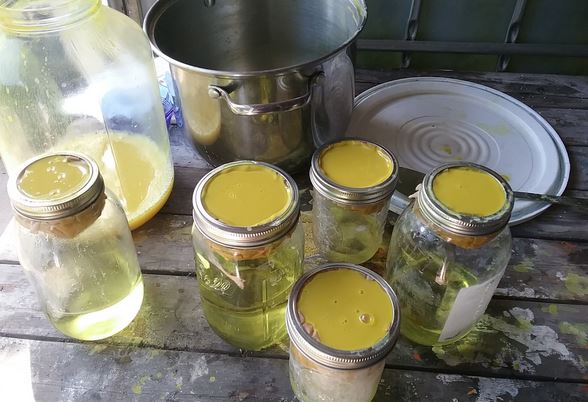
Weld lake, rinse water filtering through coffee filters
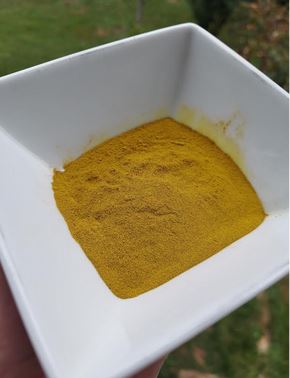
Dry Weld Lake Pigment

Weld lake pigment is a very clear, intense yellow that tends to be less than opaque when mixed in binders.  For this reason, as with other plant pigments, it was historically used as a layered glaze over other more opaque pigments.  Weld lake would have been commonly found in the margins of illuminated manuscripts.  Weld lake was used alongside indigo in the (now faded) dark green background of  Johannes Vermeer’s famous 1665 portrait, Girl with a Pearl Earring

Weld lake can be obtained from the plant after just one growing season with this simple recipe: 

Madder (Rubia tinctorum)

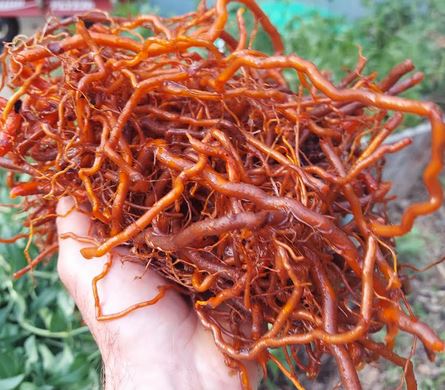
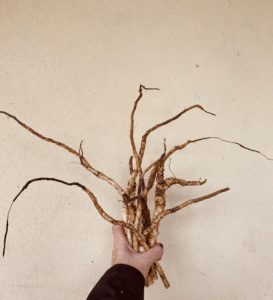
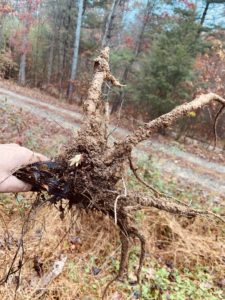
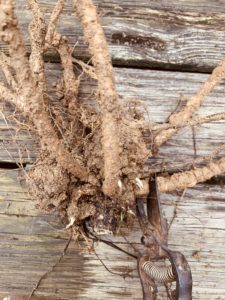
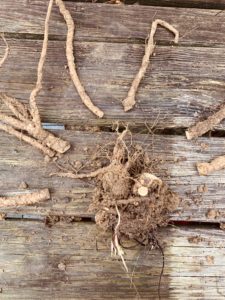
Brilliant, fresh madder roots

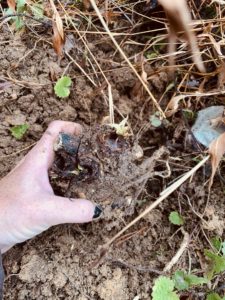
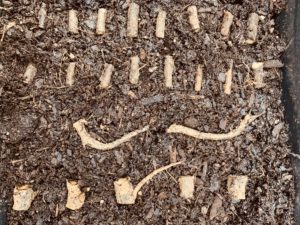
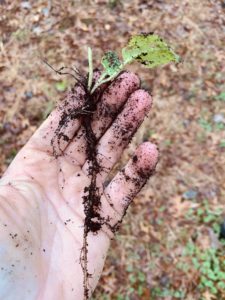
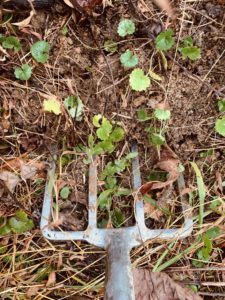
Madder is a herbaceous perennial in the Rubiaceae family. In our Southern Appalachian climate the madder tops die back annually but quickly put on new growth in the spring.  A brilliant red dye, rich in Alizarin, can be obtained by boiling washed madder roots in an alum solution. It is believed that higher pigment yields can be obtained when well supported with a trellis and grown in slightly alkaline soil.  Madder roots are easier to harvest when grown in pots.  Madder roots should not be harvested until after at least 3 years of growth.  Upon harvesting, madder can be easily propagated by transplanting a small piece of root and shoot and few leaves.

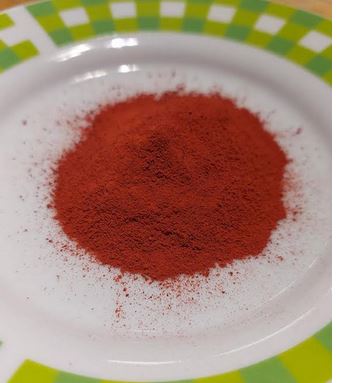
Madder lake pigment

Madder root is possibly one our most ancient dyes; cloth, dyed with madder was found in the excavated tomb of the Egyptian pharaoh popularly known as King Tut.  The red stripes of the American flag were originally dyed with madder.  Like weld, madder lake was commonly used in illuminated manuscripts and in oil paintings by Vermeer and his dutch compatriots in the 17th century.  Madder, again like weld, is a more transparent pigment that lends itself to over-painting, commonly used as glaze to bring a dimensional look to fabric and upholstery.  Vermeer again, used madder lake to accentuate the red lips in Girl with a Pearl Earring.   

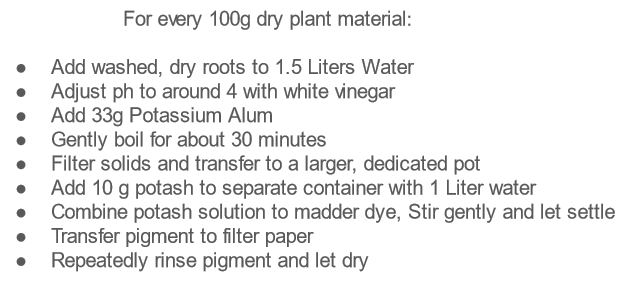
A madder lake pigment can be made when precipitating the red dye with alum and potash:

Japanese Indigo (Persicaria tinctoria)

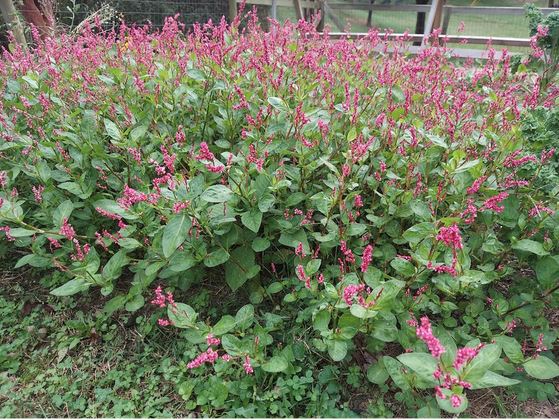
Flowering Japanese indigo plants

Japanese Indigo is a tender, flowering annual, in the Polygonaceae family.  Japanese Indigo is just one of a handful of plants that bear significant amounts of the glucoside Indican – the “precursor” to indigo pigment.  Indigofera tinctoria, or ‘true indigo’ is a commercially cultivated legume that bears significant amounts of indican.  Woad is a common indican-bearing brassica native to Europe.

Indigo is a dye with a rich and vibrant world history. Indigo pigment was likely independently discovered on at least three different continents.  Dried blocks of indigo pigment were traded on the silk road and into Europe through northern Africa.  Centuries later, indigo was among tobacco and cotton as a major export in the slave economy of the American south.  Natural indigo was the original dye of the iconic blue jeans. 

Indigo paints are found in many cultures throughout history: Pre-Columbian mesoamerican cultures employed a special technique of blending indigo pigment with an imported clay called palygorskite to create an enduring paint known as Maya blue.   Medieval Christian painters used indigo when mineral sources of blue were not available or became too expensive.  Again, Dutch contemporaries of Vermeer used indigo along with the other plant pigments for accenting clothing and drapery in oil paintings.  “Haint Blue” ceilings of porches in the American South were originally painted with natural indigo pigment. 

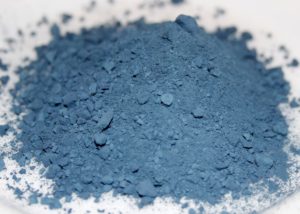
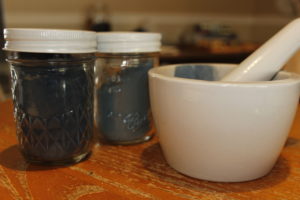
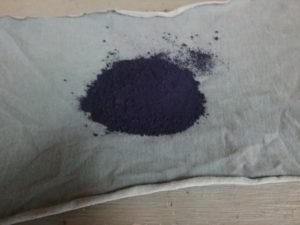
Dried Indigo Pigment

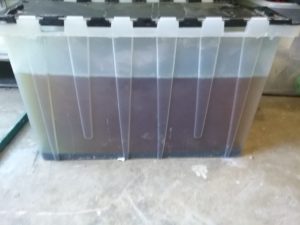
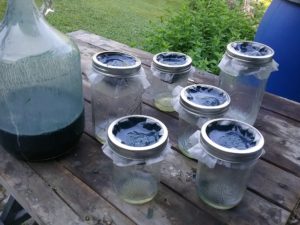
Japanese Indigo is a fast growing annual that prefers moist, rich, loamy soil.  The pigment is found in the leaves, and pigment yield is tied to vegetative growth.  It responds well to nitrogen.  It is easily propagated via cuttings.  A small section of the crop should be allowed to go to seed; Japanese indigo is a plant that is notoriously difficult to germinate after one year.  When about 18” tall, the tops can be cut off about 4” above the ground.  The tops will bifurcate and grow back more densely for up to 3, or even 4 or 5 harvests in a single season.  Pigment can then be extracted from fresh tops through a multi-step fermentation process best described here, but summarized below:

  • Cover Japanese indigo stems and leaves with water and keep submerged
  • After approximately three days in warm weather, the water will turn an eerie, bright greenish blue and take on a unique sweet, low-tide smell. 
  • The process is temperature dependent, be careful not to over-ferment. 
  • Liquid should be filtered and poured into another container.
  • Fresh quicklime (CaO, or ‘pickling lime’) should be added at approximately 1 tbs per gallon of liquid
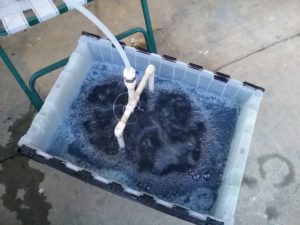
  • Liquid should be aggressively aerated for at least 10 minutes. 
  • After aeration the liquid should become dark blue and frothy
  • Pigment should settle within 12 hours, upon which water should be decanted. 
  • If settling does not occur, incrementally add small amounts of more fresh quicklime. 
  • Remove pigment paste and continue draining through filter papers. 
  • Store pigment paste in the refrigerator or dry to store indefinitely in airtight jars. 
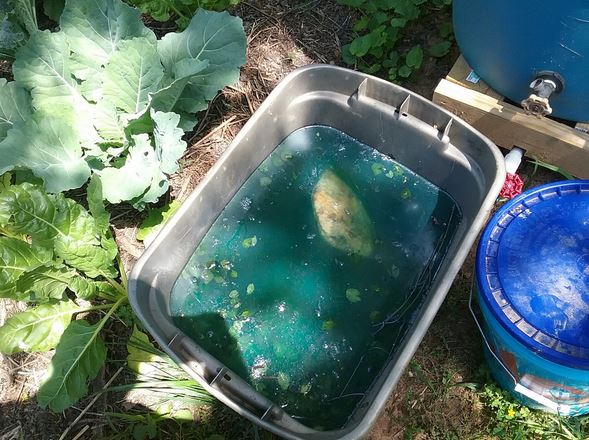
Eerie blue-green ‘mermaid’ water: Ready to aerate

Plant based pigments will never be as lightfast as their mineral counterparts, but these three plant pigments are among some of the most lightfast plant sourced pigments that are known to exist.  I find a unique satisfaction in creating art with materials grown and sourced on my own property – I hope this inspires other gardeners to experience art in this way, and other artists to discover gardening in a new way.  If you have insight with growing, extracting and painting with your own plant pigments and homemade binders I would love to hear from you.

Spawn Production For Small Farms

This post from Living Web Farms’ Ian Ruckriegel covers the creation of a small-scale mushroom spawn lab and simple methods for making mushroom spawn for use around a small farm.  Ian recently led an online workshop covering this same material.  A video can be seen here. 

My goal here is to give someone that may be new to mycology, yet interested in creating their mushroom spawn an overall understanding and basic toolkit for how it is done.  Upon reading, I hope you can walk away from this confident that you understand the process enough to get started on it by yourself.

I’ll cover the basic setup and skills for general mushroom spawn production.  I won’t be going over any species-dependent details as any given species will have their own idiosyncrasies that are beyond the scope of what we can cover here. 

This is essentially a distillation of what I’ve learned over the years of doing it on my own.  I’m not a mycologist nor a professional mushroom farmer but have managed to make a lot of low-cost, good-quality mushroom spawn for cultivation projects around the farm.  If I can manage it then I am convinced anyone can, so here is the most straightforward presentation I can give on how I do it.  I remember when I first started.  It was very confusing and difficult to know where any given piece I was reading about fit into the whole.  I hope to alleviate this sense of uncertainty in those who would like to make their spawn for mushroom projects around their small farm or home.  It is by no means exhaustive and is a kind of starting point.

Everything mentioned here can be sourced from either a mushroom supply company, hardware store or amazon.  These techniques are further focused on small farm situations.  That is,  somewhere between a home cultivator who might need a single bag of shiitake spawn for a dozen logs in their garden and a dedicated mushroom business who might need hundreds at a time.  The simple techniques here are ideal for making several dozen spawn bags at a relatively low cost for a small farmer looking to experiment or make a few hundred mushroom logs.

In the mushroom-growing communities of the internet, many content creators will advise purchasing spawn from a reputable source.  This is good advice!  If you already have a production system, specific species to cultivate, and a reliable and consistent substrate then it really might make economic sense to outsource your spawn production needs.  Outsourcing the spawn process will free up a lot of valuable time that can be better used scaling up your system.  

There are, however, many good reasons why you might want to create your own.  The unit cost per homemade spawn bag consists mainly of grains and/or sawdust and filter patch bags.  This will vary by area and source but is generally between $2-4 per 5# bag compared to the $20-30 per 5# spawn bag purchased from a supplier.  This savings can allow you to experiment with new ideas, substrates, and species on a smaller scale.  It also allows you to increase the rate of spawn to substrate which generally has a favorable effect on yield and spawn run time.  Making your spawn also allows you to clone and grow out species found in your area growing on native substrate sources.  This is somewhat analogous to growing an heirloom tomato bred in your specific locale versus a general cultivar offered in a seed catalog.  Sometimes this local adaptation can confer real benefits. 

The real tradeoff when deciding to purchase or create your spawn comes down to time and initial upfront costs.   The equipment and space needed to make your own represents a real cost initially.  However, items like an expensive pressure cooker and homemade flow hood will last your whole lifetime and once they are acquired are there to use as you need them.  It also has to be said that having a lab like this opens up a whole world of possibilities beyond just spawn production to cloning or even breeding strains and other mycology work.

The four basic steps in the whole endeavor are creating a labculturing, expansion, and inoculation.  There is a great deal of overlap in these final three steps but I have chosen to divide them here, albeit somewhat arbitrarily,  for the sake of conveying a clear approach to the many tasks.  Let’s go through each step and touch on the essential skills and ideas of each.

Creating a Lab

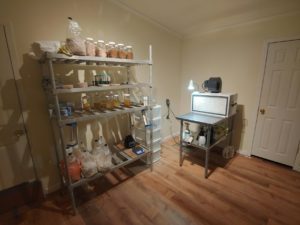
Choosing a space is the first step.  The space should be as clean as you can manage. Smooth, hard, non-absorbent surfaces that can be sanitized with alcohol are important.  Repainting the walls with high gloss white paint would be helpful although not necessary. Any rugs or fabric curtains should be removed.  When not in the room it should be pretty close to dark which can be accomplished by blocking the windows with cardboard.  The goal here is a clean, as close to sterile as is feasible, dark room with enough space to fit a small shelf and 2’x4’ table. I would say minimum square footage of around 50 sq ft should be sufficient. Almost any spare room with hardwood floors is ideal here.  If a spare clean room is not possible a small corner of a basement can work if you make a small plastic mini room within the larger room.  In this case, the optional positive pressure box mentioned later becomes more desirable.  This need not be a fully dedicated space just for a mushroom lab.  It could otherwise be an office or some multipurpose room.  It just needs to be easily cleanable before use as a lab and then your little table and flow hood could go back into the closet afterward.

Once you have a clean space for spawn making you will need the following equipment:

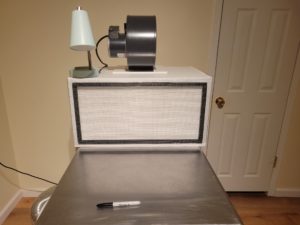
Flow hood the goal of a flow hood is to provide sterile laminar(smooth and not turbulent) air over your workspace thereby preventing contamination. This is essential for any agar-related work.  You can buy a pre-made flow hood if you have the money but I would suggest building one as it is significantly cheaper.  Purchasing a flow hood can set you back over $1000 while you can build one for less than $500.  Building a flow hood is as simple as building an airtight box that uses a fan to force air in and a HEPA filter to clean the outgoing air.  Here is a website that can provide a step-by-step DIY.  There are many such websites detailing this process and many message boards that provide easy instructions.

The most complicated part is finding a HEPA filter and matching an appropriate fan.  A fan too strong will create turbulent air while a fan too weak will not provide enough clean air to sweep the workspace clean.  The standard size is 12”x 24” which is ideal for a small lab. The filter should be 99.95% HEPA or 0.3-micron filtration capacity.   A 12”x24” 0.3-micron filter will require roughly a 549 CFM fan.  Use what’s called a blower or squirrel cage blower and NOT an in-line fan. The in-line fans can create a great deal of oscillation that will vibrate your work surface and things will slowly begin to migrate around the table and eventually fall off. Not fun.

Much of the literature available on the internet include math equations to perfectly match a blower to any filter.  Unless you plan on building a novel size or shape flow hood it’s not necessary to torture yourself with the calculations. Here is exactly the filter and blower I and many other people use:

Just get these and build a box.  You will know it’s right when you turn it on and hold a lighter about 12” from the face and the flame tilts in the laminar air about 45 degrees.

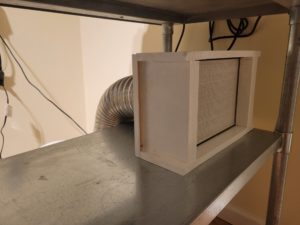
Positive pressure box(optional)– This is an optional piece of equipment that adds an extra layer of insurance against contamination that I would recommend.  It’s essentially a smaller cheaper version of the flow hood that brings air from outside the lab, cleans it with a small HEPA filter, and then pumps it into the lab.  This creates a positive pressure in the lab that then pushes cleaner air out of the lab thereby blocking the entry of unclean air.  This unclean contaminated air would otherwise be flowing in and out under the door of your lab, or anywhere else that isn’t sealed off to the exterior of the lab, as the barometric pressure and wind conditions change. It also has the added benefit of increasing the life of your much larger and more expensive filter installed on your flow hood.  

To build this get a length of 4” ducting and a small 4” inline fan.  Rig that to push air into a box whose outlet has a HEPA filter purchased from a home improvement store.  They usually have a plethora of these cheap  HEPA filters of different shapes and sizes sold as replacements to a variety of air filtration products.  Then hook the inlet to the 4” ducting to pull air from outside the lab.  This can be from a window, under or through a door, or even through the central air duct.   The important part is that the air source is from outside the lab.  This need not be large, powerful, or expensive.  You should be able to make this for $100 or less and as long as it can get in at least 100 cfm of filtered air it will serve its purpose.

Table– stainless steel preferable, smooth non-porous otherwise. sized 5’x2’ at least.  Big enough for the flow hood and a 2’x2’ workspace in front of the flow hood

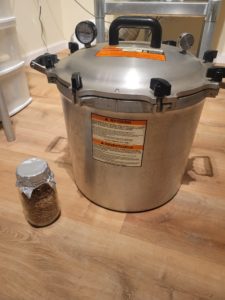
Pressure cooker–  All American brand pressure cookers are the standard for most small-scale mushroom growing They are admittedly scarce since the pandemic hit but be patient and you will find one.  Get the biggest All American pressure cooker you can.  This will drastically increase your efficiency as how much you can sterilize at a time is often the biggest bottleneck in the whole process.  I use an All American 941.  This model can fit 16 qt jars at a time or 4-6 spawn bags, which seems to be ideal for this scale.  All the following recipes are based on a batch run of each given task in this particular pressure cooker.  It can also be used for big canning projects around the farm.  These are not cheap but they are well worth the cost in my opinion and very versatile besides our purposes here.

Short of that any large Pressure cooker will do.  A minimum volume would probably be at least 15-20 qts of volume.  At least enough space to fit two 5# filterpatch bags of grain spawn or 6-7 qt size mason jars.  Anything less than that probably wouldn’t be worth your time.

Shelving–  Any shelving will do as long as it is both sanitizable and lifted off the ground to protect from rodents.   Bags of grain are very tempting to vermin.

Supplies–  There are various small items for the lab that can be procured on amazon or any mycology supply store.  Here is a list for each step of the spawn making process:

  • Culturing
    • Petri dish, 110 mm, sterile and wrapped in packs of 10-20
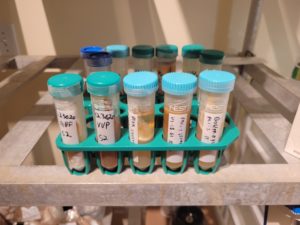
    • Centrifuge tube, 50 ml,  sterile and wrapped in packs of 25 a with holding rack
    • Scalpel
    • Alcohol lamp with denatured alcohol
    • Parafilm 2”x250’
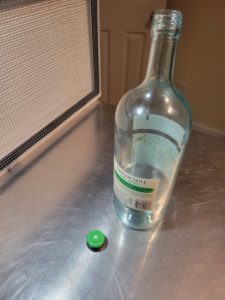
    • Screwcap Wine bottle with filter lid (poke a hole in the lid and fold up some Tyvek underneath)
    • Latex Gloves
    • Surgical masks
    • Tyvek suit
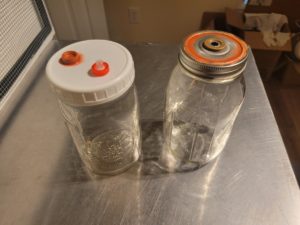
    • LC lids,  polypropylene wide mouth mason jar lids with a filtered air port and self-sealing injection port installed with silicon glue(optional, for LC)
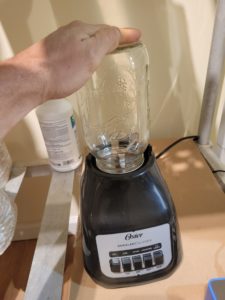
    • Cheap Oster blender,  (optional, for LC)
    • Syringe, (optional, for LC)
  • Expansion
    • Narrow mouth qt jars
    • 70 mm mason jar lids, autoclavable
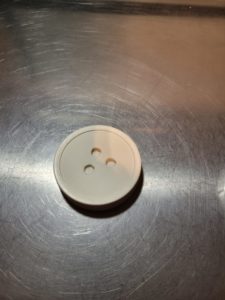
    • 70 mm filter discs
  • Inoculation
    • Filter patch spawn bags, sized 22.5 x 8.25 x 4.75 inches, .3 micron filter patch
    • Medium binder clips,  for securing the bags   

Assemble the above items in your new workspace.  The arrangement of everything in the lab affects your work.   Place the flow hood and work table on the opposite end of the room from the door with the storage rack between.  If you are using a positive pressure box place its outlet underneath or to the side of the work table facing the door.  This will create a pressure gradient that will constantly sweep toward, and eventually underneath, the door making for an upstream fight for contaminants.  Have your tools and items to be used either beside or behind you while you work.  Nothing should be beyond the flow hood or be able to shed any contaminants into your sterile laminar air.

As you work through the subsequent steps it is important to hold some ideas in mind.  Just as the arrangement of your lab is important,  the positioning of items and workflow while in front of your flow hood affects the risk of contamination.  Agar and other items sensitive to contamination need to be placed directly in front of the flow hood while working.   Do not place tools or grain jars in between the flow hood and a petri dish for instance, as this is an opportunity for a contaminant to jump from a less clean item into the agar of your petri dish via the stream of clean air coming from the flow hood.  Like the room as a whole, there is a gradient of cleanliness in the area between where you stand and the face of the flow hood. The risk of contamination increases as you move either farther from the flow hood face or behind any object introduced onto the laminar air, like your hand or mushroom specimen you intend to clone.  Arrange items in your workspace accordingly to control the risk of contamination.

Staying clean is very important in the lab generally.  Before any session in the lab, I turn on my flow hood and positive pressure box for an hour or so to clean up the air,  take a shower and then go directly to my lab and suit up in a Tyvek suit,  mask, and gloves.   I then spray the air and work surface with a fine alcohol mist. Work deliberately and smoothly while in your lab and use the alcohol flame to sterilize your scalpel or knife, heating it in the flame until it is red hot in between cuts

A quick word about temperatures:  Many mushrooms have a preferred temp they like to grow at and most sources concern themselves a great deal with incubation temps.  I find this can mostly be ignored as most all fungi grow well at room temp with only a few exceptions.  If anything you would do well to keep your lab space a little cooler as I have noticed higher temperatures seem to promote contamination.  I store almost all of my cultures in the fridge; except for Volvariella, almond portobello, and pink oysters that like warmer temps which I store in the lab at room temp.  Don’t let your lab freeze or get too hot in the summer and you can mostly not worry about temperature.

Culturing

The overall goal in the culturing step is to store a young cell line free of contamination and have it ready to expand for the next step.  The substrate, or material we will be growing the mycelium on, is agar that has been congealed in either a petri dish or test tube.  Sterility is important at this stage as any contamination will only be amplified from here on out.

The idea of a young cell line is an important one that needs some explaining.  I am sometimes asked if you can go to the grocery store and clone a mushroom you like there and use it for cultivation.  The simple answer is yes.  You wouldn’t want to use that for any serious spawn production, however, as a culture made from a store-bought mushroom would be prone to senescence and therefore lack the vigor necessary for the mushroom growing process.  The more a mycelial network expands the more it ages and a commercial mushroom operation will have already expanded its cell line greatly during the growing process.

Always have a bank of cells from which you can call upon for the expansion phase of the spawn production.  This bank is generally kept in what’s called a culture slant.  This is a test tube that has been filled with warm agar and then tilted during cooling so that the surface of the agar runs diagonal lengthwise of the tube.  I always have at least two slants of each strain I have and they can be stored in the fridge, lid wrapped in parafilm to allow for a modicum of gas exchange, and placed into a plastic bag.  Stored this way a culture can last for years.

Buying a culture slant is the absolute best way to get started with an established strain of fungi.   A culture slant will already be a sterile, relatively young cell line in an easily stored container.  Most spawn purveyors sell pure culture slants for between $30 and $90.  Considering you can turn that small purchase into literally thousands of bags of spawn retailing for around $20 a piece that’s a great deal!   Now that you have built your lab you are ready to do just that.

Cloning specimens is the other great way to get a culture in hand.  Whenever I see a good mushroom specimen fruiting plentifully in the wild I grab one, clone it and add it to the library.  To clone you will need a young fruitbody that is as free of bugs and dirt as can be managed.  You will then need to grab a clean petri dish and head to the lab.  

  1.  Place the plate directly in front of the flow hood and the mushroom farther back from the plate. 
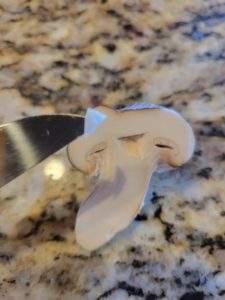
  2.  Break open the cap of the mushroom and cut out a small 3-5 mm size chunk from the white tissue above where the stem meets the cap.  Place this in the center of the plate.  
  3. Parafilm, label, and date the plate. Wait 10-20 days for the mycelium to fully colonize the plate.  
  4. Then a small piece of agar from the cleanest part of the plate,  between the initial mushroom tissue and outermost rim of mycelial growth, can be cut out and placed in a culture slant to colonize.  

You now have a purified culture to create your spawn from.   In this way, interesting and potentially useful strains are saved from the wild.  Many popular commercial strains started life by being cloned from wild specimens. 

Working with agar is one of the least forgiving areas of this whole process.   It must be sterilized to protect from contamination and once sterilized can not come in contact with anything unsterile or it will be ruined.  When in the lab anything with agar should be as close to the face of the flow hood as possible

Creating agar slants and plates is simple: 

  1.  Agar ingredients should be mixed according to the recipe and placed in a wine bottle with a filter lid and sterilized at 15 psi for 20 min.  (Do not let the pressure release on the pressure cooker go off as the agar can boil out of the bottle and be ruined)
  2. Once the sterilization cycle is complete, turn off the heat and place the pressure cooker, fully sealed, in your lab.  
  3. Allow it to cool to about 120 F before opening the pressure cooker and starting to pour.  Agar congeals around 110 F so you must work quickly and pour the whole bottle before it sets. 
    •  If pouring slants, fill the tubes in the rack, put the caps back on the tubes, and tilt the whole rack about 30 degrees while cooling. 
    •  If pouring petri dishes, stack them in stacks of ten after filling and put mason jars of hot water on the top dish to prevent condensation from forming in the dishes as they cool.   

Unused slants and dishes should be sealed in plastic bags and stored in the fridge where they will last for many months. 

MYA Agar Plate Recipe  (Yields 20 each 110 mm petri dishes or 25 each 50ml slants )

        .5 L water

        10 g agar

        10 g malt

        1 g yeast

        .5 g peptone

PMYA Agar Plate Recipe  (Yields 20 each 110 mm petri dishes or 25 each 50ml slants )

        .5 L water from a pot of boiled potatoes

        10 g agar

        5 g malt

        1 g yeast

        .5 g peptone

PDYA Agar Plate Recipe  (Yields 20 each 110 mm petri dishes or 25 each 50ml slants )

        .5 L water from a pot of boiled potatoes

        10 g agar

        5 g dextrose

        1 g yeast

        .5 g peptone

Another important consideration when working with agar is to alternate recipes for each batch of agar.  If a strain grows on the same substrate for too long then senescence can begin to set in earlier than necessary.  By forcing the fungi to adapt to new agar substrates you can essentially keep it young and vigorous.  I usually just rotate between the above three recipes.   

Once you have a culture slant fully colonized and contaminant-free it’s time to start making transfers.  This is done by:

  1.  Quickly remove a piece of myceliated agar from the slant and place it in the middle of a clean petri dish.  
  2. Seal petri dish with parafilm, label, date, and allowed to fully colonize.   
  3. Repeat with further expansions from the above dish to yet more petri dishes to obtain the desired number of dishes.

 I generally get 8 qt jars of grain per petri dish.   If you plan on starting the expansion phase with liquid cultures then you will only need one fully colonized petri dish as each dish creates one 500 ml jar of liquid culture.   

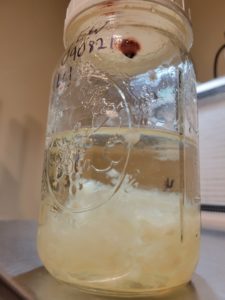
A further step can then be taken to make a Liquid Culture(LC)  which is essentially agar from a  petri dish that has been blended in water.  The mycelium is then allowed to grow for some time while occasionally being agitated.  The agitation breaks up the mycelial mat producing millions of small stellate mycelial forms allowing for rapid colonization of the grains during the expansion phase.  

Liquid cultures are not necessary to do but I do recommend it for fast-growing vigorous mushroom species like oysters or Ganoderma.  The drawback to liquid cultures is that any contamination that takes hold can then go on to ruin many jars of grain.  Many types of contamination, however,  can be visually ascertained in the LC jar before use,  although some cant.  I like LC because for the right species like oysters I rarely have had contamination and I can get a single petri dish to inoculate 50+ grain jars.  The LC can also be kept at the ready for months.  At the beginning of spring, I  make a few jars of LC and have those ready to spin up oyster spawn quickly whenever I eye a good substrate to grow oysters on.

Making the LC is very simple: 

  1. Sterilize one narrow-mouth qt jar with 500 ml water and 5 g honey, a narrow-mouth lid with Oster blender blades fitted, and a wide-mouth qt jar with LC lid and marble for 20 min at 15 psi.
  2. Take a fully colonized petri dish and put it into the narrow-mouth water/honey qt jar with the blender blade lid and blend for three 2 second pulses.
  3.  Pour the liquid into the wide mouth mason jar with marble and LC lid.
  4.  Allow the mycelium to grow for at least a week into the water.  Agitate for 30-60 seconds each day for the first week of growth and before use to keep the mycelium from forming a solid mat.


Liquid Culture recipe:    

1 wide-mouth quart jar with LC lid and marble

1 narrow mouth qt jar with blender lid

1 fully colonized petri dish with desired strain

500 ml water

5 g honey

LC is that simple.  5-10 ml of the liquid is then drawn out and squirted into qt jars of grain for the expansion phase.   If using an aggressive fungus these jars will colonize markedly faster than simply using an agar wedge thus speeding the whole process along.  You can also make 50-80 qt jars per jar of LC.  Be observant of your LC, however, as contamination can grow quickly.  The liquid should stay clear other than the clouds of mycelium growing within.  If the water looks turbid, particularly before agitating the culture,  it most likely has a bacterial bloom and will have to be thrown away.  Any mycelium not opaquely white will most likely be mold and also make it useless.

Expansion

Now that you have a clean young cell line cultured on a petri dish or LC it is time to expand the mycelial network on qt jars of grain before inoculating your final spawn bag.  Grain is the substrate of choice here even if your final product is sawdust spawn.   Each grain will become an energy-rich base camp for the mycelial network to boom through your final spawn material.   For this step, I use exclusively narrow mouth quart jars with filter patch lids.  These lids are simple to make and can be reused indefinitely.

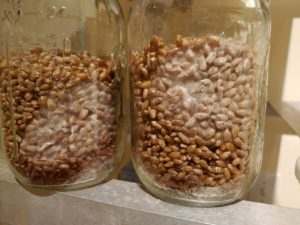
Working with grains is fairly simple and most can be used from wild bird seed to rye to wheat.  I highly recommend using whole oat grains as the main grain for almost all your needs.  These are cheap and easy to get at an animal feed store.  Make sure to get the kind still in the woody hull as these are most resistant to contamination and fungi specialize in the use of this woody outer layer.  They are also the least resistant to bursting during cooking, which I will cover shortly.   Each qt jar requires 1 c uncooked oats and each 5# grain spawn bag will need 1 qt uncooked oat grain.

Preparing grains:

Grain Prep (yields 16 qt jars grain spawn)

       4 qts whole oats

        3 gal water

        2 T gypsum

  • Rinse the appropriate quantity of grains thoroughly until the water runs clear.
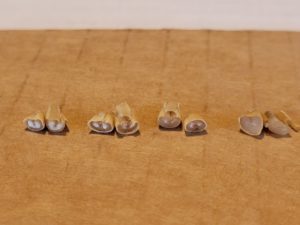
  • Place grains in a large pot with plenty of water and bring to a low simmer for 10-14 min, or until the endosperm has just a speck of uncooked starch remaining.  ( a good indicator that the grains are done is you will start to see burst granules. Be mindful of these burst granules as too many can be conducive to contamination.  A few are fine but a lot means you have overcooked the grains.)
  • Strain grains and lay them out on a large table in a thin layer overnight or until there is no excess moisture on the surface of the grains. ( If you proceed with too much excess moisture you will be asking for bacterial contamination, more on that later.   A good litmus to use is to place a tablespoon of grains on a piece of toilet paper.  If the grains make the toilet paper wet then they are too wet,  leave them to dry for longer.)
  • Once they are dry on the surface load a pint at a time into regular mouth qt mason jars.  Do not fill each jar more than halfway as you will need space to shake the jars halfway through colonization.  
  • Place filter lids on each jar,  top each with aluminum foil and load them into the pressure cooker.
  •  Run your pressure cooker at 15 psi for 2 full hours. 
  •  Allow to cool and bring the whole pressure cooker into your lab for inoculation.
  • Inoculate grains in front of flow hood
    •  If you are starting from a petri dish culture then cut your agar in 8 wedges like a pizza and drop one wedge per jar while working in front of your flow hood.  
    • If you are using an LC, then pull out the liquid with a syringe through the injection port and squirt 5 ml of liquid per jar and shake.  
  • Once inoculated allow the jars to fully colonize for 10-18 days at room temperature.  Halfway through, when you notice the mycelium has colonized 15-20% of the volume of the grain vigorously shake and turn the jars.  This fully redistributes the mycelium and breaks it up drastically speeding up the colonization process.

 The growth in the jars should be mostly uniform, complete, and with a few exceptions all white.  Any other colors could mean contamination.  Any wet-looking grains that haven’t fully colonized or foul smells will also indicate contamination.  If you have set up a clean lab and are using a flow hood, though,  contamination should be very rare.  Once you have fully colonized grain jars that smell mushroomy you are now ready to make your spawn bags.

Inoculation

The Inoculation phase is the last phase of spawn making. This step entails taking the expansion phase grain qt jars of mycelium and inoculating our final spawn bags.  Here we have a choice of final spawn material.  We can use grain spawn for a final product or we can use sawdust spawn for our final spawn material.  This choice depends on the type of mushroom we want to grow, and in some cases, we could choose either/or as in the case of oyster mushrooms.  The decision for the final spawn type is somewhat of a separate discussion so here I will simply go over simple techniques for creating both and allow you to choose as the situation dictates.  

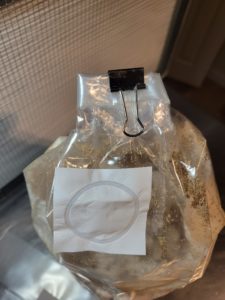
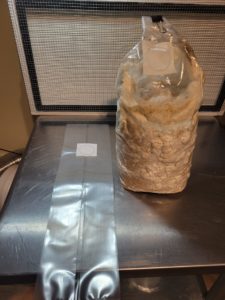
The final spawn bag will be in whats known as a filter patch bag.  I prefer to use a larger-sized bag of roughly 22.5 x 8.25 x 4.75 inches.  The reason for this is I like to inoculate each spawn bag with a quart jar of grain and want to get the biggest bang per quart jar.  Keep in mind that you can inoculate two small spawn bags with each quart jar of grain if you want. 

 To secure these bags once filled most spawn producers use an impulse sealer to fully close the bags.  I find this unnecessary when producing for your purposes.  Simply fold the open end down a few times,  then fold it together from each side and secure with one of those big black binder clips.  This works great and the clips can be reused indefinitely.

Creating grain spawn bags is the same process as during the expansion phase, you’re just putting the grains in the filter patch bag instead of the mason jars.  Once the grains are properly cooked and dried load each spawn bag with grains and fold down the top of each bag in a pleat style.  Stack them in your pressure cooker and sterilize for 2 hours at 15 psi.   Once cooled bring the pressure cooker into your lab and inoculate in front of your flow hood.

        Grain Prep (yields 4 each, 5# grain spawn bags)

        4 qts whole oats

        3 gal water

        2 T gypsum

Creating sawdust spawn bags is simpler and more scalable than grain spawn bags.  Grain spawn being very nutrient-rich means you must sterilize the grains and carry out the inoculation phase in a sterile setting.  Sawdust spawn is a different matter.  You can get away with rough pasteurization and inoculation anywhere with sawdust.  This means you aren’t hindered by the number of bags you can pressure cook at any given time.   So if I can get away with sawdust spawn then that is my go-to spawn type

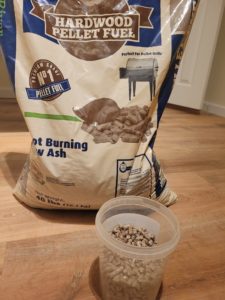
The secret to quick and easy sawdust spawn is to go to the hardware store and buy hardwood fuel pellets.  These are cheap and plentiful throughout the country.  One $4 bag of fuel pellets weighing 40# can yield 18-20 5# sawdust spawn bags.  The bag must say it is hardwood explicitly and not conifer, as conifer is not appropriate for most mushroom cultivation.

To make sawdust spawn:

Sawdust Prep (yields 4 each, 5# sawdust spawn bags)

        4 qt hardwood fuel pellets

        4.5 qts boiling water(36 oz per bag)

        Pinch of gypsum per bag

  1.  Turn your oven on to 160 F and allow it to preheat.   Pull the racks out except the bottom-most rack.  (The bottleneck here is the number of bags you can fit in your oven.  In my oven I can fit 12 bags so I will do a 3x of the recipe below.)
  2.  Fill each spawn bag with a qt of pellets and a pinch of garden gypsum while your water comes to a boil.   
  3. Once all are filled and water is boiling turn your oven off and CAREFULLY pour 36 oz of boiling water into each bag.  Use oven mitts to protect against the heat and roll around each bag to evenly distribute the water as the pellets fully expand into sawdust.  
  4. Fold down the top of each bag and quickly stack each bag in the oven.  Once the oven is stacked full of how bags the oven will stay above 140 F for many hours.   This constitutes effective pasteurization.   
  5. After the bags have cooled to room temp,  take them out and pour in your quart jars of grain.  
  6. Roll them around evenly distributing the grains within the sawdust. 
  7.  Fold down the top few inches of the bag above the filter patch and clip with a binder clip.
  8. Allow your Inoculated spawn bags to fully colonize.  No need to shake or disturb these bags to speed it along,  just focus on evenly distributing the grains into the spawn bags and you will get lightning-fast colonization in 7-14 days. 

Once done these bags can store for several months in a cool dark place like a fridge awaiting their use.   I generally make large batches of each type of mushroom I want to grow at the beginning of both fall and spring and then have them ready for use throughout their respective season.

Creating your spawn is as straightforward as is shown here and once you run through this process on your own a few times it will seem easy from then on.  There are many books and resources available to help hone your techniques.  I recommend Tradd Cotter’s book Organic Mushroom Farming and Mycoremediation as well as Paul Stamets’ Growing Gourmet and Medicinal Mushrooms.   It will take some time and money to put together your lab but once it is in place it will be a resource that pays dividends. Having a lab like the one detailed here opens up a mycological world of possibilities and I encourage everyone to invest in their ability to make your spawn.

Anthroponics


This post documents our work using urine as a primary nutrient in hydroponic systems. It is a  part of a series of blog posts exploring the historical and modern applications for human urine.  Part 1 is available here.  Part 2 is available here.  


Three years ago, in the early spring, I bought two used, food-grade plastic 55 gallon drums, cleaned them out, sawed one in half and put the other in the back corner of the insulated shipping container that was then serving as our black soldier fly larvae production room.  I bought and installed a small 120 volt aquarium pump and filled the large drum with well water.  I carefully filled the remaining half-drum with washed walnut-shell biochar and arranged it to sit above my larger water-filled drum on a welded stand.  Then I carefully measured 100 mL of my own urine and poured it in.

These were the first steps in building out a small experimental aquaponics system, the purpose of which was to help us answer a few questions while exploring first hand if it would be appropriate for us to scale up:

  • First, How would our walnut shell biochar perform as an alternative to conventional hydroponic grow media? 
  • Could we build and maintain a functioning system on a very small budget using mostly salvage materials? 
  • And last, what would it take to maintain low expenses by entirely eliminating the need for imported fish feed?

Think of aquaponics as a pairing of conventional aquaculture with hydroponic growing.  In these recirculating systems, fish waste is made available as plant nutrients by means of nitrifying bacteria, where then plants uptake these nutrients as they grow, in turn, cleaning the water for the fish.   Farm-raised fish boast an incredibly efficient feed conversion ratio, and aquaponics takes this incredible nutrient efficiency a step further by growing vegetables with what would otherwise be wasted, either filtered or drained away.  These can be remarkably elegant systems – once dialed in, aquaponically grown vegetables can be incredibly productive and nutritionally efficient.  Furthermore, aquaponic systems show potential for hyper-local organic vegetable and protein production on degraded lands, dense urban areas, or even indoors.

Those that have tried know that problem-free aquaponics is easier said than done.  Conventional gardening problems persist alongside the challenges of aquaculture.  Ideal water characteristics for fish don’t always match ideal conditions for vegetable growth.  Fish waste is a mostly-balanced fertilizer, but it’s not quite complete – micronutrient supplementation is still necessary.  Mechanical problems arise too: filters clog, drains overflow, sometimes the power goes out.  And though profitable commercial aquaponics is possible, these are systems that must be continually monitored and maintained by qualified technicians.  

Given this was anyone on the crew’s first time with any aquaculture, hydroponic growing, or even any kind of indoor growing for that matter, it goes without saying we had our share of challenges.  Looking back, it’s possible we weren’t feeding our Tilapia fry enough, though it’s equally as likely we were battling some kind of disease pressure.  Ammonia levels were always in check, but nitrate levels in the water were never adequate and it’s certain we hadn’t provided adequate light for our kale.  In hindsight, sharing the heated space with the black soldier flies wasn’t helpful either.  By winter, gas exchange was low and humidity remained so high that feed pellets were molding over the weekend in our DIY automatic feeder.  We hadn’t even begun to breach the issue of eliminating purchased feed before losing the last of our tilapia fingerlings, at no more than 6 months old, by December 2018.

This early foray into aquaponics was not a complete failure.  For a very low cost we had built out the hardware of a functioning system and our biochar media had performed very well.  Though removal of dead fish from the system was a humbling experience; it is a reminder of an obvious point: that the most successful farming systems are the ones that can be appropriately managed.  One thing was abundantly clear: to be successful in any future hydroponic experimentation we were going to have to simplify. 

Walnut shell biochar as soil-less grow media


At the time, I dismantled the system, and would not return to it for another two years, during which my exploration into the fertilizing applications for human urine would eventually guide me back to the world of soil-less growing.   It was then, near the start of the covid pandemic, that I first came across the term anthroponics used to describe a method of hydroponic growing where human urine was the primary nutrient source.  As a form of organic hydroponic growing anthroponics combines elements of both conventional hydroponic cultivation and aquaponics. 

I’ll use the remainder of this post to share my work with anthroponics, but first, to get a better sense of how these systems work, it’s helpful to understand the basics of aquaponics


Aquaponics 101

In aquaponics systems, the fish waste to nutrient transformation takes place in oxygenated water by means of nitrifying bacteria.  First, fish excrete ammonia through their gills.  Additional ammonia and phosphorus enter the water via fish urine and mineralizing detritus.  If left unchecked, too much ammonia poisons the fish – this is where nitrifying bacteria come in.  This process, called nitrification, takes place on a biofilter, where bacteria convert poisonous ammonia first to nitrites, and then to plant-available nitrates.  It’s these nitrates, along with phosphorus and minerals from decaying detritus that make up the array of plant nutrients.  

Through a process known as cycling, a well-functioning biofilter with robust populations of nitrifying bacteria must first be established in new systems before introducing meaningful quantities of fish.   Cycling can be accomplished in two broadly different ways:  

  • Gradually add fish over weeks or months.  Nitrifying bacteria is ubiquitous and will make its way in, but it will take a long time to accumulate the nitrates needed to sustain vegetable production.  Plants must be slowly added too. 
  • Inoculate with water/media from a healthy, functioning system or use commercially-available cultured bacteria, and then introduce your own ammonia.  Urine is a perfectly acceptable, natural and safe source of ammonia.  “Fish-less cycling” with added ammonia  is an all around faster way to establish a biofilter. 

The same rules apply for fresh-water home aquariums too.  Healthy fish life is supported by nitrifying bacteria.  The key difference here is that nitrates are typically adsorbed in disposable activated carbon filters rather than made available as a plant nutrient and continuously removed as plants grow.   Recirculating aquaponics systems are about striking balance: the inputs must coincide with outputs.  It’s important to realize that even though the plants are essentially growing on nutrients from fish waste, these nutrients aren’t free.  Fish feed is the input, i.e. the source of fertility, and conventional fish feeds are almost synonymous with unsustainability – conjuring up images of depleted fisheries and thousands of acres of monocropped soybeans.  And while there are sustainable high-protein feed options, many of which can be farmed on site:  black soldier fly larvae, duckweed, etc., these are farming systems in and of themselves that require inputs and support.  

Ironically, it was the prospect of a low-cost and limited-waste source of protein that drove my initial interest in aquaponics. It was these early failures that led to an alternative hydroponic cultivation method that still utilized waste and was significantly easier to manage. 


Aquaponics Without the Fish

Recall that a biofilter can be established by adding ammonia in the form of urine.  One could think of anthroponics as an alternative, where instead of tapering off urine and relying on fish feed/waste, nitrate production is simply maintained by the regular addition of urine

Typical human urine is about 95% water; the nitrogenous compound urea makes up about half of the remaining 5%.  In time, by way of the ubiquitous enzyme urease, the urea present in urine will convert to ammonium, hydroxide and carbonate ions.  When urine is stored in closed containers for up to a  few weeks, this process occurs naturally – it’s a good thing – the elevated pH helps mitigate possible bacterial contamination and the ammonium mimics fish waste and itself kicks off the nitrification process.  Extended storage is not the only method to ensure sanitation of urine fertilizer, but is by far the simplest.  

Hydrolysis of urea


Anthroponics shares many of the advantages of both aquaponics and conventional hydroponic growing.  Like all hydroponic growing, water demand is drastically lower than conventional agriculture.  Growing conditions – environment, nutrient balance, etc – are highly controllable; they’re good for experimentation, and there’s potential for high food production capacity even in desertified or urban settings. As in aquaponics systems, there is no environmental cost of resource intensive, petroleum-based chemical fertilizers.  It goes without saying too that unlike conventional fertilizers, urine is not subject to the whims of the market.  Anthroponics systems are biologically based too, and by extension of the resulting food-web, when compared to conventional hydroponic culture they are likely more robust against pest and disease pressures.  

Anthroponics systems have certain advantages compared directly to aquaponics systems.  For starters, there is no feed requirement associated with aquaponics.  With no fish to manage there’s no solid waste, and therefore no need for additional filters, tanks and hardware.  Temperature and pH still play a role in effective nitrification and plant health, but here they are no longer critical life and death factors.  There is no question that anthroponics systems are much easier to maintain.

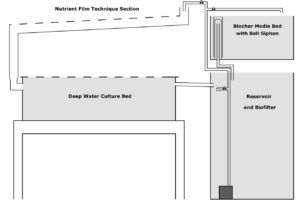
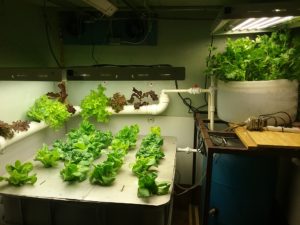
Our pilot anthroponics system built off our original 50 gallon drum tank arrangement.  In addition to the full size drum reservoir and half drum biochar-media bed, I added a 7 foot section of 3 inch PVC as NFT channel that flows around into a single 100 gallon IBC tote bottom as a DWC raft bed.  The outflow from the raft bed returns directly back to the reservoir.  Our small aquarium pump is located in the lowest point of the system and by way of simple manually operated ball valves, flow can be directed to one of three paths: directly into the media bed, through the NFT and DWC route, or as a means for both flow control and oxygenation, directly back over the biofilter/reservoir. 

Our initial indoor arrangement, with various lettuces in both NFT and DWC sections. Celery is in the biochar media bed on the right.


Biofiltration

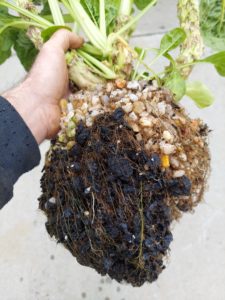
Biofiltration largely refers to the conversion of ammonia/ammonium to plant-available nitrates by means of nitrifying bacteria.  Nitrifying bacteria thrive in neutral-warm, highly oxygenated water where they cling to surfaces and form biofilms that act as sticky filters, trapping suspended solids like bits of stray plant material and grow media.  A typical biofilter in a large aquaponics system commonly looks like a dedicated tank with vigorously aerated suspended plastic media.  A biofilter can be more basic too; our biochar media functions as a biofilter.  In the introductory anthroponix tutorial from Hong Kong’s Dim Sum Labs, it’s the rooting media itself that functions as a biofilter.   

In addition to the 20 gallons of walnut biochar media as filter, we employ a (in my opinion) rather clever and low cost solution for creating even more surface area:  HDPE plastic flakes.  Through our previous work with on-farm plastic recycling we had amassed plenty of used gallon-size milk jugs from area restaurants and coffee shops.  Food-grade HDPE is widely considered the most benign plastics – BPA, plasticizers, etc. are not a concern here.  In our typical process these jugs would be cleaned and shredded into flakes before injection molding or extrusion.  Here, about 1kg (the equivalent of 16 whole jugs) of these shredded flakes are simply loosely packed into nylon mesh paint strainer bags.  By my estimation, each jug provides 450in2 of additional surface area.   By adding 5 flake bags (of 16 jugs each) in the reservoir, we add an additional 250ft2 of surface area.  

Milk jug-sourced HDPE flakes for additional biofilter surface area


First Harvests

By January of this year we had a fully functioning and cycled anthroponics system, installed under salvaged T5 fluorescent lights hung from the ceiling in the back of our insulated shipping container.  By now our goals had changed, humbled by initial failures of my foray into aquaponics, I now set out to find answers to more simple, albeit meandering questions:  Could we demonstrate the long-term feasibility of urine as a fertilizer in recirculating hydroponics?  What kind of problems would present themselves after multiple harvest cycles?

I first germinated an array of romaine and loose-leaf lettuces in small net pots filled with composted pine bark media; these were transplanted to the NFT and DWC as soon as the first true leaves appeared.  Celery shoots were transplanted from soil to the media bed at the same time and over the succeeding two weeks I added 2.5 liters of regular urine to reach a 200:1 water-to-urine ratio. 

As a plant fertilizer, urine is relatively high in nitrogen and phosphorus and is most closely balanced for growing leafy greens.  Potassium is present, but not at balanced levels for growing vegetables – even low nutrient crops like lettuce will need supplemental potassium.  Wood ashes can be a potent source of readily soluble potassium, along with calcium and a host of other micronutrients, but these too are   Excesses can be a problem too: because this is a closed loop recirculating system where salts won’t readily leach from the soil, sodium and chloride ions from the urine, along with other micronutrients from the wood ash may eventually reach toxic levels. 

Knowing that imbalances could quickly manifest, I added celery in the system specifically to help remove sodium; because of its brackish origins I figured celery would thrive here.  Lettuces, on the other hand, are known to be more sensitive to high sodium concentrations.  Nonetheless, without accurate analysis, at this point I was relying solely on external indicators of imbalances – leaf malnormaties, odd flavors, stunted growth, etc.   In each case it wasn’t long before nutrient deficiencies began to manifest, first on the leaves of the romaine lettuce and then later on the celery.

Pale and curling from indoor-grown romaine lettuce leaves. Samples of this crop were sent to the NCDA lab for analysis


Nutrient Balancing

The balance of nutrients in urine varies considerably based on diet and time of day collected.  A high-protein diet yields higher nitrogen.  Hydration level is obviously an important factor.   The Rich Earth Institute in Brattleboro Vermont, USA, reports an NPK value of 0.6-0.1-0.2 in urine collected from their community urine donation program.  Urine collected in morning has long been assumed to be more potent.  Looking to validate this assumption I had a composite sample of my morning-urine sent off for analysis:  

Nutrient Analysis of my own morning-urine. NPK: 1.0-.07-.13. Note the significant quantities of sodium.


Note the substantially higher nitrogen concentration in my morning urine.  Also, take note of the actual lower concentration of phosphorus and potassium. Should I expect my daytime urine to have higher phosphorus and potassium content? Is this an indication these minerals are lacking in my diet? It may not be as useful to keep morning and daytime urine separate.  Nonetheless, this morning sample is my known composition and barring any radical diet changes, it’s what I’ll plan to use in the anthroponics system moving forward. 

Urine alone will not be a balanced fertilizer for growing much of anything.   Even though lettuce and other leafy greens prefer a relatively high balance of nitrogen compared to other nutrients, I’ll still need to include additional potassium, phosphorus and other minerals.  Wood ash, another ‘waste’ product I’ve talked a lot about before, does a very nice job bringing us closer to a balanced nutrient solution.  Like urine, there’s substantial variation in the nutrient composition of wood ash.  A composite sample of a prior year’s wood stove ash was sent off for analysis:

Wood ash composition


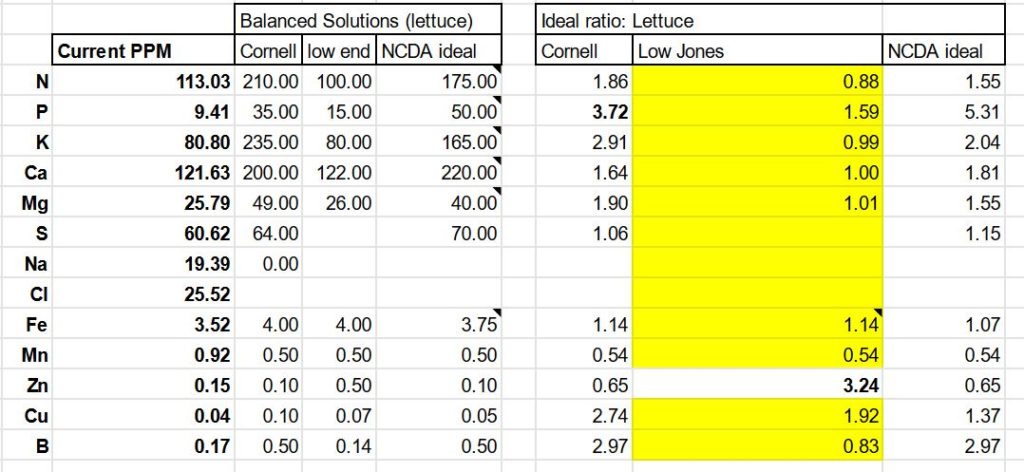
I sought out and compared three different guidelines for an ideal nutrient solution for growing hydroponic lettuce: from this Cornell publication, guidelines from the NCDA, and from J.Benton Jones’ Practical Guide for the Soilless Grower (quite affordable when only rented for a month on the kindle app) .  Using these guidelines, along with the nutrient values from my urine and wood ash analysis, I built a simple spreadsheet and from there was able to identify additional nutrient deficiencies and design a custom ‘mineral blend’ that would accompany and balance the nutrient profile of my urine.  

This custom mineral blend includes primarily wood ash and gypsum, along with a small amount of magnesium oxide some of my (wood ash-sourced) potassium carbonate.    I blended together all of these ingredients in substantial quantities – enough to last me for at least another year of growing.  Now, for each 200 ml dose of morning urine, I’ll add just shy of 1 tablespoon of mineral mix.  I’ll also add 30mL of chelated iron for each full liter of urine.  The recipe that follows accompanies 1 liter of my morning-urine:

30 grams Wood Ash (mixed Appalachian hardwood, stove ash)

4 grams Gypsum (calcium sulfate)

4 grams magnesium oxide

10 grams potassium carbonate


Determining proper mineral blend with a custom spreadsheet: The closer the numbers are to 1, the more perfect the ratio of nutrients is to the stated ideal.


Spring Harvests

Now with some confidence that I had control of the nutrient solution I added a few more varieties of lettuce transplants to the DWC raft and NFT sections.  At the same time, now early February, I introduced a few swiss chard plants as well.  Swiss chard is a known sodium-hungry crop with similar high nitrogen feeding requirements.  For what it’s worth, I found germination to be quite satisfactory when seeded directly in 2” net pots filled with aged pine bark.  


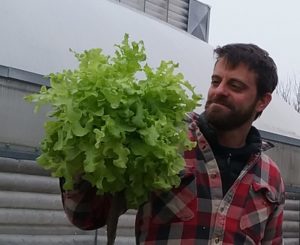
Loose leaf lettuce varieties – oak leaf lettuce in particular – both presented and tasted the best overall


In this period starting from when I switched to a complete mineral blend on 2/17 to 4/9 I added only 6.4 liters of urine and harvested 3 kg of Oak Leaf lettuce, 9.8 kg of Giant Caesar lettuce, and 6.2 kg of Swiss Chard leaves.  Additionally there was some celery, but this was not accounted for by weight.  There is significant overlap here with some plantings done prior to 2/17, and the nutrient solution had not been completely changed out yet at this point – these figures should be taken cautiously, nonetheless it’s helpful to see what kind of productivity one could expect. 


Summer Harvests

By May I was convinced I had the nutrient solution more or less dialed in and temperatures had warmed enough so that I could move the entire operation outside.  This gave me a great advantage, not just by substituting energy-intensive artificial lights for the real thing, but also the gentle wind and free air gave much improved vigor to all subsequent plantings.  In hindsight, my hunch it’s likely that these initial malnormatles with the lettuces were due in large part to irregular calcium uptake, caused in large part to a confluence of negative environmental factors in the indoor grow room: high humidity, light was possibly TOO intense at times and not completely full spectrum, and little gas/air exchange.  

Upon moving the system hardware outside I refilled the system with fresh well water and dosed urine and corresponding minerals at the initial rate of 1 liter urine per 200 liters of water.  Additionally, I added soluble humates and a small amount (about 2 cups) vermicompost extract to the reservoir.  From this point forward I would strive to incrementally build up to a consistent nutrient level through routine dosing of urine and minerals, while consistently monitoring EC, maintained at a conservative 700 us/cm.  

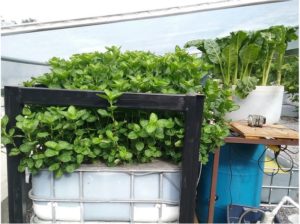
For the next round of plantings in the media bed I swapped out celery in favor of two other swiss chard varieties.  When inside, in the DWC raft bed, I found the chard quickly grew large enough to easily fall over in net pots; I found Swiss chard much better suited for planting in the biochar media bed.  Along with lettuces in the NFT section, these chard plants proved very productive right up until the end of October this year.   

When exclusively growing lettuces indoors – and I’m sure this won’t be surprising to anyone – I could not find anyone outside of my family willing to eat the lettuces I was growing.  What I did find a bit surprising however, was that their prejudice was less about  urine-as-fertilizer, and more about hydroponic growing in general.  I’m much too green to take this debate head on – but I would encourage those who doubt that nutrient-dense food can be grown hydroponically using organic inputs to at least first read about others’ work in ‘bioponics’, or at least check out the conversation going on at the Organic Hydroponics facebook group before settling on any opinions.  

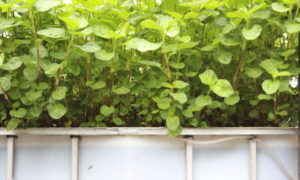
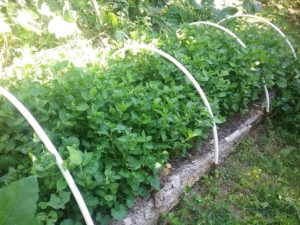
That said, 27 heads of lettuce is still too much for my family.  Having moved outside for the summer, I chose to clear out the space on my DWC raft and make room for experimentation with Japanese indigo.  Persicaria tinctoria is known to propagate easily in water and it thrives in summer heat.  In a previous post I wrote about my success with urine fertilization of Japanese Indigo in my gardens. Now I wanted to compare the growth rate and pigment yield of my anthroponic-grown indigo to my prior year’s soil grown plants. 

The highly productive mid-summer Japanese indigo and Swiss chard arrangement


Nitrification is much faster with warmer water.  This was clearly seen as temperatures continued to rise as the summer progressed – I was no longer seeing the pH fluctuations after dosing with high pH urine.  I found a rhythm here – for the most part, pH held steady around 6.5 and EC was consistent around 650 us/cm with regular dosing of around 1 Liter urine / week.  

While warmer water speeds up nitrification and encourages growth, there are reasons to prevent the nutrient solution from getting too hot.  Warmer water holds less oxygen and potential pathogen proliferation is more likely in higher temps.  Cool season plants will prefer cooler water: this was especially evident later in the season as the lettuces and Swiss chard became increasingly bitter.  However, the Japanese Indigo was thriving in the warm summer temperatures. 

On May 17, 20 Japanese Indigo starts in 2” net pots were transplanted to the DWC raft bed.  This was immediately after the cotyledon stage, when the first true leaves appeared.  Eight weeks later, in mid-July, the plants were over 18” high and ready for the first harvest.  This first harvest yielded 12.5 lbs of fresh plant biomass. Subsequent harvests were ready in just 3 weeks’ intervals: on 8/6 I harvested 9.5 lbs, on 8/31 I harvested 10.25 lbs.  I found this to be an extremely fast growth-rate.  What is not clear yet is the quality and yield of the indigo pigment – when extracting pigment from this ‘anthroponically’ grown indigo, I found the fermentation to be incredibly fast.  Upon floculation after only 36 hours’ fermentation time I had a brown, presumably organic-rich supernatant.  Compared to my soil-grown indigo, these plants are tender; I suspect I had already ‘over-fermented’ each batch in a very short time. 


Where to go from here?

Anthroponics/peeponics/bioponics – whatever you choose to call this method of hydroponic growing with urine – is not without its challenges.  Urine must be collected far enough in advance to ensure adequate sanitation.  There is the obvious public perception problem.  Regarding recirculating systems, there is the persistent issue of variability of nutrient profiles among urine and wood ash.  Given enough time it seems inevitable that some problematic nutrient imbalances will occur. 

As I write this, I’ve got the system set up again for indoor growing under dappled artificial light.  For the winter, I’ve switched to growing two different wild sourced duckweeds: Lemna minor and Spirodela polyrhiza.  In many ways duckweed is the perfect crop for an anthroponic system; duckweeds thrive in slow moving nutrient-rich water; they are one of nature’s filters for nutrient polluted waterways. Duckweed is well known as a fast growing, protein rich fish and poultry feed – though I suspect many may not be aware that the protein content of duckweed is closely linked to the concentration of available nitrogen in the water.  Late summer 2021 trials show that Spirodela polyrhiza, originally sourced from the edges of our irrigation pond, is almost three times as protein-rich when cultured in my anthroponics system.   Indoor growing has not yet proven to match the productivity of late summer 2021.  Suffice to say, I’m looking forward to setting up a scaled-up version of the duckweed farm for next summer.  

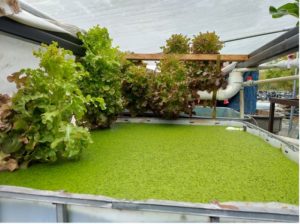
Spirodela polyrhiza (giant duckweed) in anthroponics system


Wild-sourced duckweed on right – 15.6% crude protein. Anthroponically-grown duckweed on left – 39.8% crude protein.


In many ways, growing high protein fodder may be the most appropriate application of anthroponics for us.  Even though we’re capable of growing highly productive leafy greens, we may not be capable of finding anyone to eat them.  Pee-into-protein with anthroponics is a powerful story:  one where humans and their waste become an integral part of a safe, and potentially highly productive, closed-loop nutrient cycle. 

One final note: Those just entering the conversation about fertilizing with urine shouldn’t be intimidated by the complexity of hydroponic growing.  Fertilizing plants and feeding the soil biome with urine is absolutely practical at the home garden scale.  For more on soil applications of urine, please read part 1 of this series, watch our video series, and refer to posted references for more.  As always, feel free to send comments by email.  


Indigo Sig Vat

Waste not: Urine – Part 2: The Indigo Sig Vat

This post is part of a series exploring the historical and modern applications for human urine.  Part 1 is available here.

At the end of the previous post I left off with a short anecdote about how last year I set out to grow my own dye plants, and how after transplanting my japanese indigo (Persicaria tinctoria) too early I used urine as a fast-acting nitrogen fertilizer to encourage my plants to stop early-flowering and ‘force’ them back into a state of vigorous vegetative growth.  Vegetative growth is what we’re looking for here, as it’s the leaves of this frost-tender annual that contain the most of the indigo pigment precursor known as indican

Unique indican-bearing plants exist in many parts of the world.  Indigofera tinctoria is a legume native to India and Southeast Asia.  The similar Indigo suffruticosa is native to the subtropical Americas.  Woad (Isatis tinctoria), a brassica, is a native to the steppes of Caucasia that ultimately became the primary source of blue dye in medieval Europe.  Persicaria tinctoria is in the buckwheat family and is native to east Asia.  Before “true indigo” from India came to dominate the global trade of indigo pigment, each of these unique plants supported a dyer’s economy of their own in their respective native region as far back as 2000 BC.  This suggests that some form of indigo dyeing may have arisen independently among various far-flung cultures, but what’s perhaps most intriguing here is that the actual process of dyeing with indigo is not all that intuitive.  In fact, it’s quite likely the discovery of the process was accidental, and involved large amounts of – you guessed it – urine.

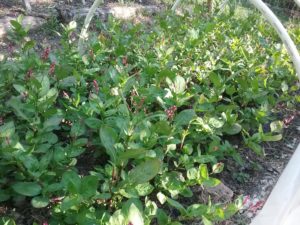
A small bed of Persicaria tinctoria in early summer

Indigo Chemistry

Indigo is unique among natural dyes.  Lightfast blue dyes are rare in nature, and indigo is one of the oldest dyes known to man.  It’s one of few substantive natural dyes; no mordant is required for a washfast dye that binds well to both animal fibers (wool, silk) and cellulose fibers (cotton, linen).  Indigo dye is extracted from indican-bearing plants and rendered useful by way of a series of chemical reactions that historically speaking, have only recently been fully understood.

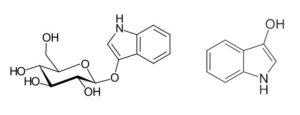
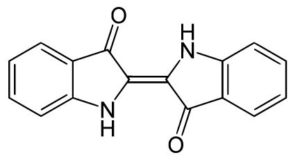
On a molecular level, indican is a glucoside.  Think of a glucoside as a sort of two-part molecule with a loosely connected glucose and non-glucose component; indican is part glucose, part indoxyl.  When held under water for some time, enzymes cleave the molecule into its two components where then bacteria consume the glucose, and the indoxyl component is left in solution.  Under water, the soluble indoxyl is in itself colorless, but when exposed to oxygen it becomes the dark blue and insoluble pigment indigotin.  If allowed adequate time to settle, water can be decanted and the remaining indigotin can be dried and stored as indigo cakes or powder.

indican to indoxyl


indigotin

Under the right conditions indigotin powder can be made soluble again in the concentrated amounts necessary for dyeing shades of deep blue.  This a two-stage process: Insoluble indigotin must first be chemically reduced before it may dissolve in alkaline solutions.

Indigo dyers meet these conditions by preparing a vat of alkaline liquid that includes some sort of reducing agent.  Indigo powder is added, and upon reduction the vat may turn a muddy yellow or green color.  Now ready, the undyed material  is lowered in the vat and soluble leucoindigo soaks in and mechanically adheres to the fibers, where then upon removal and exposure to air it reverts back to its insoluble form.  Deep shades of blue are possible through a process of repeated dips following aeration.  To watch this process is a one-of-a-kind, almost magical experience: immediately after removal from a well-reduced vat the fiber will be a grassy green hue that morphs into brilliant blue right before your eyes.

With the insight of modern chemistry, dyers can now choose between natural and synthetic indigo powders of varying purity, and among an array of alkaline powders and reducing agents from which to build their vats.  In ancient times, however this was not the case – conditions for a suitable vat were made possible by bacterial action in aged urine

Urine

An excerpt in a circa 300 A.D. collection of ancient craft and dye recipes known as the Papyrus Graecus Holmiensis confirms that by this time urine was commonly used in Europe and Northern Africa for processing indican-bearing woad:

“105. Dyeing in Dark Blue. Put about a talent of woad in a tube, which stands in the sun and contains not less than 15 metretes, and pack it in well. Then pour urine in until the liquid rises over the woad and let it be warmed by the sun, but on the following day get the woad ready in a way so that you (can) tread around in it in the sun until it becomes well moistened. One must do this, however for 3 days together.”

The ancient text of the Papyrus Graecus Holmiensis AKA Stockholm papyrus

In his book The Art and Craft of Natural Dyeing author J. N. Liles writes how some of the earliest indigo dyeing was done by using fresh plant material in containers of stale urine.  Soap was unknown to the ancients; available cleaning agents would have largely been limited to alkaline liquids like wood ash lye and ammonia in aged urine.   Niles writes that urine was:

“…collected and stored by literally all primitive cultures. If, by chance, some indican-bearing plant material found its way into a urine vat, the bacteria growing therein would render the vat in a reducing condition (use up the oxygen and release hydrogen) and the ammonia, being alkaline, would dissolve the resulting indigo white.  Now, if some fiber fell in the vessel, and if it were retrieved later, the yellowish green material would turn blue before the eyes of the retriever, and the material would be dyed a permanent very pale blue”

It takes a lot of plant material to make shades of deep blue.  A fresh leaf vat, certainly that of the relatively weak woad, would indeed yield a very light color.  The deeper shades we now associate with blue jeans would certainly require concentrated vats, made possible by using extracted indigo pigment.

Indigo Pigment: Water Extraction Method

Powdered indigo pigment can be extracted from indican-bearing plants by a fermentation process that typically takes 3 to 5 days.  Immediately upon harvest, leaves and stems should be rinsed and then placed in a suitable container and covered entirely with water.  Warm water speeds up the reaction.  It’s important to make sure leaves are clean and completely submerged; dirt and oxygen are not helpful here, their presence will decrease yields and contaminate the final product with the unwanted related compounds isatin and indirubin.  

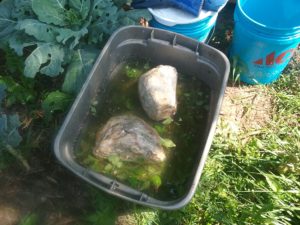
Preparing Japanese Indigo for water extraction

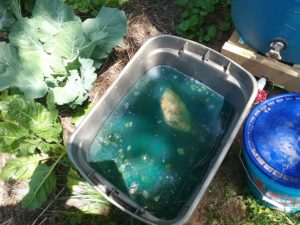
Over the 2020 growing season I was able to harvest my 40ft² bed of japanese indigo a total of three times.  The fermentation step for each extraction took the expected 3 to 5 days.  It’s during this time that enzymes are working to cleave the aforementioned indican molecule into its constituent parts: glucose and indoxyl.  Here’s where things get interesting: Over the next few days glucose is consumed, indoxyl moves into solution, and the ferment takes on an antifreeze-like otherworldly neon blue/green color.  The smell here is very apparent too.  Odd, sweet and only slightly rank is what we’re working for.  Over-fermentation leads to dramatically lower pigment yields, and this disappointment will be matched by a shift to an intense, distinctly putrid smell.  I’ve read of one person who described the smell as ‘like a shrimp boat’.  For me, it has a definite low-tide smell, but with the faintly sweet smell of tempura.  When fermentation is complete, indoxyl is in solution and has not yet deteriorated.  Smell really is your best cue here, and better judgment is said to come with experience.

Otherworldly hues from fermenting Indigo leaves

When fermentation reaches that sweet spot, pour the water into another vessel while straining the plant material.  I go for as much liquid as I can and give the wet, slippery leaves a good squeeze before turning them under the compost pile.  Recall that when indoxyl is exposed to air it shifts to the dark, insoluble blue pigment Indigotin.  First, however, the solution should be brought up to a higher pH by addition of some alkalizing agent.  Though some have said to have success obtaining pigment without adjusting pH, the settling process absolutely takes much longer and with likely lower yields.  There are options here: wood-sourced potassium hydroxide/carbonate was almost certainly historically common, nowadays slaked lime (calcium hydroxide, sold in grocery stores as pickling lime) is a nice choice. Slaked lime doubles as a flocculant here, greatly speeding up precipitation, but also contributing to an impure product.  It’s best to use as little as necessary – start with as little as .5 grams per gallon of solution.  Aim for a pH  between 9 and 10.

The blue/green water is now ready for oxidation and dependent on scale, there are multiple ways to go about this. In the days of the indigo plantations around the world  it might be common for lower-caste workers, or even slaves, to literally stand in and kick air into alkaline pools of reduced indigo.  On a small enough scale one can repeatedly pour the solution back and forth between containers.  For my 10 gallon batches I use the same air pump and manifold I have for making aerated compost tea at home.  With the air pump I can sufficiently oxidise the solution in a matter of a few minutes.   Now, given enough time at rest, indigo pigment should settle down leaving behind a supernatant of clear, brown alkaline water.

Introducing oxygen via air pump manifold

Precipitated indigo powder

At my scale it’s easy to start a siphon to decant the water into five gallon buckets.  At a pH of 9, I’m not too concerned: this water goes over the compost pile.  Once the excess water is carefully removed, I’ll consolidate the remaining watery paste and pour over coffee filters.  Once water is fully drained out, Indigo pigment extraction is essentially done. The resulting paste can be stored in airtight containers in the refrigerator or dried completely and is indefinitely shelf stable.

Draining excess water from indigo paste

Dried indigo powder can be indefinitely stored in airtight containers

Much of the indigo pigment extraction process, with all its nuance, is detailed in this document from fibershed.org.  A special thanks goes to the moderators and community at the Indigo pigment extraction methods facebook group – the kindhearted souls there bring hope for the future of social media.

Sig vat

The urine vat – referred to by practitioners as the Sig Vat (a name of obscure origin) – is certainly one of the oldest methods for dyeing with indigo.  If you read my prior post, you may recall that urine is typically about 95% water and somewhere around 2 to 3% urea.  As urine ages, the natural enzyme urease transforms urea into ammonium, hydroxide and carbonate ions which causes the pH to rise from it’s slightly acidic starting point to about 9.   Now slightly alkaline, the urine is largely considered safe from pathogens (e.coli, among others), but it is certainly not a sterile environment.  Bacteria are already at work here contributing to urea transformation, and all the while also consuming organic compounds and additional nutrients in the urine.  Bacterial action releases CO₂, therefore creating the alkaline and low oxygen environment necessary for reducing indigo pigment.  Compared to urine collected throughout the or from that of beer and coffee drinkers, the relatively higher urea concentration in morning urine contributes to a more potent vat.  Allegedly, the urine from diabetics is best – this makes sense – higher glucose levels would promote more robust bacterial-induced oxygen-reduction.

Compared to other indigo processes involving chemical reductants, my experience is that a sig vat is a comparatively weak, slow and fickle process.  Maintaining a functioning vat takes effort:  the vat must be kept warm, introduction of air should be kept minimal, and special care must be taken to keep out chemical contaminants lest they disturb the active biology.  Japanese researchers have worked to isolate the specific bacteria that are well-suited to this alkaline, oxygen-free environment.  In this research, they determined that acidic ‘micro-environments’ may form, that can be mitigated through daily stirring.  Additionally, Indigo powder must be ground very finely.  Some suggest introducing powder to the vat by means of a suspended filter – imagine an indigo tea bag – kneaded on occasion, where then only the fine indigo particles are able to pass through.

Preparing a slow-release indigo ‘tea-bag’

The inherent weakness of the vat does have its advantages.  There is the personal satisfaction of learning a process that is very old, that no doubt must have seemed quite magical  to the ancients.  Atavistic tendencies aside, the lack of harsh chemicals here does reduce the risk of damaging fabrics.  When building shade a weak reducing environment prevents re-reduction of pigment on the fiber during re-dips.  Some fabrics can be left in the vat for extended periods of time, ensuring very deep and permanent penetration of dye into the fiber matrix.   In fact, as J.N. Liles points out in another excerpt from The Art and Craft of Natural Dyeing:

“The alkali of the urine vat is the least damaging of all alkaline substances to wool, and for the reason buyers of indigo-dyed woolen yarns and woolen articles often would not purchase such items if they did not smell right”

Sig Vat attempt #1

My first attempt at a sig vat was in the early months of 2020 – long before I had any of my own homegrown pigment.  Instead, I was using a 45% purity indigofera tinctoria sourced pigment, found here for sale in small quantities.  I collected enough daytime urine to fill a 2-gallon wide-mouth jar within 2 inches of the top.  Then, I loosely covered the jar with an old t-shirt and moved it into a back corner of our biocharprocess-heated shipping container.  This is a multi-functional space that we had originally setup for rearing black-soldier larvae and at this time in late winter, temperatures for the most part were maintained around 70 degrees.  At this time of year it is not unusual for daytime temperatures here to climb up to 80 degrees.

Using the 1 tsp/liter ratio described in Kevin M. Dunn’s Caveman Chemistry, I measured out 2.5 tablespoons of pigment for my 2 gallon vat.  Using this blog post as my guide, I made a ‘sock’ from a scrap of old t-shirt and mason twine, weighted with a stainless steel nut.  As Dunn describes, using smell as my guide, the urine was already turning after only a few days at this temperature.  I dropped in the ‘sock’ and, while wearing gloves, gently ‘massaged’ it to slowly release indigo – the color change in the vat was nearly immediate.  A few more times throughout the next week I gently stirred and released more indigo into solution.   After a week or so, essentially guessing, I made a determination the vat was ready.

Adding indigo powder to my first sig vat.  Blurry photo taken ‘in the moment’

Dyeing with this first vat was quite successful, but still slow when compared to the more common hydrosulfite vat.  I started with a set of 6, 2 oz cotton napkins, and found I had room to dip 2 at a time, where I kept them submerged for 20 minutes.  I found I could dip and wring-out each pair only once before a noticeable color shift in the vat – the deep green, reduced vat would shift to blue after introducing too much oxygen.  At this point, I would need to wait at least another day for reduction to take place before my next dip.

Some of the cotton pieces were dipped up to 8 times, at which I was able to build some fairly dark shades.  Once I was satisfied, I poured the nearly exhausted vat over large wood chip piles and thoroughly rinsed the all 8 cotton cloth napkins in cold water until the rinse water ran completely clear.  The entire process took me about 3 weeks, although I suspect shorter reduction intervals would have been possible.  Lastly, I should mention the smell vanished after a single wash in a machine and after almost a year of occasional use these pieces have maintained nearly all of their original color.

Building shade in early winter at the biochar facility

Sig Vat attempt #2

By mid-summer of 2020 I was ready to try another sig vat with my homegrown indigo pigment. This was the pigment from my second extraction – and no doubt the indigotin concentration (purity) of each extraction increased with experience – the purity of this batch was indeed quite low.

Again, I collected two gallons of ‘normal’ daytime stored in the same glass jar.  Outdoor temperatures now modulated between an average nighttime 60 and 80.  I placed the glass jar inside a five gallon bucket with a lid and kept in a sunny location in the garden.   After a week I added ½ cup of refrigerated indigo-paste directly to the vat.  For me, the ½ cup was a bit of guess – Assuming at the time that I had both accounted for lower purity and additional moisture content, this concentration ultimately proved to be quite dilute.   Nonetheless, I was able to dye light shades on a pair of lightweight cotton batik dish towels.

A first attempt at a simple batik, sig vat dyed in the garden

Resources

Historical context and detailed ‘recipes’ all kinds for natural dyers, including in great detail the construction of indigo vats, preparing fibers and troubleshooting: J.N. Niles: The Art and Craft of Natural Dyeing: Traditional Recipes for Modern Use

An amusing and eccentric history of the chemical industry, with project-based lesson plans:   Kevin M Dunn: Caveman Chemistry

A very helpful and active community of natural Indigo processors

A detailed account of both composting and water-extraction methods for isolating indigo dye from plants: The Production of Indigo Dye from Plants 

Waste Not Urine

In his posthumously published 1911 work Farmers of Forty Centuries, USDA agronomist F. H. King documents his travels studying the intensive agriculture of China, Korea and Japan.  Multiple references are made to the efforts of farmers and city-dwellers alike to collect and distribute human waste to nearby farms as a valuable source of ongoing fertility:

“In such public places as railway stations provision is made for saving, not for wasting, and even along the country roads screens invite the traveler to stop, primarily for the profit of the owner, more than for personal convenience.”

Ancient Roman launderers known as fullones collected human urine from the public in small pots set alongside the street,  diluted it with water and used it to aid in removing dirt from clothes.

In a vain attempt at producing gold, 17th century alchemist Hennig Brand accidentally discovered elemental phosphorus while heating in a retort the residues of some 5,500 liters of boiled down urine.

In his book At Home: A Short History of Private Life, author Bill Bryson writes about how before “sanitation’s greatest champion” Joseph Bazalgette started work on the central sewers of London, he had built his reputation on a plan to construct public urinals throughout the city, where then the urine would be collected and sold to industrial processors of alum.

Historically speaking, it’s clear that the current ‘flush and forget’ system of human waste disposal is abnormal.

In Bazalgette’s time, London’s growing population was experiencing cholera outbreaks that were widely thought to be the result of breathing the foul smelling air around the open sewers that led to the Thames river.  It wasn’t yet widely understood that diseases were spread by fecal contamination in drinking water.  Bazalgette’s contribution was to enclose sewers and pump and dump the waste further downstream, offsetting the offensive smell, while also incidentally beating the cholera crisis by moving the human waste further away from the source of London’s drinking water.

Nowadays, wastewater treatment systems are very effective at keeping fecal-derived pathogens out of our drinking water, but it comes at a cost.  In a system where nutrient-rich liquid waste is diluted with flush water, mixed with fecal matter and whatever else people put down the drain, nutrient recovery at the sewage treatment plant becomes challenging and expensive.  The majority of modern sewage plants are designed to remove most of these nutrients before discharge, typically either through chemical flocculation, various means of microbial immobilization or some combination of both.  The resulting phosphorus and nitrogen-rich sludge may be anaerobically digested or further treated and applied as a (somewhat controversial) fertilizer, but more often than not (as is the case with my local wastewater plant) it is incinerated or landfilled.  Moreover, although the liquid effluent from sewage plants is largely free of harmful pathogens, some contamination still persists: pharmaceutical contaminants or hormones may still be present, along with remaining nitrogen and phosphorus, further contributing to nutrient pollution in our waterways.

In recent decades, researchers in Europe and stateside organizations like the Rich Earth Institute in Vermont are advocating for a new approach to managing human waste where nutrient reclamation and sustainability takes center stage.  Sometimes called Ecological Sanitation or ecosan, these are whole systems designs that attempt to ‘close the loop’ on human waste and agriculture.  Common among these designs are urine diverting dry toilets (UDDT) where urine is kept separate from feces and flush water and stored in holding tanks to be applied directly as a fertilizer at nearby farms.

Urine diversion represents a sort of ‘low-hanging fruit’ in ecosan system designs. Compared to feces and kitchen waste water, urine is very easy to manage for pathogen reduction.  By volume, urine accounts for only 1% of domestic wastewater while comprising up to 80% of the nitrogen, 55% of phosphorus and 60% of potassium.  Urine is a potent fertilizer that is well balanced for grain production:  an often cited Swedish publication from 2004 states that over the course of one year the average person produces enough urine to fertilize a 250kg crop of maize.

Urine accounts for most of the possible major plant nutrients that are flushed away in domestic wastewater.Source

Seeking a deeper understanding of the science of nutrient cycling, in early 2020 I set out to explore firsthand the historical and relevant modern uses for human urine.   In a way it was good timing – the isolation brought on by the Covid-19 pandemic enabled me to invest more time in these admittedly anti-social projects.  Ultimately, there’s too much to cover in one post.  Here I’ll cover in detail the issues with urine collection and agricultural applications.

In later posts I’ll share my efforts with a historical method of using urine for processing indigo dyes and saltpeter production, experiments with the use of urine in recirculating hydroponic systems (known as anthroponics, or pee-ponics), and lastly I’ll share my trials with a low-tech process of struvite precipitation, yielding a potentially valuable, easily transported and stored urine-derived mineral fertilizer.  But first, in order to discuss urine applications in any detail, we need to know more about what’s in it.

Composition

Healthy human urine is between 91% and 96% water.  Over half of the non-water fraction is the nitrogen-containing compound urea.  Nearly all of the Nitrogen in fresh urine is the form of urea.  The remaining portion is a panoply of mostly innocuous organic compounds and inorganic salts.

These figures for average nutrient concentration in human urine were published in the 2011 report: Technology Review for Urine Diversion Components

The elemental composition of urine changes with diet.  Urea is a product of the metabolism of protein.  Meat-eaters should expect their urine to have higher nitrogen levels, as well as higher levels of phosphorus and calcium.  Conversely, those with a largely vegetarian or protein-limited diet should expect a higher pH urine with a higher ratio of potassium.  Additionally, urine collected in the morning – the first after waking up – has been shown to have comparably higher levels of urea, calcium and phosphorus.

It has been said that adults are essentially at a ‘steady-state’; major plant nutrients nitrogen and phosphorus are no longer needed to grow, and thus not retained in the body.  A diet rich in minerals will produce mineral-rich urine.  On the flipside, diets high in common salt are going to reflect high sodium and chloride levels in urine.  Pharmaceuticals can be persistent too, leading to valid concerns over the use of urine as a fertilizer and subsequent accumulation in agricultural soils; this has been the focus of much ongoing research, where a symbiotic application of biochar may be a solution.  Urine is the product of filtering blood through the kidneys and contains only substances that have been metabolised. Heavy metals are largely a non-issue; metals are removed from the body as feces – a combination of both metablised and non-metabolised material.  Interestingly it has been shown that when compared to expulsion via urine, sweating from the result of vigorous exercise is a much more effective means of removing metals from the body.

Is it Sterile?

Technically, no. Contrary to popular belief, human urine as it exits the body is not absolutely sterile.  However, it should be noted very few diseases are transmitted via pathogens in healthy urine.  In Carol Steinfeld’s book Liquid Gold: the Lore of and Logic of Using Urine to Grow Plants we are told on the authority the Swedish Institute of Infectious Disease Control that significant urine-transmitted diseases Leptospirosis and schistosomiasis are only of particular concern in humid, tropical environments.  Salmonella is potentially transmittable through urine but is inactivated quickly after excretion.

There seems to be a general consensus among urine-reuse advocates that the risks of infection are nil if the urine is collected only from healthy members of your own household and destined for application on crops consumed only by the household.  The conventional wisdom here is that you cannot get a disease from your own urine that you don’t already have.   However, problems arise with fecal cross-contamination, and I suspect this is more often the case than I expect most people would like to know.  In her presentation for the 2020 Rich Earth Summit, ASU researcher Daniella Saetta and team shared their work in identifying microbial communities in urine collected in waterless urinals – of all the samples, none were without contamination.  For all practical purposes we should assume urine may harbor pathogenic bacteria and that come harvest time you may decide to share the produce with friends outside of the household.  This is not to say we should be scared, but rather cautious.  The risks can be easily mitigated through a regime of pre-treatment and best practices upon application in the garden.

Pre-Treatment for Safer Agricultural Use

Recall that fresh urine is slightly acidic. It’s mostly water, while the remaining portion is mostly urea, along with some inorganic salts and various organic compounds.   Among these organic compounds is the enzyme urease.  Urease is naturally found in both urine and soils, and is ubiquitous among other many species of plants, fungi and bacteria.  Urease is the catalyst by which through hydrolysis urea is ultimately converted to ammonium and hydroxide and carbonate ions.

Hydrolysis of Urine: By far, the simplest method for pre-treatment

Hydrolysis of urea and the resulting conversion will raise the pH from its starting point to at least 9.  Pathogens are deactivated after a length of exposure in this high pH environment.  This is an easy strategy for pre-treating urine prior to agricultural application – it’s largely a spontaneous process, all that is required is proper storage.   Odorless ammonium easily shifts to gaseous ammonia, complete with it’s potent, distinctly pungent odor.  Storage containers should remain closed but not necessarily gas-tight.  The goal is to keep this volatile nitrogen dissolved in water, rather than lost to the air.

Under normal circumstances, hydrolysis may take anywhere from a few days to weeks.  The speed of the reaction is largely temperature dependent – higher temperatures will speed up the reaction while very cold temperatures will nearly stop it.  The rate of the reaction is also dependent on the amount of urease in the urine.  Scientists have shown this through supplementation with urease found naturally concentrated in the jack bean.   Researcher Henrique Sanchez has shown that by adding 1 gram of dehulled, crushed watermelon seeds to 100 mL fresh urine he was able to facilitate hydrolysis within 20 minutes.

Addition of watermelon seeds can speed up the hydrolysis reaction.  In my trials I determined seeds should be crushed with a mortar and pestle, but dehulling was tedious and unnecessary.   24 seeds (.54g when dehulled) helped bring 600mL of 6.8pH urine up to 9 in less than 20 hours.

Hydrolysis of urine is an easy way to safeguard urine from pathogenic bacteria but it is not without its downsides.  Containers must be kept at a moderate temperature for at least a month or more.  The WHO recommends retention times above 8.8pH for 1 month when applied to fodder crops or those that will be later processed, and 6 months when applied on crops to be eaten raw.

The conversion of urea to volatile ammonia all but sure ensures that some nitrogen will be lost to the atmosphere.  The smell is potent, and even though it has been said to dissipate quickly, make no mistake: doing anything with aged urine is likely going to be a lonely experience.

Another complication associated with hydrolyzed urine is the formation of struvite.  Struvite is a mineral form of magnesium, ammonium and phosphate that precipitates out of stored urine as the pH rises.  The formation of struvite leads to scaling of fixtures and clogging of pipes in urine diversion systems.  The sediment builds up on the bottom of collection tanks and can clog fertigation equipment.  It also changes the nutrient profile of the urine – all of the magnesium and most of the phosphorus will precipitate.  Calcium too, will precipitate under high pH conditions.  This is not to say these minerals are unavailable as plant nutrients – quite the contrary – struvite formation has been seen by some creative engineers not as a problem, but as a low-tech and accessible way to reclaim nutrients from urine in a solid form.  Gardeners can be sure the mineral component of urine is delivered to soil through dilution and stirring before application.

Nutrient Analysis of Human Urine Before and after Hydrolysis.  Source

Problems associated with struvite and ammonia losses from hydrolyzed urine are one of the reasons researchers are looking for alternative ways to sanitize urine.  Some have suggested treatment with citric acid to deactivate pathogens by adjusting pH down while also preventing struvite formation.  The Rich Earth Institute employs a pasteurizing system.   Others in the permaculture community have experimented with fermentation of urine along with wood ash and dynamic accumulators such as comfrey.  Lacto-fermentation of the comparably phosphorus and calcium-rich morning urine is the method I’ve chosen for use in my recirculating hydroponic system (more on this in a future post).

Urine as a Fertilizer

Urine is a free and natural source of fast-acting, soluble nitrogen that compares well to widely-used industrially-produced urea and ammonium fertilizers.  Recall that nearly all of the nitrogen in fresh urine is in the form of urea.  Upon application in the soil, as in urine hydrolysis, soil-borne urease works quickly to convert urea nitrogen to ammonium nitrogen.  Ammonium is in itself a plant-available source of nitrogen; ammonium may also be converted in the soil to plant-available nitrates by way of nitrifying bacteria.  Nitrate conversion typically occurs in a few days.  Biologically active soils will see faster conversion.

Nitrification: Conversion of Ammonium to Plant-Available Nitrates

Other major plant nutrients – phosphorus, potassium and sulphur are found in urine in their readily available ionic form.  Researchers in Sweden determined that locally-sourced urine had an NPK ratio of roughly 12:1:3 and was well-proportioned as a fertilizer for cereal production.  Still, nitrogen is the primary nutrient here – urine alone is suited for nitrogen hungry leafy vegetables; supplemental potassium will be required to balance urine as an appropriate fertilizer for fruiting vegetable crops.  Joe Hollis from Mountain Gardens mixes urine directly in wood ash – a potent source of potassium, calcium and micronutrients.  Alkaline potassium and calcium will quickly raise the pH and deactivate potential pathogens, but will also encourage loss of nitrogen through ammonia gas formation.  Mixing urine and ash can be a suitable way to create a balanced fertilizer that will be best stored in closed, corrosion resistant containers.

Depending on diet, urine is likely to have a concerning amount of sodium.  Few common vegetable plants actually need any sodium at all, and therefore sodium accumulation in soils can reach harmful levels if left unchecked. In our humid climate in the Eastern United States rainfall will usually be enough to leach unwanted salts in outdoor gardens.  However, gardeners must take special care not to allow excessive salt buildup anytime when growing under cover, or during periods of drought. This is especially the case with any indoor growing  – potted plants, greenhouses for example.   This is one reason why occasional deep irrigation is often recommended.

Application Methods and Rates

As a directly applied fertilizer, urine should be applied in methods that minimize ammonia volatilization,  both for fertilizing efficiency and curbing offensive smells.  Band application, low to the ground, is most appropriate for larger scale projects.  In the garden, ammonia losses can be mitigated by applying in small holes or furrows alongside  crops and immediately covered after application.  The same technique can be applied with mulches when pulled aside and covered again after application. As a rule-of-thumb, keep urine 4” away from the base of the plant.  Trees can be fertilized to the dripline.  Nitrogen efficiency will be greatest in soils that are rich in organic matter, where urine is readily absorbed and won’t leach through or evaporate quickly – reducing losses from both above below.

Urine is easily measured, diluted and applied with a watering can when stored in small containers.

Avoid spraying altogether – foliar application will damage leaves as water evaporates and concentrates salts.  Application of through drip irrigation is likely to cause problems due to precipitation, but may be an appropriate method for the remaining phosphorus-free, yet still nitrogen-rich liquid that remains after struvite precipitation.

Dilution of urine with water prior to application is a common practice that isn’t entirely necessary.  The Rich Earth Institute determined that there were no adverse effects of applying undiluted to hay.  However, in the garden more precise application is possible when urine is diluted, and dilution helps prevent over-application and alleviates the risk of damaging roots.  Garden vegetables are likely less tolerant of the high sodium content in urine; excess water in diluted urine will help evenly distribute all minerals, lessening the impact of concentrated salts.  On a large scale dilution is not always practical, increasing labor and contributing to soil compaction issues, where larger tanks are required to carry additional water.  A better strategy may be to apply urine at full-strength followed by light irrigation.  In either case, urine is best not applied to dry soils.

Application rates are dependent on nitrogen needs of the crop at the time of application.  Precise rates are all but impossible to determine without a urine nutrient analysis, however, we can make some assumptions based on published data. The Rich Earth Institute estimates there are .05 lbs of nitrogen (N) per gallon of urine.  Much of the Swedish literature assumes 7 g N per liter – the equivalent of .063 lbs per gallon.  Assuming .05 lb N/gal, then 20 gallons will provide 1 lb N over 1000ft² – for reference, this is the amount of nitrogen a typical suburban homeowner would apply two or three times a year to their front lawn. A typical corn N recommended application rate may be 240 lbs/acre, or 4800 gallons urine.  Swedish trials found significant improvement in yield of winter wheat, assuming 7 g N/l, with an application rate of 120 Kg N/ha – the equivalent roughly 1,800 gallons urine.  According to Swedish estimates the average person produces between about 1.5 and 2.5 liters urine a day – the equivalent of 145 to 241 gallons/year.  Farm-scale urine fertilization clearly takes a community-scale collection effort.  Such a project requires committed participation from a range of individuals – daunting, yes, but not impossible.  Larger scale projects in Sweden have been implemented with installed urine diversion toilets and collection tanks and for their large-scale trials and the Rich Earth Institute has a program for accepting donations of urine from members of the local community.

Practical Advice

At a smaller scale the urine collected from even a single person can make an appreciable impact in the garden.  Collecting a little over a quart a day, a single person can supply a ½ lb N every month for a 1000ft² garden.  Vegetable crops are only fertilized during a portion of the growing season, so if urine is collected and stored throughout the year, one could reasonably fertilize a garden 3 or 4 times that size.  Alternatively, urine can be used in ways that support fertility without direct application to the soil.

At home I keep a smaller dedicated vegetable garden space, a small orchard of 10 fruit trees and grapes, along with a patchwork of ramial chip mulched beds.  I collect urine in a simple five gallon bucket in a private location outside on my property.  Only 3 or so partially filled buckets will be stored and treated through hydrolysis for direct application on garden vegetables.

Lately I’ve been collecting morning urine separately in quart or gallon size plastic jugs and fermenting it and storing for a month before use as the primary nutrient for my recirculating hydroponic system – a little goes a long way here.  Smaller storage jugs are easier to measure, dilute and pour into handheld watering cans for targeted application.  As a male, it’s easy to use these, and for now, I prefer to keep it simple as I don’t expect anyone else in my family will be excited about contributing their own for a long time. 

Outside of the garden, urine is applied in the orchard and occasionally on the compost pile. Diluted urine is applied once a year in the early spring on select trees in the orchard.  Often I’ll take a half-full 5-gallon bucket and top it off with water before pouring over a thick layer of ramial wood chip mulch under the drip line of individual trees.  Nearly all of my fresh food waste goes to the worm bins – urine is not welcome here. However, in the fall I’ll start a passively aerated compost pile for carbon-rich yard and garden cleanup, and here, urine is absolutely a helpful way to apply nitrogen that facilitates decomposition of woody material.

Passively aerated carbon rich compost, including biochar and urine

It seems in nearly all of our biochar presentations, someone in the crowd inevitably mentions charging biochar with urine.  There is wisdom here.  High temperature biochars especially have been shown to retain nitrogen and phosphorus anions.  A common strategy here is to pre-treat, or ‘charge’ the biochar with urine before mixing as an ingredient in the compost.   I use this method as means of including both nitrogen and biochar in my carbon-rich static, passively aerated piles.  In conventional 30:1 C:N thermophilic compost,, it stands to reason that biochar may be more effective at absorbing ammonia gases when applied without a urine pre-treatment.

Conjecture

It was about this time last year I set out to begin establishing a dye garden.  Dyeing with indigo pigment is a fascinating process involving reduction in an alkaline vat – a condition that historically was met by using aged urine.  Out of some morbid curiosity of all things tedious, groomed through last year’s work with wood ashes, I set out to attempt the process on my own. Again, I’ll speak more about this in a follow-up post.

Germination of my Japanese Indigo (Persicaria tinctoria) was very successful – 90 frost-tender plants were ready for transplant in the greenhouses by mid-march.  Started early enough and managed carefully, some growers can expect 3, sometimes 4 harvests throughout the growing season.  However, it was about this time the Covid-19 pandemic became more severe and indigo plants were no longer a priority – space in the greenhouse was to be reserved for food and medicine.

Mid-April is our average last frost.  In prior years our final spring frost had come very early and I retained some hope I could transplant by the first of April in my own garden.  Around 60 plants were well established after a month in a 40 ft² before a late April cold snap arrived.  A low tunnel kept enough heat in to prevent frost damage, but the cold was enough to signal early flowering.

Early spring flowering

Nitrogen is known to encourage vegetative growth; urine is a well matched fertilizer for leafy greens.  Following this logic, I pinched off early flowers and applied a heavy dose of 1 gallon urine, diluted with 3 gallons of water, over the 40 ft² bed.  In two-week intervals I repeated this process 3 more times so that an estimated .2lbs of N was applied in an 8-week period.  By late spring flowering had largely stopped, and despite the early season setback, I was still able to harvest completely 3 times throughout the growing season.  Urine would prove to be well-suited for both growing and processing my indigo crop.

Did applying a heavy application of urine fertilizer force my early-flowering Japanese Indigo plants back into vegetative state?

Helpful References

The Rich Earth Institute is researching and advocating for urine use in agriculture in the United States.  Their Home Use Guide is a helpful summary of best practices in the garden.

Guidelines on the Use of Urine and Feces in Crop Production

A Technology Review of Urine Diversion Components

A report on urine diversion with concrete examples of use in agriculture: Urine Separation – Closing the Nutrient Cycle

WHO Report: Urine Diversion – Hygienic Risks and Microbial Guidelines for Reuse

How I Caught the Steer

Our blog for December is a true story from Living Web Farms’ livestock manager, Rocco Sinicrope.

Let me tell you about the time I caught the steer.

When we were first starting in the cattle business I figured we were a little too small for a cow calf operation.  We were, after all just beginning and I had next to no experience.  That, topped with the fact that we only had 20 or so acres of grass which is comparatively small and the responsibility of a breeding program was enough to convince me to start off with an all in all out.  Granted that jumping in head first does have its advantages when it comes to hands-on learning, but, in this case familiarization of alternative grazing systems was the priority.

 All in all out basically means you buy steers and grow them to market weight, then sell the beef.  A stocker program like this typically produces beef faster than a breeding system, but you are subject to whatever animals you can find.  I was a student of what I’ll call alternative grazing techniques as opposed to the traditional, and I was dying to implement mob grazing, high density grazing, multi species animal impact, and stockpiling grasses for winter.  That’s plenty to chew on and get under your belt without having to figure breeding as well.  Well, one thing at a time.

So where do we start?

Baby Big White

The livestock auction, or sale barn as it’s commonly known, is a fine time. In addition to a place to buy and sell cattle, It often acts as a community hub; lots of information gets passed along there both formally and via casual conversation.  I have experienced a strong sense of camaraderie at farmers markets both with other farmers and customers, and the sale barn has the same quality, I think primarily because raising livestock is next-level stuff.  I love vegetables and have been raising them for over 15 years, but in my opinion, livestock is more visceral. The energy exchange is more in your face.

For myself at that time however, the mysterious nature was enough to make me look elsewhere.  I’m glad I went, and I still go from time to time just to keep myself honest, but I learned that some folks take their best stock there, and some take their worst. The problem for me at the time was my inability to really tell the difference. I kind of figured why not go to the source?  Besides, who the hell can understand that auctioneer.

Knowing a little historical background on the animals you are buying and bringing to your farm is useful because it gives you more of an idea of how these animals were raised and the lives they have led.  The less they have to adapt to dramatic changes between where they are coming from in correlation to where they are going, the better off they’ll be.  This is how I came to meet Tommy Heffner.

I forget if it was Craigslist or the Iwanna (a local bulletin for this kind of trading) but one spring day I found myself headed to upstate South Carolina to meet Tommy who had come highly recommended by some good ol’ Mills River folks.  Tommy was a local Henderson County man himself who had moved down off the mountain a few years prior.  Presumably to have a little more room to roam and to find some land that was more affordable. I eventually arrive at Tommy’s farm and while driving in I recall being in deep thought, wondering if the rain I was driving through was the hardest I’ve ever seen.  I mean to tell you, it was pouring…hard.  So after seeing me pull up, he waved me into his shop, we introduced ourselves face-to-face, and from there it was obvious that we didn’t have much else to do but sit down and get to know each other.  I also had the chance to meet his wife, Francis and being stuck in their company was such a pleasure.  We talked and swapped stories for a couple hours until the downpour subsided and we were able to go look at his yearlings.

Geese are helpful defense against birds of prey for a chicken flock.

Tommy had all the hands-on farm experience that I lacked at the time, and I just sat there like a kid at his feet doing my best to soak in and glean all that I could.  I had all these ideas and concepts and theories but finally here was a real opportunity to bounce them off someone with tons of familiarity.  I don’t believe any of these ideas were new to him, but it’s fair to say he was more of a conventional practitioner, and if he ever thought my ideas or plans were off the wall crazy, he sure hid it well! It was like free consultation.  All-in-all, Tommy turned out to be a great resource for me, especially when I was just getting my feet wet.  He was encouraging and supportive, from time to time I’d call on him with a quick question or two or just to say hi, and from time to time he’d do the same.

Tommy has passed on now but as it turned out he was a big fan of frequenting the sale barn.  I’m not sure that he did a whole lot of buying and selling although I know he did some, but more to keep up on prices and spend a little time with buddies.  I wouldn’t necessarily call this a regret, but as I sit here and reflect on these memories, I sure wish I’d gone to an auction or two with him.

We ended up getting five steers from Tommy and he brought them to us a week or two later.  One thing my years of diverse vegetable production has taught me is the concept of staggered harvest via successive planting.  It’s nice to have a steady supply of produce coming in over the span of weeks or months as opposed to a one shot deal.  For example, the last frost date may be May 15th, but we typically plant tomatoes the entire month, and even into June to stagger the harvest down the line.  It also reduces risk because it provides a scenario where plants are coming into and going out of their peak production all at the same time.  Why not apply the same philosophy to the steers?

So when Tommy brought us his yearlings I thought I’d bounce an idea off him – would you bring me some older steers Tommy?  It made sense to him and at this point he had a pretty good idea of what I was looking for, although he didn’t have any steers that were in the age range I wanted, he said he’d be sure to keep an eye out at the sale barn for me.  A few weeks went by, the new steers had gotten accustomed to the frequent paddock moves that make up mob-grazing, and sure enough one day my phone rings and Tommy informs me that he just picked up three big steers for me and he’d see me tomorrow.  Great!  He shows up the next day, backs into the barnyard and we unload three of the prettiest Charolais crosses I’ve ever seen.

One red, one blonde, one white.

The steers as they arrive

Charolais are a French beef breed. Most American cattle (at least in this area) are some cross of European beef breeds; Angus, Hereford, and Charolais are among the most popular.  They unloaded fine and for the most part fell in line with my management system – which includes being moved into relatively small paddocks every 12-24 hours in an effort to maximize efficient use of grass, heavily impact weed pressure, boost fertility, and conserve stockpile grasses for the dormant season.  The cattle herd was running with a flock of hair sheep and two donkeys, giving us a flerd.  Moving all these animals at least once a day gives you a good rapport with them.  Among other things, one advantage in seeing them up close everyday is easy regulation of their body condition.  Point is, all these animals were moving along and getting along just fine.

However, there was something that I always noticed.  When I would walk out to them for a move, the big white steer would always be the first one to look up and keep his eye on me. Not the five smaller steers from Tommy, not the big blonde or red one, but always that big white.  He was always the last to go back to grazing after being moved into a fresh paddock.  He would see you from across the farm and never really settle until you were really far away.  For the most part, my little flerd was just chugging along that summer.  The big white steer never really got too excited about anything, he was just always the first one to stop what he was doing and check you out but he complied and followed all his companions into the next paddock so I never really paid it much attention.  Things continued that way for quite a while until it was time to load them for the processor.

Moving livestock somewhere they want to go – like a field full of fresh, lush grass is one thing – moving them somewhere they’re not too sure of is another.  A livestock trailer is a prime example.  The best way I have found to get cattle loaded is to simply take your time and get them accustomed to it.  If you have a handling facility with a loading chute it’s pretty easy to get them loaded, but if like me you don’t, you have to do the best with what you’ve got.  Expecting cattle to walk right onto a dark, confined space that they are unfamiliar with can be a tall order, here is my recommendation.

Cattle that don’t fear you are much easier to work with.

Park your trailer in a location that isn’t out of the ordinary.  Secure the wheels and jack so it has no chance of rolling away or shifting when a couple thousand-pound animals walk in it.  Prop open the back door in a way that is secure,  but allow yourself the ability to shut it quickly and quietly should the opportunity present itself.  Put the water trough all the way in the back.  Put it in a spot where the livestock have to walk the entirety of the trailer floor to get a drink.  Then simply walk away and give yourself a few days for the animals to learn that nothing bad happens to them on the trailer.  If you have a date for the processor, or some other reason to move them, just work backwards and set yourself up three or four days in advance to relieve any stress by building familiarity.  When the time comes to load them, now they are accustomed with where you want them to go and it’s so much easier than having to force them.

Another little trick that can come in handy is using sweet feed as a little treat for the livestock.  Sweet feed is a highly palatable treat for cattle that seems to have the same effect on them as ice cream does for children.  Not only can it help to lure cattle, it also trains them that when they get  on the trailer a nice surprise awaits them, thereby associating the trailer with good thoughts – a mobile sweet morsel facility, as opposed to a big scary metal trailer.  Just feed them a little bit during the time they are getting accustomed to the trailer, and when the time comes to get them loaded, you throw a little in the bin and the cattle come running and you simply shut the door behind them.  Done – stress free.  It’s just a helpful trick to know and to have in your toolbelt.  A couple handfuls in their last days as a treat and to get them where they need to be with no hassle is worth it in my book.  To make my point even further I once saw an old-timer load a dozen hogs on a trailer simply by walking on it and they all followed him, then a buddy shut the door, he strolled to the back and his friend let him off.  All the pigs ready to go, the whole process probably took 20 seconds. Talk about making something look easy.   Amazed, I asked how he did that, it was like magic!  He walked over to me, looked me right in the eye and said “son, you gotta be smarter than they are.” He then reached in his pocket and pulled out a crushed up hand full of vanilla wafers.

Learning to work with livestock and how to move them is like learning another language. The more you do it, the more it becomes second nature to anticipate their next move.  Always keep in mind that we are not raising predators but prey. Now when you are standing next to an animal that is ten times you size, it’s easy to feel intimidated and for good reason, they can injure people and you should always be careful  If bulls and full grown boar pigs were all the size of cat and dogs I think the world would have a lot less farm accidents and there would be far fewer handling and loading issues.  My point is that the size of livestock can lead to people being intimidated by the animals they are trying to manage.  In and of itself it is a stressful situation that has the potential to get dangerous.  Observation leads to understanding, understanding leads to knowledge which in turn enables you to provide the most efficient and stress-free situations for you, the people around you, and the livestock. So to the best of our ability, let’s avoid the scene of scared people handling scared animals.

Livestock and handler engage in a dance to the tune of the animals’ comfort level.  You can stand 100 yards from a steer, and while it will notice you are there, more than likely it won’t react because you are too far away to cause immediate threat.  Now, standing 12 inches from a steer, you are now close enough to achieve physical contact, and it simply turns into a “too close for comfort” situation and simply goes into a get-out-of-there, flee-as-fast-as-possible state.  There is a beautiful and precise point.  This one little spot where the animals aren’t stressed, but they don’t want you to come any closer, when one step forward adds pressure and one step back relieves it.  That’s where the magic happens, where the dance begins, where you lead and they follow.  That precious place fluctuates between species and within species individual animals, but working that edge in a calm manner is the key to handling livestock.
The flock

So, back to the due date.  The three big steers had been gaining nicely all summer and it was time for them to meet their maker.  I had an appointment at the processor and it was time to get them ready for the one-hour ride to Forest City.  I put them in the barnyard and set up the trailer.  This was the first time I had them in a somewhat confined area – the barnyard is about an eighth of an acre with access to the barn for staples and cover.  Anytime I had previously looked or gone in there with them they didn’t get stressed or seem to really pay me any attention, but on loading day, something really spooked big white.  I’ve never been able to pinpoint what elevated his stress level so much. The other two were just fine but when I went to load them he ran back and forth the perimeter of the yard, trying to get as far from me as possible while me and the other two steers watched in surprise.  I decided to load big red and blonde by getting behind them and doing the dance with their comfort level. A step to the left to make them go right, a step to the right to make them go left, and a couple steps forward and they eased onto the trailer with no significant hesitation.  I pushed them all the way forward and closed the middle gate and turned my attention to big white.  As soon as I stepped off the trailer, he took one look at me, got a big run and sprinted toward the corner of the barnyard and leaped right out of it, back into the main pasture!  I had never seen anything like that before or since.  He had been on and off the trailer many times in the previous days but on that day he very clearly wanted nothing to do with it.

I stood there dumbstruck, scratching my head.  Well what now?  After a few failed attempts to get him back in the barnyard it was clear that he had no intention of cooperating, no intention in fact of letting me even get to a place where I could try and get him to cooperate.  It takes a while for animals to calm down after they have experienced high levels of stress, and after an hour or so of running around and trying my damndest to get him back in the barnyard, it was painfully clear that I had lost this battle.

I was a little embarrassed the next morning when I showed up to the slaughter house with two steers instead of three, but they were encouraging and seemed to understand.  Apparently I was not the first farmer who couldn’t get an animal loaded, so I made another appointment a few months out and figured I’d try again.  The other two big steers had been processed, but Big White wound up back in the rotation with the sheep and things returned to business as usual.  Round two approaches.

Fast forward a few months and it would be like rereading the previous couple paragraphs.  Now he knew the barnyard wouldn’t hold him and as soon as I even thought about trying to load him, he simply hopped the fence again.  It’s not that I couldn’t get him on the trailer;  I couldn’t even get him to a place where I could get him loaded.  Possibly the most frustrating part was that at this point I’d spent nearly a year with him, providing fresh pasture with daily moves, and he was still untrusting.  So I called the abbatoir and had to tell them I would miss yet another appointment, which was embarrassing at this point because it’s basically calling a business you had a deal with and telling them they won’t be making money today because I couldn’t keep up my end of the bargain.  Again, they were understanding but I made it a point to say I’ll call you when I’m ready and have him caught as opposed to making another date.  They happily accepted.

I’ve had a lot of teachers over the years and they have all helped and contributed in so many ways.  It still never ceases to amaze me how people can have two fully functioning regenerative farms, totally successful and have different management tactics.  This isn’t a one size fits all sort of thing and there are truly as many farms as there are farmers.  One of my teachers is Jim Elizondo.  I won’t try to describe Jim’s level of knowledge when it comes to cattle, genetics, and grazing, mainly because I wouldn’t come close to doing him justice, I mean he is really brilliant.

Living Web Farms is an educational farm and we do classes on various subjects for the public and sure enough Jim was coming here from out-of-state to teach a segment on stockpiling winter forage, complete with a little farm tour where we kept the flerd.  The morning of the class was cold and rainy and I was full of excitement.  While doing chores I had the bright idea to put big white back in the barnyard and add my unsuccessful attempts to catch him as part of a transparent class.  Plus, maybe Jim had some bright ideas on how to load him.   I hadn’t planned on doing this but convinced myself that it was a good idea although it put me in a bit of a rush.  So I hopped in my truck and set up the trailer in its spot, step one.  I opened all the gates and doors and made sure they were secure and easily accessible if a lucky opportunity should arise, step two.  I ran out to the feed store and picked up a bag of sweet feed.  A 50 pound bag is inexpensive and I use it so rarely and infrequently I thought I’d get a fresh one.

With the trailer set up and the lure in place all I had to do was cut out big white from the sheep flock and stick him in the yard. Up to this point, getting him from the barnyard onto the trailer was the problem, not from the pasture to the barnyard, so this shouldn’t be a big deal.  Maybe Jim had some secret way to load him and the participants of today’s class can glean some wisdom on animal handling, and I can get this animal on the trailer? A win-win for all people involved right?

Time was against me at this point.  It doesn’t take too long to set all that stuff up, but it’s the running around that will eat up your day.  I still had to go home, shower, put on some clean warm clothes and be the first one there to greet Jim with open arms and enthusiasm, all while putting on my hospitality hat for our guests while we all learn.

We use electrified mobile fencing or netting for the sheep. They respect it more than the single strand polybraid which a lot of operations use for cattle.  I also believe the netting creates more of a mental barrier for the sheep as opposed to just one lonely strand. It is formidable and encourages sheep to stay put.  As a quick side-note: sheep can be tough to keep in electric fencing.  They are light and agile so they aren’t particularly well grounded (not like hogs or cattle anyway) and they have a heavy wool layer that keeps their skin well insulated from the elements and electricity too.  Make sure your fence is real hot when you’re training sheep to respect electric netting.

It can be tricky cutting out different species from one big group.  While daily moves are routine at this point and everyone is well accustomed to them, it can still be challenging when you are moving three different species.  When the paddock where you want them is right next to the paddock where they are going it’s pretty easy, but there are those times when you have to move them across the whole farm.  Our routine at that point was mainly staying ahead of the donkeys because they had the highest level of confidence, not pressing the steer too hard because he is easily frightened, and giving the sheep plenty of space.  Moving sheep is interesting, they have the highest flock mentality so when you move them they really unify and act as one being as opposed to a bunch of different personalities.

On this day, the steer was feeling satisfied, and decided he couldn’t be bothered to move anywhere, while the sheep on the other hand were ready to high-tail it across the farm.  Why they decided to have such different reactions on what was otherwise a totally normal situation I don’t know, but I have since convinced myself that they had a meeting before I got there and decided to do their best to humiliate me.

Well, they did.  At this point I’m rushing.  Jim’s class has already started and I’ve been frantically going back and forth around the perimeter of the paddock trying to get the steer out and keep the sheep in.  The dance I described earlier is a good analogy, but some days are better than others and I was out there with two left feet.  The sheep would get out and the steer would stay, I couldn’t turn my attention to the steer cause the sheep would run off and then I’d have to go get them.  Soon as the flock went back in the paddock, the steer wouldn’t go anywhere and if I applied too much activity or pressure, he’d just jump over the netting.  It was mildly chaotic and that’s a bad state to be in when you’re working animals.

Again, this is something I do every day with no stress or struggles at all!  Why did it have to be today? I was due some humility because right when I was having all those thoughts, at the peak of my frustration of running back and forth around the electric netting, I ran up to it to keep the sheep inside, slipped in the mud right in front of netting, snagged the bottom of the netting with my boot as my feet lifted into the air and over my head, and then came crashing down with a thud, square on my back only to have the netting land right on top of me and give me a couple good jolts until I could crawl out from underneath.  I got up and put the fence back together, knowing that I had clearly lost this day.  Cold and wet, muddy and tardy, I showed up to my instructor’s class thirty minutes late, a beaten man.  Humility served.  I spent the class huddled in the back corner kinda hoping no one would notice me.  Suffice to say, when it was time for the farm tour I stuck to the subject matter at hand – grazing, not herdsmanship.

There were a couple more unsuccessful attempts that winter and spring which granted the same results, the steer was still around and any new plan of mine to load him proved unsuccessful.  It got to the point where I simply didn’t know what to do.  I couldn’t get him loaded. In fact, the worst was I couldn’t even get him to a place where I could load him – and he knew it.  Big white was well aware of the fact that he didn’t have to do what I wanted him to do and his efforts of distrust resulted in his victory.  I really understood the importance of low-stress animal handling, and was basically doing it everyday, but I was beginning to doubt my ability and skill level as a farmer. At least now I can look back and laugh, but at the time it had got to the point where some buddies were making fun of me.  I had shared these attempts with people who might actually have some helpful advice and one response was “well, I guess he’s gonna just die of old age.”  That one stung a little bit, but I’m thankful for it – because it stuck.  A voice inside me said “No. No, he won’t.  I’ll get him, one day I’ll get him and I will not give up”  I just didn’t know how…

If I recall correctly about a year went by.  A full year or so since I missed that initial first slaughter date and it did appear that big white was just gonna have to live here forever.  Man, he was big too.  We never ran out of grass the whole time and he just lived with the sheep, getting moved everyday and gaining weight everyday.  The typical standard weight for steers at slaughter is 1200 pounds live weight.  I gauged him to be every bit of 1800 pounds.

One warm evening when the days are nice and long I had finished work for the day and was just piddling around the farm in the cool of the evening when suddenly a thought came to me.  Lysondra was in town.  Lysondra is a good family friend.  She and my wife had met years before when they worked at the same restaurant in Hendersonville.  The service industry is something I have no experience with, but they really hit it off and apparently you can develop quite a bond amidst that fast-paced environment.  She had moved out of state and was visiting this evening with my wife and kids.  Lysondra is a real sharp lady, raised on Staten Island and grew up there in the 80’s; quick-witted and says what she means, she and my wife would have lots to catch up as it had been awhile since they’ve seen each other.  I also knew she’d keep my kids occupied because it’s all about family with those two.  For me at this moment it meant that I didn’t have to rush home to be with my family because they were occupied, and it was such a nice evening, I didn’t really want to leave anyway.  Piddling around thinking about what to do, realizing I didn’t have anywhere to be I said aloud: “I’m gonna go catch the steer”.

The flerd had been in the goat pen for a few days.  The goat pen was this little half-acre paddock that I built years prior when we tried our hand at meat goats.  It was this little section that wasn’t quite pasture and wasn’t quite forest, that lovely little mix of multi flora rose, privit, blackberries, and a bunch of other pioneer species that I wasn’t familiar with.  I had built a five-foot tall, 4”X2” welded-wire fence secured with T posts and let some goats have at it.  The meat goat venture ran its course and the farm was left with this cool little paddock in a transitional location between the main pasture and the woodline.  Normally, there was only about 12 hours worth of forage in there but I prolonged their stay by feeding hay for an extra day to add to the animal impact and lay down some more carbon.  It was worth it to keep that area leaning toward growing grass as opposed to forest, without having to get in there with machinery and rip all that brush out.  Livestock like to move, and they like to eat green grass when they have a choice, so I knew they would exit the goat pen with no fuss, but I was gonna throw a little curve ball at them.
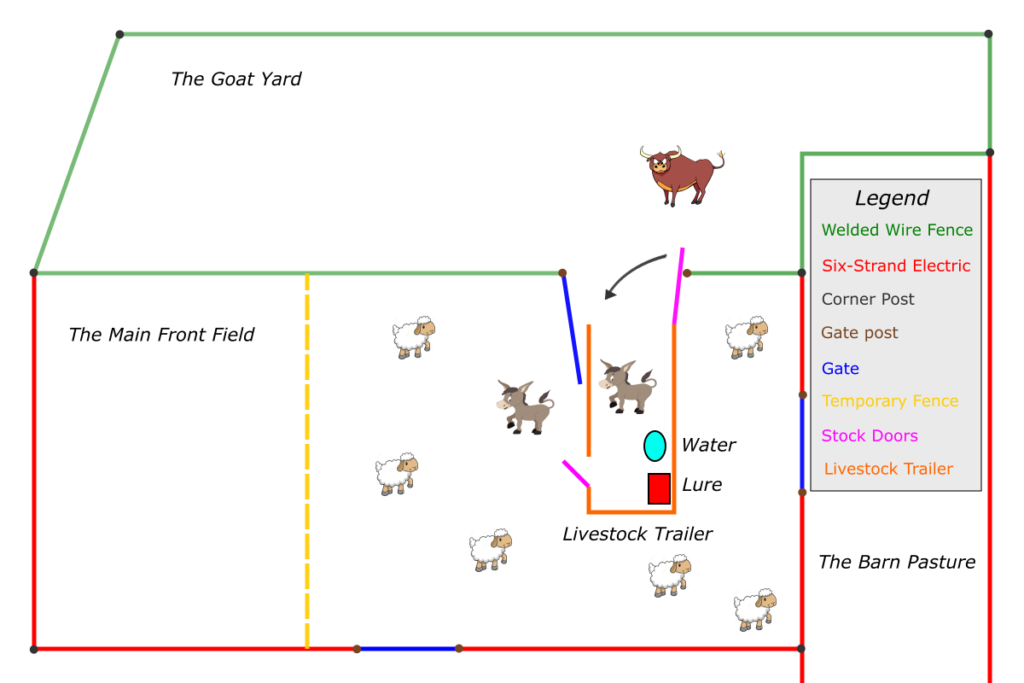
A map of the pasture as it was on that fateful day.

I went and got the livestock trailer and set it up just outside the gate to the pen.  I put up a strand of temporary netting for their next paddock, and I even had a little sweet feed laying around I took with me.  Nothing was different except the trailer being in between where they were and where they wanted to go.  I opened the big back loading door and the small pedestrian door on the front passenger side and hid.  I went outside to the front of the trailer and laid underneath it on the ground completely out of sight from all the animals and waited, quietly.  The donkeys were the first to go through.  No hesitation to speak of, they went to the back of the trailer and kinda stared at it for a moment, then hopped right on and went right out the front door into the new paddock and began grazing.  All I could really see was a bunch of hooves scurrying along.  My point-of-view was fairly limited from underneath and as soon as the sheep watched the donkeys pass through unscaved and start eating, they soon followed.  It was fun to hear the flock scamper on the floor just inches above my head.  I was feeling rather proud of myself, so-far-so-good.  In the moment, my efforts at concealment were thus far paying off, but I had learned many times over not to get too confident.  At this point, Big White was not where I wanted him to be, and the scoreboard had him winning and me losing by a landslide.

My plan went something like this: as soon as he got all four feet on the trailer, I would spring up and close the pedestrian door, then dash to the back as quickly as I could and close the back door.  I layed there, out of sight, no movement, no sound and peeked out as I watched him start galloping back and forth in the paddock.  One thing these herd animals really don’t like is to be alone.  With the rest of the flock in plain sight, happily and calmly grazing along, all he had to do was walk through the trailer to cross the threshold.  That was the last option in his mind though.  He ran fast as he could all along the inside of the goat pen just looking for an alternate route, and I knew that he could jump fences because he’d done it many times in the past.  At 1800 pounds, my little goat fence wouldn’t stand a chance.  Right when I was thinking about all that he took a full fledged sprint straight toward the fence and I knew he was going to jump right over it and all I could do was sit there hidden and watch.  In addition, if he jumps over this fence and sees my lying under this trailer trying to be all sneaky, I’ll really have my cover blown.  It would just be another victory for the steer – chalk one up for him again.  To my amazement, right in the very moment when he would have jumped, he stopped.  He stopped and checked out the trailer, sniffing it and pacing behind it.  After he calmed down a bit, I could see his feet getting real close to stepping up there.  I could see he had his head in and was considering going in; there was hesitation, and I thought maybe he could smell me and I was adding to his suspicion.

I figured he was getting pretty stressed again. After that last episode, I thought to myself:  not having caught the steer is different than not having caught the steer and having him jump another fence, and then having to go fix it.  So, I decided to go back to the drawing board – maybe some other opportunity would arise and I’d have better luck.  I got up and walked toward the truck, all set to hook up to the trailer and move it out of his way when I said to myself: “You know what.  If he wants some damn grass he can walk through that thing and get it himself and if he hops another fence, so be it.”  I got about 40 yards away and sat and watched.  It was close to sunset by now and that little spot on the farm has great western exposure.  The peacefulness of the sheep and donkeys grazing in the cool air with a watercolor-painted sky was quite tranquil.  The ease only disrupted by big white still pacing back and forth in the goat pen looking for a way out, any way out other than through the trailer.  Just as I figured I better get the truck and let him settle, I was astonished to watch him suddenly walk right through the backdoor and straight out the front.  It was a decisive move, almost as if he shrugged his shoulders and just went for it.  I guess he got tired of watching all his compadres eating grass and felt he was missing out on the fun.  I was so relieved to see it happen, thankful to witness him conquer his fear and pass through, but it didn’t get me any closer to achieving my goal.

So now he is out with all the sheep and two donkeys, I let him settle down a bit after he started grazing and he looked perfectly content, all was calm.  He really had to pump himself up to go through the trailer, so I knew I didn’t have a prayer of getting him back on tonight.  Besides, it was getting dark and I would have to set up a whole new configuration to even try.  I headed back toward the barn, with my chin on my chest a bit feeling like I had lost yet another battle with the steer – a feeling I was too accustomed to.  On the way back I remembered the half bag of sweet feed and an empty feed bucket.  I eased back through the flerd with the sweet feed and they were so content nobody really paid me any attention.  I took a little detour to the donkeys who hang out together in the field.  They have been around the block on the farm, in fact the older one was here before me so I thought I’d give them a little treat just because I had the opportunity to do so and they practically never get any sweets.  I’m scratching their ears with one hand and feeding them with the other when low and behold, big white looks at me, smells the air and takes a step or two in my direction.  Quick and calm, I placed the feed inside the front pedestrian door, went to the back and closed the big door and sat off in the corner to see what would happen.  I put the feed all the way inside the pedestrian door as far back as I could.  If they wanted it they would have to step up in there and get it, not stand outside with their feet on the ground and stick their heads in. This would prove to make a big difference.

The donkeys practically followed me on the trailer, soon as I set the feed down they were on it.  The two of them shoulder to shoulder eating out of a bin in a corner creates a touch of a competition.  Healthy rivalry among the animals isn’t a bad thing and it worked in my favor because Big White was easily twice their size, but the treats were in short supply.  I was well out of the way back to my 40 yard spot to make sure no matter what happened, I wouldn’t interfere.  Sure enough, Big White followed his nose down there and looked in the trailer to see the two donkeys having a grand time eating what is essentially ice cream to livestock.

A couple key things happened next: first he stuck his head into the trailer, then he put it as far in the trailer as he could without stepping in.  He still couldn’t quite reach the feed, at least reach it and enjoy it comfortably with two donkeys in his way.  I worried that they would run out, I didn’t put that much in the bin, just a treat and if I ran down there and spooked them by trying to add more, I would risk blowing the whole thing.  I think the urge to have a couple good satisfying mouthfuls was enough to convince him, and considering he had just been on the trailer and nothing remotely bad happened, he had no reason to associate it with any danger.

My excitement, anticipation and heart rate were all on the rise.  Here he was with his whole head in the space where I wanted him, I’d never been so close. No noise, no people clapping and screaming, no chains banging on metal, none of the things you know would spook livestock, just a little bit of feed and me well out of the way.  Then it happened, he put his two front feet on the trailer.  I couldn’t believe it! So close!  I flew down there as fast as I could and I never made a sound (yes I’m bragging a bit on that one) careful to stay completely out of his sight path should he look up.  I positioned myself a few feet away, trying hard to remain calm, a lot could still go wrong here but then… yes!  He took a full step forward, all the way into the corner to get complete access to the feed while the donkeys had to wait their turn.  Now I am inches from him, he still doesnt know I was there and I’m face to face with his rump, which is as tall as I am.  It was really exhilarating, nearly a year’s worth of failures had all accumulated to this very moment, and I had to play it right, my one chance!  He was mostly in there but not all the way, two back feet still on the ground, how can I get him up there, and without thinking about it I slapped him on the ass as hard as I could and he jumped right on the trailer!  I had that door closed in the blink of an eye and nearly had what felt like a panic attack but with excitement.  I must have ran around that thing checking the doors and latches at least a dozen times.  With him loaded and the trailer secure I finally had him.  Having lost every previous battle, that evening I won the war.

The next day I called the abattoir first thing and happily reported that the steer that had been alluding me this past year was loaded and ready to go and could they please find an opening for me.  To my surprise, they had one the next day, so I filled a water trough for them and parked the trailer in the shade.  The donkeys would simply have to go for a ride.  The slaughterhouse has a great handling facility and when I got there we put them back on the trailer with no difficulty whatsoever.  When I got back to the farm, they went back in with the sheep and are still out there grazing right now as I write this.

As previously mentioned, most steers are finished at 1200 pounds live weight.  After they are eviscerated, the carcass hangs on the rail in a cooler for 10-14 days.  This is called the hanging weight, typically 60% of the live weight, typically somewhere around 700 pounds.  Then after the carcass is butcher, you end up with roughly 500 pounds of actual meat.  Another way to consider it is 40-30-30.  Forty percent skin, bodily fluids, hair, etc.  Thirty percent bones, and thirty percent meat.  When I went to pick up Big White he had hung on the rail at 1,020 pounds, 300 pounds over average.

This all happened about 8 or 9 years ago and since then I have loaded, moved, worked with and harvested many animals.  I’ve never had one that was that untrusting and fearful.  All the livestock I have since worked with display similarities at times but never to that extreme.  I’ve had a few old-timers tell me you always get one like that.  This makes sense if you think about it.  When you are around animals all your life and they are constantly coming and going, consider the one that was the most difficult, its bound to happen in life that some animals are easier to work with that others

I’m thankful for that steer.  Thankful for the lessons he taught me about low stress handling.  His hypersensitivities forced me to treat him gently and with great care, in a way he kinda taught me about trauma.  If I had chased him, or used cattle prods, or constantly yelled and scrambled at him I have every reason to think he would have been even more difficult to work with even more stressed.  I have no interest in making any animals’ lives stressful, just the opposite.  If the goal is to understand as much as we can about livestock and try and work with them to regenerate our lands, not depreciate them, and only in the end to transition them into food we serve our friends, families, and customers, they absolutely deserve the best possible life we can give them.  He taught me that I’ll never know what an animal wants more than the animal itself and so it becomes my job to observe and provide.

There is an element to farming that I think all producers experience in different ways and at different times.  A feeling of trying to control things you don’t have control over.  Sometimes it goes the way you want and you feel on top of the world, other times things don’t pan out and you have to succumb and show up tomorrow to try again.  Over the years, the more I remove my intentions, the more I try to let nature show me what it wants, the more I’m able to plug-in and achieve cohesion, the more success I have.  The animals are my greatest teachers, I hope it stays that way.

Thank you, Big White

Working with the Roots

By Greta Dietrich

In the southeastern United States, November is the time when we begin to gather the root medicine from our perennial allies. Midway through fall, as the days shorten and the weather becomes colder, first freezes die back the terrestrial parts of plants. After the living green dies away the energy of a plant flows into the underground organ we call the root or rhizome. Starches and carbohydrates and many other chemical components gather in a concentration in the root acting like a battery to assist the plant through the winter and ensure new growth in the spring.

There are optimal times throughout the year for harvesting all parts of the plant – the flowers, leaves, buds, seeds and roots. Some plants require several seasons to pass before they are ready for harvesting roots. Echinacea, purpurea for example, needs to have three years of growth, and Astragalus, membranaceus needs four to five years of growth. Only after these plants have had many seasonal cycles will their root medicine be ready. This is mostly because it takes several years for the roots to develop into large enough size and build up a concentration of medicinal constituents.

Deciding the best way to harvest a root is unique to the plant. Before harvesting, take into consideration if the plant that you have positively identified is native or a non-native species. Non-native are more sustainable to harvest because often they are more invasive and are endangering native species. If it is a native species check to see if it is an at risk plant. United Plant Savers is a great resource for educating yourself on endangered plant species.

Instead of wildcrafting native species, search out your local woodland farmers and support them. Do not harvest anything that is endangered or at risk.

After answering these questions for yourself, then decide if you should partially harvest a root, fully harvest it or leave it alone. A partial root harvest allows for some of the root to be harvested and replanted with the intention that the plant will continue to grow for years, creating a more sustainable relationship. This may be a great option for a plant you are trying to establish a large patch of and don’t want to cut into the population such as black cohosh (Caulophyllum thalictroides) or wild yam (Dioscorea villosa).

As an example, one can harvest part of a comfrey root and replant the rest. Comfrey (Symphytum officionalis), is easy to propagate from root. Half of the harvested root can be used to propagate new comfrey plants and used to replant in my garden, the remainder I will dry and use for salves.

figure 3

If I treat 6-7 comfrey plants like this I can get a good amount of medicine and a plethora of new roots for vegetative propagation for the following year. Deciding whether or not to harvest a whole root as opposed to partial root harvest depends on what your need is. Either way, inspecting the root when harvesting gives opportunity to make root divisions and stimulate new growth come spring. Harvest half to three-fourths of the root system for medicine and replant the remaining roots attached to the crown (see figure 3 & 4).

figure 4

By digging the root and separating the rootlets and buds and cutting up the root you can make clones of the root stock and enlarge your stand of that particular plant. Depending on the plant you could get anywhere between 7-20 baby plants or divisions off of a mother plant (see figure 5). The benefit of this is that you can bypass the process of seed starting which has many processes such as the time it takes to create mature plants. Planting from division you get the same characteristics as the parent. This is a great way to work with genetic qualities you favor and characteristics you like in a plant.

figure 5

Take extra care to properly identify the plant before harvesting. The lack of foliage may prove difficult to identify. Roots tend to overlap and inter-grow. Once I had a very well-meaning forager bring me a nice harvest of Japanese knotweed. The patch of plants had been properly identified and I happily set to work processing the freshly harvested roots. While cleaning tiny little rootlets that were growing in and around the main root system, little did i know i was removing poison ivy roots with my bare hands, which 48 hours later showed up as the worst poison ivy rash of my life. It is wise to follow a plant through several seasons for this reason to properly identify it. If this had been done with the knotweed, then certainly the jolly forager would have known poison ivy also grows in this patch with the knotweed.

Another thing to keep in mind is where you are harvesting. Steer clear of roadsides and around houses or fence lines where the ground may have been sprayed with harmful chemicals. If you decide to do a whole root harvest, then the plant obviously will not be growing the following year. This may be fine especially if the plant is an invasive species in your planting zone like japanese knotweed or kudzu root, or if you simply want to thin out an overcrowded area in your garden.

A digging fork is a great tool to use for harvesting roots. Use the sturdy tines to create a circle around the plant you wish to unearth. By gently rocking the digging fork back and forth around the base of the plant or root crown you can begin to loosen the root and get a sense of how deep it is and if there are any lateral roots. Stopping and using your hands to get a feel for how and in what direction the root is positioned is helpful.

As soon as you have harvested the roots , you will want to process them as soon as you can. Using a hose and a brush is very helpful in removing soil. I always have pruners handy to break up bigger sections and scissors to break up smaller sections. As soon as all roots are well cleaned, chop them into desired size as soon as possible because they harden very quickly as they dehydrate.

Root season is an active time for harvesting and processing. It is a rich time for both propagating and medicine making. Whether you are foraging or feasting, roots offer a bounty of food and medicine. Getting to know your local roots will connect you deeper to the natural world, and the rewards abound.

Native herbs of the Eastern United States can be purchased here, here and here.  Thanks for reading, and Happy Rooting!

All About Batteries

Batteries have become such a ubiquitous part of life that we often don’t give them much thought until they fail.  At that point, they’re an inconvenience, an unwanted expense, and to most of us a profound mystery. Yet they’ve brought so much accessibility to our lives that it would be difficult to imagine getting by without them.

Cell phones, power tools, laptops and tablets, medical and communications equipment, portable devices, and even vehicles all rely on some form of battery storage. And since batteries span a full spectrum of applications, chemistries, performance, and environmental impact, it can be difficult for a consumer to make a good—not simply convenient—decision when making a purchase.   

The common dry-cell battery found its way to market in 1896 and used a zinc-carbon and paste construction to replace earlier liquid solutions, opening the door to portable electric devices, most notably the flashlight, since it would work in any orientation. That first cell was essentially the plain-vanilla D-cell 1.5-volt general purpose battery still used today.  A single-use disposable, it served nearly a century no questions asked until we began to question the very fabric of our throw-away culture.  

The first dry cell appeared in 1896 and opened a world of new possibilities for portable electric devices

Curiously enough, several years after the National Carbon Company (predecessor of Eveready/Energizer) introduced the dry cell, a rechargeable Nickel-Cadmium (NiCad) alkaline battery was developed in Europe. Alas, it was a wet cell and relatively expensive, and so the technology didn’t find its way to U.S. shores until after the Second World War.

Following several decades of persistent research into alkalines, technological breakthroughs occurred beginning in the 1980’s when Lithium-Ion (Li-ion) and Nickel Metal Hydride (NiMH) chemistries were developed for satellites and specialty applications. Today, there is an impressive range of battery chemistries and constructs, seven in the Lithium family alone. But for the purpose of this blog, I’m going to focus on the most popular consumer rechargeables and single-use batteries common to specific devices because that’s what most people use.

What’s in a Name?

Let’s begin with terminology. What we commonly call a battery is actually a cell, or a single electrochemical unit that converts chemical energy into electrical energy. When two or more cells are assembled together, it becomes a battery, or group of cells.

The batteries that we’d typically use in our devices have positive and negative terminals and two internal components called electrodes—one cathode which carries a positive charge, and one anode to carry a negative charge. These are embedded in an electrolyte, a material that conducts electrons between the terminals. When the battery is installed and the device is turned on, an oxidation reaction takes place and electrons move through the electrolyte to exit the anode and power the device.

Because they’re often called storage batteries, there’s a misconception that batteries and cells “store” electricity. What actually happens is that they store energy in a chemical form, and when a conductor provides a path for electrons to move and do work, the process initiates the chemical reaction. In time, the reaction degrades the chemicals and they eventually stop supplying electrons. In a rechargeable battery, the electrons’ direction of flow is reversed during charging, reversing the electrochemical process and restoring the electrodes to their original chemical state.

A dry cell battery works through a chemical reaction activated by a load such as a light bulb or other working device

Primary batteries are single-use disposable units, the AAA, AA, C, D, 9V, and button/coin types familiar to us in many products from flashlights to cameras. These are by far alkaline or lithium batteries, though general-purpose zinc-carbon cells are still manufactured.

Secondary batteries are rechargeable and are usually device-specific, though secondary letter-size and 9V batteries that use NiMH and Li-Ion chemistries are widely available. (The most popular Li-ion cells are 3.6V but 1.5 volt cylinder sizes exist.)  They have largely replaced reusable alkaline batteries, a transition technology developed in the early 1990’s as a green option to single-use disposables.   

Other than determining by shape and size that a battery will actually fit in your device, there are other things to be aware of when battery shopping. Voltage output is indicated on the cell. So an AA configuration not only tells you that the cell is 14.5mm x 50mm cylinder, but that it has a nominal voltage of 1.5V. Coin and button-cell batteries use an alpha-numeric code, where the first two letters indicate the chemical composition and the shape, followed by four numbers indicating the size in millimeters, diameter by height.

Nominal simply means in name only. Actual voltage of an AA alkaline battery fresh out of the pack is about 1.6 volts. A reusable alkaline of the same size, 1.2 volts.  And an AA rechargeable NiMH between 1.2 and 1.25 volts. So how do they all work in the same device? Because the voltage of a single-use alkaline cell declines immediately as the battery discharges, putting it on par with the reusable and the NiMH, which tend to maintain their consistent voltage much longer under use. 

Battery capacity is measured in milliamp-hours (mAh) and may range from 900 mAh to over 2500 mAh depending on chemistry. A battery with a rating of 2000 mAh should deliver a current of 2000 milliamps for one hour. Though higher energy capacity batteries will generally power a device longer, high-drain devices like digital cameras will deplete an alkaline cell more quickly than it will a NiMH cell because of their high rate of draw. In comparison, the Nickel Metal Hydride cell can tolerate higher rates without exhausting the battery.   

Self-discharge rate is an important factor for devices that spend a lot of time waiting for use, such as a flashlight or smoke alarm. It’s also a measure of shelf life, as when stocking up for later emergency use. Power loss on standby can be fairly high in standard NiMH batteries—up to 40% capacity in a month. Hybrid NiMH batteries (marketed as pre-charged cells) do much better in this category, and Li-ion chemistries excel, along with standard alkaline batteries.  

Charging cycles refers to how many times a battery can be charged and discharged before its useful life is over. Alkaline batteries are generally not rechargeable (except for the reusable types) but NiMH cells can be cycled over 500 times and some Li-ion cells over 1000. Pre-charged NiMH batteries perform slightly better than standard NiMH cells.

Single-use batteries may be less costly initially but they take an environmental toll over time in that they cannot be conveniently recycled and are usually just discarded. Occasionally local recycling facilities may sponsor a hazardous household waste collection event where they can be turned in, or you can take advantage of the mail-in or take-back programs offered.

Rechargeable batteries are a better choice in that they are generally recyclable. NiCad cells are hazardous waste and must be recycled when they are spent. NiMH and Li-ion laptop batteries are non-hazardous, but can be recycled through local programs or through Call2Recycle outlets. Some button-cell batteries contain silver and mercury, but many are mercury-free and relatively benign. Regardless, these too should finish their lives in a recycling facility.   

One aspect of battery manufacture that doesn’t always get the attention it warrants is the necessary extraction of conflict minerals. Mining and mineral harvest are part of any manufacturing process, but the evolution of battery technology has increased the demand for materials such as lithium and graphite, and with certain chemistry types,  rare metals such as cobalt, nickel, and manganese. These are often mined and processed in developing and politically unstable nations, where worker rights and protections are meager at best. Certainly something to keep in mind when buying batteries, and certainly an incentive to maintain them properly to extend their useful life.

Mineral extraction includes the harvest of conflict minerals which are often mined in unsafe conditions

Choosing a Battery

If this were a discussion on batteries for electric vehicle design, factors like weight, size, and safety would be key considerations. Since those factors are already established in a laptop or flashlight or any other consumer device, a buyer should be comparing cost, capacity, charging cycles, and disposal in order to get the best value. NiCad cells, for example, have largely been replaced by NiMH cylindrical batteries because they don’t contain highly toxic cadmium and have a 40% greater energy capacity.     

From Encyclopedia Britannica 2007

In most cases, if the other parameters are satisfied, contrasting cost to cycle life offers a good yardstick for value comparison. For example a popular pre-charged NiMH 800mAh AAA cell is available for $10.49 a 4-pack, or $2.62 per unit. Another manufacturer sells standard NiMH cells with the same capacity for $2.08 per unit. Even though the cost of the pre-charged is $0.54 higher, their cycle life is nearly three times greater so they represent a better value over time.  

Charging Strategies

Proper charging and discharging practices are an essential part of maintaining the life expectancy of any type of battery. In normal use, a battery performs best when it’s not exposed to extremes of heat or cold, especially sub-zero temperatures. If you can schedule charging sessions once the pack has been acclimated to room temperatures, it’s better for battery health.

When NiCad batteries were more common, users were cautioned against the “memory effect,” or recharging after shallow discharges, which encourages that chemistry to absorb only the amount of energy it supplied during its previous discharge. NiCad’s, in fact, require a periodic full discharge and prefer a fast charge and immediate use to being cradled in the charger for days at a time.

NiMH batteries, and Li-ion’s particularly, share no such memory quirks. They can be recharged at any point in their cycle with no recall effects. They will, however, last considerably longer if they are discharged within the shallow end of their range before recharging. A good rule of thumb is a 30% discharge, with 50% acceptable. Deep discharges, especially under high loads, can reduce cycle life by half. Charge times for NiCad batteries can be as quick as one hour. The others need 2 to 4 hours to full charge, with slightly less time for reusable alkalines.   

The slab, block, prismatic, and pack style batteries found in cell phones, laptops, and other consumer devices are often Lithium-ion chemistries and come with dedicated chargers. Rechargeable cylinder style cells are similarly charged, or can be used in what’s known as an  intelligent digital balance charger which accepts NiCad, NiMH, or Li-ion cells (up to 20,000 mAh) and automatically adjusts voltage and charge rate to suit the chemistry of the battery.

A plug-in balance charger accepts a variety of battery chemistries and self-adjusts for charge profiles

When charging multiple batteries, avoid mixing different capacities and different brands, and try to maintain the same age cells in a simultaneous charge. The same practice should apply when using the batteries as well; consistency promotes better performance and longevity.

There is also a wide array of solar chargers on the market that provide a reliable source of power whether you have access to the grid or not. Compact windowsill chargers are made to supply energy to multiple configurations of NiMH and NiCad cells, and similar packages are available for older style reusable alkaline batteries too.  

Compact solar chargers are economical, versatile, and convenient

Borrowing from the outdoor recreation venue, foldable portable chargers provide greater wattage and work with many devices including cell phones, rechargeable lanterns, tablets, digital cameras and the like. More robust configurations with adapters will charge a variety of larger devices including compact power stations safely, with an assortment of voltages. 

Portable solar chargers can be used for a wide variety of devices

Reliable battery technology has brought us to a place unheard of even a few decades ago. Using it wisely is the responsibility of all of us if we’re to be educated consumers.  

On-Farm Plastic Recycling

From last year’s Cooking with Food Waste workshop to the upcoming installment of the developing Waste Not series, Living Web Farms is making a point to not only reduce waste, but  help change the perspective on waste all together.

There is no waste in nature.  As agriculturalists, there is great importance in studying farming practices that mimic natural systems.  However, as farmers, it is also important to be honest about certain non-natural materials, particularly plastics, and their role in productive modern sustainable agriculture.  Plastics are lightweight, resistant to biological decay, mostly translucent, tough, and most of all, inexpensive.  On the farm we use HDPE containers, polystyrene starting trays, PVC piping systems and polyester floating row covers – just to name a few examples.  It would be hard to imagine a better suited material than translucent LDPE film for greenhouse coverings; its low cost allows more farmers access to year-around food production.  In this sense, plastics could be said to have a democratic “leveling” effect – and, herein lies the problem – agricultural plastics have become so prolific, and so cheap to replace that many farmers and municipalities have implicitly agreed there is little incentive to recycle them when their useful life is over.  Without recycling opportunities, the most responsible farmers are left to landfill their plastics. Others bury it on site, or worse yet, burn it.  Still, for others, spent agricultural plastics are often piled up and neglected, exposed to UV light and weathering where its size is reduced to unmanageable bits.  Perhaps what is most offensive here is our newfound reliance on materials made from petroleum stocks that are formed over millennia, used only for a few seasons, and left behind to degrade for possibly yet another millennium.

For nearly three years the LWF biochar crew has been exploring on-farm plastic recycling.  Our doe-eyed naivete humbled and hardened over years of experimentation; Working mostly in fits  and starts, what began as a catch-all attempt at processing a wide range of consumer plastics ultimately had us finding our niche at the intersection of contaminated agricultural plastics and biochar production.

Preparing aging drip tape for on-farm recycling

Nutrient Cycling

Advocates of a circular economy often describe a dividing line between what they call ‘organic’ and ‘technical nutrients’.  Organic nutrients are materials defined by those made from renewable feedstocks and their recycling is governed by biochemical processes – think timber, biofuels or natural fibers for example.  A naturally dyed cotton tee shirt can be safely and easily composted whereby it’s nutrients are returned to the soil.

Circular Economy System Diagram from the Ellen MacArthur Foundation

Technical nutrients are materials synthesized from non-renewable materials such as glass, aluminum, steel, or plastics.  Ideally, technical nutrients are those that can be continuously recycled without losing integrity.  In circular economy models this is realized through leases or refurbishment buyback programs, where products and their various ‘technical nutrients’ are returned to the manufacturer when their useful life is over.  On the farm, technical nutrients can be thought of as those that can not be cycled via organic processes – or those that must be repurposed, recycled, incinerated or landfilled when their useful life is over.

This distinction between technical and organic nutrients may seem very mundane – but there are important implications in making these distinctions at home and on the farm.  A polyester (technical) and cotton (organic) blend tee shirt CANNOT be responsibly composted at the end of its life.  The authors of Cradle to Cradle: Remaking the Way We Make Things warn us about these ‘monstrous hybrids’ of inseparable combinations of both technical and organic nutrients.  Coated to-go coffee mugs and PVC/paperboard blister packages are common examples.  Wax-coated produce boxes and synthetic ‘latex’ painted plywood are examples of monstrous hybrids one might find on the farm.  Lacking foresight, something resembling a monstrous hybrid may be created too – for example, where tangled nylon tomato support strings become frustratingly tangled among the vines, or used LDPE film mulches become contaminated with dirt and moisture beyond the point where conventional recyclers will accept it.

The gardeners at Living Web use durable woven polypropylene landscape fabrics for weed control on specific row crops.  Rolled up gently at seasons’ end, and stored away from UV light these fabrics can be expected to last three to five years – at which point these aging fabrics must be removed before their breaking point is realized.  Otherwise they will begin to fray, leaving behind strands of the inorganic material, which become increasingly smaller and impossible to remove – effectively creating a ‘monstrous hybrid’ out of our soils.

Woven polypropylene weed barrier, reusable for no longer than five years

Reduce, Reuse, Repair, Repurpose, Recycle, Remove

Farmers wishing to reduce their plastic footprint and eliminate pathways to pollution should have a management plan for each type of plastic material used on the farm.  It should be simple and for many will sound very familiar.  A management plan should include provisions to:

  • Reduce future purchases of new material.
  • Reuse existing new material to the extent that it remains safe and effective.
  • Repair existing material when possible, to further extend its useful life.
  • Repurpose existing material when it has exceeded its useful life for its original purpose, so long that it remains safe and effective for its new purpose.
  • Recycle existing material when it is no longer useful in its current form
  • Remove from circulation the material that is no longer useful, cannot be repurposed and longer safe and is not able to be recycled.

Let’s look at few examples:

Example 1: Polypropylene Weed Barrier

  • Reduce: Prioritize robust mulches from organic materials.
  • Reuse: Gently remove as soon as possible at seasons’ end.  Further extend life by removing loose dirt and storing dry and under cover.
  • Repair: Fuse tears and frays by melting ends together with a gentle flame.
  • Repurpose: Save short sections for other seasonal projects.
  • Recycle: Although it will likely be very challenging to find a recycler to accept the material, your chances are greater by thoroughly removing dirt and water before tightly bounding.  Reach out to a local extension agency and see what recycling services are supported in your area.
  • Remove: All fabric should be removed from circulation after a field-determined maximum lifespan (five years for us), or when material begins to tear easily and frayed ends become excessive.

Example 2: LLDPE Drip Irrigation Tubing

  • Reduce: Use non-plastic or more permanent irrigation techniques when feasible.  Purchase robust and reusable 15 mil drip tape when replacing spent lower quality drip tubing. 
  • Reuse: Gently remove at seasons’ end, flush if necessary and store clean and dry.
  • Repair:  Inspect for visible damage upon removal and installation. Routinely inspect for leaks throughout the season.  Keep repair couplings accessible to field crew.
  • Repurpose: Heavier mil drip tapes are tough and allow for many creative uses of short sections.
  • Recycle: Until very recently there were markets for used irrigation tapes that were cleaned and baled separately from mulch films.  In our own on-farm recycling trials, drip tapes have proven to be one of the best, most consistent and easiest to work materials.
  • Remove:  Replace aging tapes with higher quality material when leaks appear more consistently and repairs become prohibitively expensive.

Repurposed drip tape

Small-Scale Recycling

Recycling – turning used products that would otherwise be discarded as waste and turning them back into useful products – is a complex system of processes with multiple steps, each with its own nuance and challenges.  A complete consumer plastics recycling system includes means for Collection, Sorting, Processing, and Forming.  On a municipal scale these steps are typically handled by different agencies – collected plastic is sorted and baled at the recycling center, sold to a processor, who then markets the chipped or pelleted raw material to a manufacturer.  Our initial on-farm recycling efforts were an attempt to handle all of these processes on our own.

These early efforts were largely inspired by the machine designs from Precious Plastics.  Originally a design-school project by dutch artist Dave Hakkens, Precious Plastics has grown into a global network of young and enthusiastic multi-talented plastic-waste problem solvers.  At the heart of the movement are open-source plans for mostly DIY low-investment recycling equipment, including a shredder, injection molding and extrusion machines, and various adaptations on compression molding machines.  An active online community offers troubleshooting help along with encouragement and advice of all sorts.   Nowadays, the precious plastic mission has expanded in scope; included among their offerings now are upgraded semi-industrial machine plans and an online marketplace dubbed the bazar.

By the end of the summer 2017 our crew completed building slightly modified versions of the V2 shredder, injection molding and extrusion machines.  The crew’s tenacious fabrication skills combined with a bit of junkyard savvy helped keep fabrication costs extremely low.  We were ready to begin experimenting.

The author, posing before a demonstration of our precious plastics recycling equipment.

Farm staff and families were asked to bring us all of their consumer plastics.  Quickly thereafter sorting, de-labeling, washing, shredding, drying and cataloging plastics nearly became a full-time job.  Each step had its own challenges, and it was quickly becoming an overwhelming effort that was taking away too much from other responsibilities.  After some brief experimentation with PET (#1) and polystyrene (#6) our initial broad collection efforts were quickly limited to only HDPE, LDPE (#2, and #4) and some polypropylene (#5).  Even then, reliably sorting polyethylene from polypropylene and subsequent cleaning of equipment after switching between polymers was proving too cumbersome.  The following spring, a friend and delivery driver for a local dairy helped us by collecting used, rinsed-out HDPE milk jugs from area restaurants – finally providing for us a steady supply of material that was well-suited for the capabilities of our machines.

Remembering the monstrous hybrid – One of our first hurdles was finding a reasonable way to remove paper labels from hundreds of milk jugs.  We attempted solvents, applying heat, scraping and some combination of all three before ultimately settling on cutting them out entirely prior to washing and shredding.  Shredded milk jug flakes were laid on screens and allowed to dry overnight before storing for later use.  Working within the limitations of our smaller machines, suitable injection molds were designed and fabricated by our incredibly industrious biochar crew.   Meanwhile we continued to collect brightly colored HDPE laundry and shampoo bottles when offered.  A combination of modest amounts of colored flakes with the translucent white flakes from milk jugs yields fascinating swirl patterns in injection molded products.
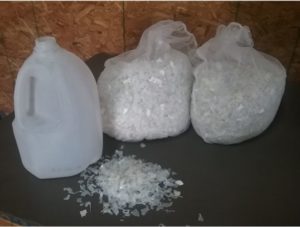
HDPE “Project Boxes” Injection molded at 180/185C


Fruit Bowls, black ones formed via extrusion of shredded drip tape at 120/126C

Precious Plastics is doing important work and has rightfully gained the attention of an international audience.  Where plastic products are generally thought of as mass-produced and cheap throwaway items, the community at Precious Plastics is helping change the narrative about waste.  By empowering people around the world to craft unique and beautiful products on machines they can make themselves, others are beginning to see plastic waste with an entirely different perspective.  Our machines are now used almost exclusively for demonstrations.   For children, a demonstration is a chance to watch trash turned into unique toys. Kids are shocked to learn that the material from a single one-gallon milk container is more than enough for one injection-mold full-size drumstick. For many adults there is a realization of the amount of work that goes into modern recycling systems.  The job is far from over when the recycling truck pulls away from the curb.

We have never bothered to offer products for sale.  The labor requirements of running our machines is way too high.  And, although usually a point of pride, our machines are a little too junkyard-sourced.  We have always been uneasy about the amounts of energy involved.  Naively, we jumped in without much consideration for generation of waste water and microplastics with our low-tech processing equipment.  After some time, we began to question if the work we were doing was even tangibly helpful at all – even after China rattled the global recycling industry by banning imports of mixed plastics, regional markets for recycled HDPE do still exist.  However small our impact, in some ways, our work with clean HDPE served to divert material away from professionals who could do the job better than us.

To be clear, our failure to achieve a reasonable economy is not indicative of the entire Precious Plastics community.  Many in developed countries have persisted and developed fantastic niche products.  In developing countries, where plastic pollution is much more apparent, these kinds of low cost accessible machines offer real opportunities for entrepreneurs to clean up waterways while making something beautiful.  However, on our farm in our part of the world, it was becoming apparent that in order for us to move forward with our work in plastics recycling, we would need to come up with tailored solutions that address our own plastic waste and use much less energy doing so.

Finding Our Niche

Those who have followed us know that we speak often about biochar.  We’ve talked a lot recently  about various small scale production methods, inoculating biochar for use in the garden, and even touched on water filtration applications for homemade biochar.  And even though we’ve been relatively quiet about it, we are still producing biochar with our farm-scale system.  At our peak production our ‘triple-retort’ system is capable of manufacturing about ten cubic yards of biochar/week.  From 1200 lbs of sawmill waste, a single batch yields about 400 lbs of crushed biochar along with some 40 gallons of wood vinegar, 5 gallons of ‘pyrolysis oil’, and a considerable amount of heat from the combustion of excess syngas.  Wood vinegar and oils in the form of raw condensate are stored in second-hand caged HDPE containers known as IBC totes.  Over time, tars settle to the bottom of these containers where then clarified wood vinegar can be decanted off the top.  We had accumulated a considerable amount of wood vinegar in the years before modifying our system to include a condenser bypass.  Scaling up our wood vinegar field trials means a considerable amount of tar-stained IBC totes are left behind.  Suffice to say, these tar-stained HDPE totes are too contaminated for conventional recyclers to accept.

Products of wood waste pyrolysis

Simply put, biochar can be produced when wood, or some other carbonaceous material is heated in the absence of oxygen.  This process – known as pyrolysis – requires heat to get started, though after some time it will become self-sustaining.  Gases created during pyrolysis can provide the energy to continue the process.  In our system, sawmill waste is loaded into large oxygen-limiting stainless steel containers known as retorts.  These retorts are indirectly heated, starting at ambient temperature and over the course of a few hours reaching a critical point at which a transformation of the wood waste begins.  Some solid material is left behind and carbonized into biochar, while the same time, through destructive distillation gases are released from the heated wood.  This blend of gases, known as syngas, exits through a series of pipes where then condensable gases can either drop out as liquids or be directly combusted to provide heat. Through a corresponding series of channels and valves, heat from the combustion of excess syngas can be directed throughout our system and used to start another batch, heat or water, or in our case, recycle plastic.

Process time compared to internal temperature of wood in the retort.  A five hour window of opportunity for recycling happens between 400 and 900F.

Moving forward with recycling contaminated IBC totes would present a series of challenges.  Preparing totes for molding would require removing as much sticky tar as possible from the material prior to shredding.  What we found to work best is a process involving removal of the totes from their cages, cutting the bins into strips and laying them out in the sun for weeks.  The sun-baked tar is easily scraped off during the shredding process.  Still, we needed a larger shredder to accommodate the thicker material.  We found luck when a neighboring business sold us a decades-old salvage Weima-WL 6 wood shredder, where then we had it adapted to a tractor PTO drive.  Today, shredding the material still remains our biggest challenge.

Our early product designs sought to mimic the versatility of plastic lumber.  We built simple steel molds and a large custom press and trials began shortly after.  Molds were filled with HDPE chips, loaded directly into one of the retort chambers and indirectly heated until reaching a predetermined optimum temperature.   These trials were largely a guessing game at first – and failures were often demoralizing.  Plastic would overheat and offgas noxious fumes.  Molds were unevenly heated resulting in burned and unmelted sections on the same piece.  Even when successful, the shrinkage rate of cooling HDPE was too apparent in the longer board-length molds, causing our finished product to take on a twisting, uneven quality.  Nonetheless, we persisted, ultimately concluding 195C was the optimum temperature for compression molding our tar-stained flakes.

The crew addressed the problem with uneven heating by constructing a suspended interior chamber, which could drop into the retort and keep molds suspended above and isolated from overheated surfaces.  Air circulation throughout the chamber is maintained with a junkyard-sourced furnace blower.  This blower remains powered on throughout the entire heating process. A small setpoint-controlled exhaust blower is utilized to draw in ambient air when necessary to help maintain a more precise internal temperature – in this way, we have both coarse and fine methods for temperature control.  Built as a prototype at the time, this ‘convection heater’ has proved effective and is still used today.

Cutaway diagram of the suspended convection heater. Yellow line represents high temperature gases from combustion chamber to water heater. Red lines indicate circulating air, limited to 195C.

Prior experiments had shown that our method for compression molding HDPE would not produce usable plastic lumber without considerable post-processing – planing, shaping and sanding – all processes that create a demanding amount of fine plastic dust.  Additionally these trials proved that a substantial amount of pressure would be required for adequate compression.  By the end of 2019, we had built a new, exceedingly robust stainless steel mold and corresponding 20 ton press. Our tree planter mold would handle 28 pounds of HDPE flakes and fit snugly inside our process-heated convection oven.  What followed were yet another series of increasingly smaller, but seemingly endless demoralizing losses – we had to build the press even stronger, modify the mold to include a removable bottom, and locate suitable release agents all while continuing experiments with optimizing temperature and residence times.  By spring of this year, after nearly a dozen failed attempts at complete tree planters, we had finally dialed in our process.

At ¾” thick, these 18” tall hexagonal shaped tree planters are robust and, in my opinion, quite attractive.  Heavy walls and non-structural applications mean we can accommodate contamination to a degree that other more precise molding processes could not.  At 28 pounds, we can process a meaningful amount of otherwise non-recyclable plastic – a scale that matches nicely with our stock of material and available process heat.  Labor demands are much lesser now during molding and post-processing, but remain high during shredding and washing.  Future work will seek to improve on this, and potentially open the door for molding with alternative materials – including LDPE films, and woven polypropylene bags and mulch fabrics.
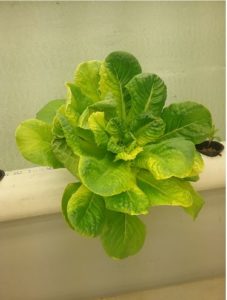
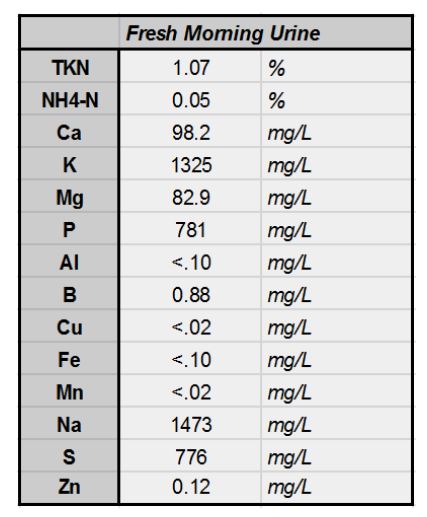
Compression molded tree planters. A small amount of colored flakes makes for fascinating patterns

Planter mold detail

In Defense of Downcycling

In the fall of 2018 we held an open-house style workshop showcasing our work with plastic recycling.  This was right around the time when we were just beginning to experiment with compression molding with biochar process heat.  One of the attendees, a recycling industry professional, spoke of a company in the midwest USA that was accepting lower grade agricultural mulch films for recycling into standoffs for interstate guardrails.  As someone who commutes via interstate to an agricultural community, I’m often reminded of this comment – a business owner had found a use for all that dirty black film – not in making new film, but in making something entirely different – something downcycled.   Downcycling – normally the bane of plastic pollution activists – in this case was the solution.  In our case too, our contaminated IBC totes would never be accepted by conventional recyclers forced to compete in quality with virgin material.  Downcycling is the only kind of recycling we can do with our expertise, on our shop-made equipment.
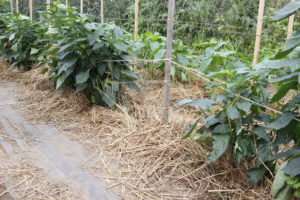
A defense of downcycling should not be confused as a defense for the proliferation of single use plastic – What else comes to mind is the absurd distance this lightweight, non-dense material travels to make this transformation. Shipping our plastic waste to China, only to be returned as more single use plastic was an absurd system.  It goes without saying we should do all we can to eliminate unnecessary plastic.  At the same time, we can be honest about the productive and democratic benefits of durable plastics in our homes and on the farm.

A year later, towards the end of 2019, another visitor to the shop spoke of Dominican locals who would harvest beach plastic and gently heat them while pressing them into blocks.  Where others would carve driftwood figurines to sell to tourists, some were beginning to use these mixed plastic blocks as raw material instead.

In my humble opinion, at the time of this writing,  those in developed countries wishing to pursue DIY recycling for genuine environmental reasons would do well to be like these Dominican innovators and keep it local and small.  They should look to the ideas of the midwestern USA innovators and maintain a narrow, focused approach.  And, like both of them, they should prioritize working with conventionally non-recyclable materials.

Questions, Comments, Criticism, Compliments? Send an email

  • Dirty IBC totes - no longer conventionally recyclable

Making Fish Sauce, Fish Fertilizer, and Garums

By Meredith Leigh

The earliest evidence of fish sauces, or garums, dates back as early as the 3rd century BCE, made by ancient Greeks, and much speculation exists regarding whether the practice traveled from the shores of the Black Sea to the many other regions where garums are found, or if people across the Mediterranean, Asia, and elsewhere spontaneously developed their method for similarly preserving fish, without the help of trade. Modern day Tunisia, in North Africa, is where some of the oldest evidence of production can be found, in old garum factories carved from limestone, which would date to Carthaginian reign. When the Roman Empire took over, and sprawled across the Mediterranean, much of Europe, the Middle East, and Central Asia, culinary traditions spread with it. However, this doesn’t explain the origins of Scandinavian fish sauces, or garums found in Indonesia. What is certain is that where fish were abundant, fish sauces were the primary means of preserving and deriving maximum flavor and nutrition from fishery resources.

Fish Sauce varies in its chemical composition and flavor depending on where in the world it is made. Variations can be due to the fish available, the preference of the people making it, as well as climactic implications. Versions of fish sauce can be found in numerous countries, identifiable by their distinct names:

Indonesia: kecap ikan
Thailand: nam pla
Philippines: patis
Japan: shottsuru
Vietnam: nuöc mâm
Malaysia: budu
Myanmar: ngapi
France: pissala
Greece: garos
Iran: mahyaveh
Pakistan: Colombo-cure
China: yeesu
Korea: aekjeot

Fish sauce everywhere is just fish, slowly hydrolyzed, or broken down with water, by proteolytic (protein-digesting) enzymes. These enzymes come from the fish viscera (innards) and muscle tissue, as well as enzymes from microorganisms that may have been living on the fish. All animals have endogenous, or internally originating enzymes that aid in the digestion of their flesh. These only come in handy when the animal dies, and a process of autolysis, or an organism digesting itself, begins. No matter what fish sauce you’re interested in, you’ll find the common ingredients of whole fish, water, and salt. The fish and its internal organs and tissue provide the enzymes, and the salt offers stability by excluding harmful microorganisms that may spoil the product before autolysis can digest the fish.

Thus, the production of fish sauces the world over includes a mosaic of approaches to these basic ingredients, each method seeking to balance enzymes with salt as their palettes and climates allow. The ratio of these two ingredients within the context of temperature and time is what produces the lively variation in flavor, smell, stability, and overall character in garums everywhere. Analyses of almost 50 different fish sauces from the Phillipines, Southeast Asia, and Italy found salt contents ranging from 10-30%, overall protein content varying widely, and chemical and biological composition being similar, yet distinct from sauce to sauce. Think of it this way: there are many animals in the world which we call “fish”, but the species, shapes, colors, and other characteristics differ fantastically within their kingdom. It is as glib to generalize fish sauces as it would be to broadly generalize fish. What we can say is that they are fishy, nitrogen rich, and probiotic, to varying degrees and delights. Analyses of different sauces found 39 microorganisms representing 11 species of bacteria, 1 yeast, and 3 filamentous fungi.

Traditional fish sauce production in Vietnam

A more traditional approach might unfold as follows: Once the ingredients are mixed, the fish is fermented in concrete vats for 9 months at temperatures between 30-37C/ 86-98.6F. The liquid, known as “liquamen” is captured then aged 3 months. Some cultures flavor the liquamen as it ages, with spices favored in the region. The residue, or “allec” from this initial extraction is often leached 2-3 times and mixed with brine to produce sauces of varying lower qualities, which are usually blended with various amounts of the primary extract. The final residue of bones and sludge is used as a fertilizer.

In the oldest accounts, these varying quality sauces were associated with status. Liquamen from the blood and guts was called “haimation” and considered most valuable, whereas the pastes made from the allec were relegated to lower classes. This may sound strange, but fish sauce was so valuable in the Roman Empire that amounts as much as one gallon could be traded for nearly a ton of wheat. This is likely due to the fact that it was so full of tasty umami, but also because of its important nutritional qualities. Research in Asia on the nutrient density of fish sauces has shown that they can contain significant levels of nitrogen, mostly in the form of essential amino acids. This means that consumption of just 40mL/1.5 ounces of fish sauce in a day can account for almost 8% of an individual’s needed protein.

Most traditional accounts call for a ratio of as little as 1.5 to as high as 4 parts fish for every 1 part salt. Higher salt contents are likely attributed to regions with warmer temperatures, as more heat would encourage microbes that may outcompete proper enzymatic reactions.  Salt content in garums depends on how long the makers want to ferment, seasonal temperature flux, and time of year.

The type of fish varies, too. While most fish sauces are made from small fish like anchovies or sardines, larger sea fish are also used. The recipe included for this post uses mackerel, not an uncommon fish for garum. Most fish sauces are made with saltwater species, however there are accounts of ancient people using freshwater species from the Nile.

Modern adaptations of garum traditions are where fish sauces are being liberated. Far from falling into a strictly Asian culinary category, the sauces are being realized for their usefulness across the flavor spectrum. Chefs at world famous Noma are making garums from grasshoppers and bee pollen, and modern chefs worldwide are using garums in soups, vegetable pickles, and sauces. Because the flavor profile from such varying garums differs so much from the more traditional or familiar fish sauces,  they provide the perfect umami kick behind the dominant flavor in the food.

Like many ferments in modern kitchens, garums are experiencing a revival, and in the excitement of rediscovery, there is the urge to hasten processing, and modify. One way of recasting the fish sauce process has been the popularization of using the mold koji (Aspergillus oryzae) as the enzymatic catalyst for autolyzation, which can reduce the need for fish viscera in the recipe, and also speed the production. If you’re unfamiliar with koji, you can learn more about it, and how to grow it yourself in my workshops on “Koji in Every Kitchen” as well as “Making Miso, Tamari and Soy Sauce (coming soon to our video archive).” Makers pairing koji with fish trimmings for their fish sauce can create garums absent of innards, using instead just the fins, bones, heads, and meat, and still achieve proteolysis, because koji possesses the enzymes to do the job, and do it quickly. With the power of koji comes the ability to further play with temperature and salt. Paired with the technology of incubators and other control devices, the evolution and variation of fish sauces advances and telescopes with an ever-quickening pulse. As you craft the fish sauce, here, you will jot your own record in the ancient tablet of garum stories. A messy, smelly, mysterious and wild effort oddly organized by a common quest for concentrated deliciousness.

Homemade Fish Sauce (or one approach, at least)

For this sauce, I purchased two whole mackerel, and filleted them. My family and I ate the filets smeared with miso and pan-fried, but the rest of the fish- bones, heads, eyes, guts, and fins, went to this sauce.

1 lb./500g mackeral parts

4.25oz/120g pearl barley koji (either purchases, or home grown- see our “Koji in Every Kitchen” or “Making Miso, Tamari & Soy Sauce Workshops for more info on Koji)

14oz./400mL non-chlorinated water

3/5 oz./100g kosher or non-iodized sea salt

Fish parts, koji, water, and salt are all you need to make a fast-tracked DIY fish sauce.

Cut the mackerel pieces into roughly 1-inch pieces and place in a bowl. Crumble your koji and place it in another bowl. Measure the salt and set aside. Measure the water and have it ready.

Mix everything well.

Sterilize whatever jar or jars you’re  using for the fish sauce. I find it easier to fill the jars with even amounts, and then mix the ingredients, rather than mixing everything and then trying to slop it into my jars. You will want head space in the container, so think about that beforehand. I split this recipe into two-quart Weck jars, to ensure I had enough head space in each. Place each jar on the scale and fill them up. In my case, each jar got half of the mackerel pieces, half of the salt, half of the koji, and half of the water. Once the jars are filled with their respective ingredients, mix the contents thoroughly with a wooden spoon.

Seal the top of the mixture to minimize oxygen

Next, encourage a piece of Saran Wrap down into the jar, snugly on top of the sauce. Trim the edges and ensure that the sauce is covered by the plastic. Place the lids on the jars. If the seals are removable, remove them, as you will want gases to be able to escape as the sauce develops. I put the glass lids of the Weck jars on with the clips but left out the rubber sealing rings.

Label the jars with the type of fish used, the percent salt (in this case, 20%) and the type of koji. Place the jars into an incubator set to 98-100 degrees Fahrenheit. Allow to ferment for a minimum of 10 weeks before you begin tasting the results. Sample the liquamen to taste. If you want to age it further, return the jars to the incubator. If you want to decant the solids, do so, then bottle the liquamen and consider aging it for 2-3 months in a cool, dark cabinet or cellar. You may choose to add chiles, spices, or aromatics during this aging phase.

After one week. You won’t see much degradation of the fish pieces in the first 3-4 weeks. Don’t worry. Keep going 🙂

Note: Once you’re ready to decant the liquamen, be sure to use your residues or “allec” as well. If you’re not into making fish paste, use them in the compost pile or on the garden. Hydrolyzed fish protein is excellent food for beneficial soil fungi.

Storage: Your fish sauce should have stable water activity, due to the salt content of the recipe. As such, it will not need to be refrigerated, however you may choose to refrigerate it to cut down on the smell in your kitchen, and to keep it more stable. Add it by the drop to enhance soups, dressings, vegetables, and more.