Waste not: Urine – Part 2: The Indigo Sig Vat
This post is part of a series exploring the historical and modern applications for human urine. Part 1 is available here.
At the end of the previous post I left off with a short anecdote about how last year I set out to grow my own dye plants, and how after transplanting my japanese indigo (Persicaria tinctoria) too early I used urine as a fast-acting nitrogen fertilizer to encourage my plants to stop early-flowering and ‘force’ them back into a state of vigorous vegetative growth. Vegetative growth is what we’re looking for here, as it’s the leaves of this frost-tender annual that contain the most of the indigo pigment precursor known as indican.
Unique indican-bearing plants exist in many parts of the world. Indigofera tinctoria is a legume native to India and Southeast Asia. The similar Indigo suffruticosa is native to the subtropical Americas. Woad (Isatis tinctoria), a brassica, is a native to the steppes of Caucasia that ultimately became the primary source of blue dye in medieval Europe. Persicaria tinctoria is in the buckwheat family and is native to east Asia. Before “true indigo” from India came to dominate the global trade of indigo pigment, each of these unique plants supported a dyer’s economy of their own in their respective native region as far back as 2000 BC. This suggests that some form of indigo dyeing may have arisen independently among various far-flung cultures, but what’s perhaps most intriguing here is that the actual process of dyeing with indigo is not all that intuitive. In fact, it’s quite likely the discovery of the process was accidental, and involved large amounts of – you guessed it – urine.
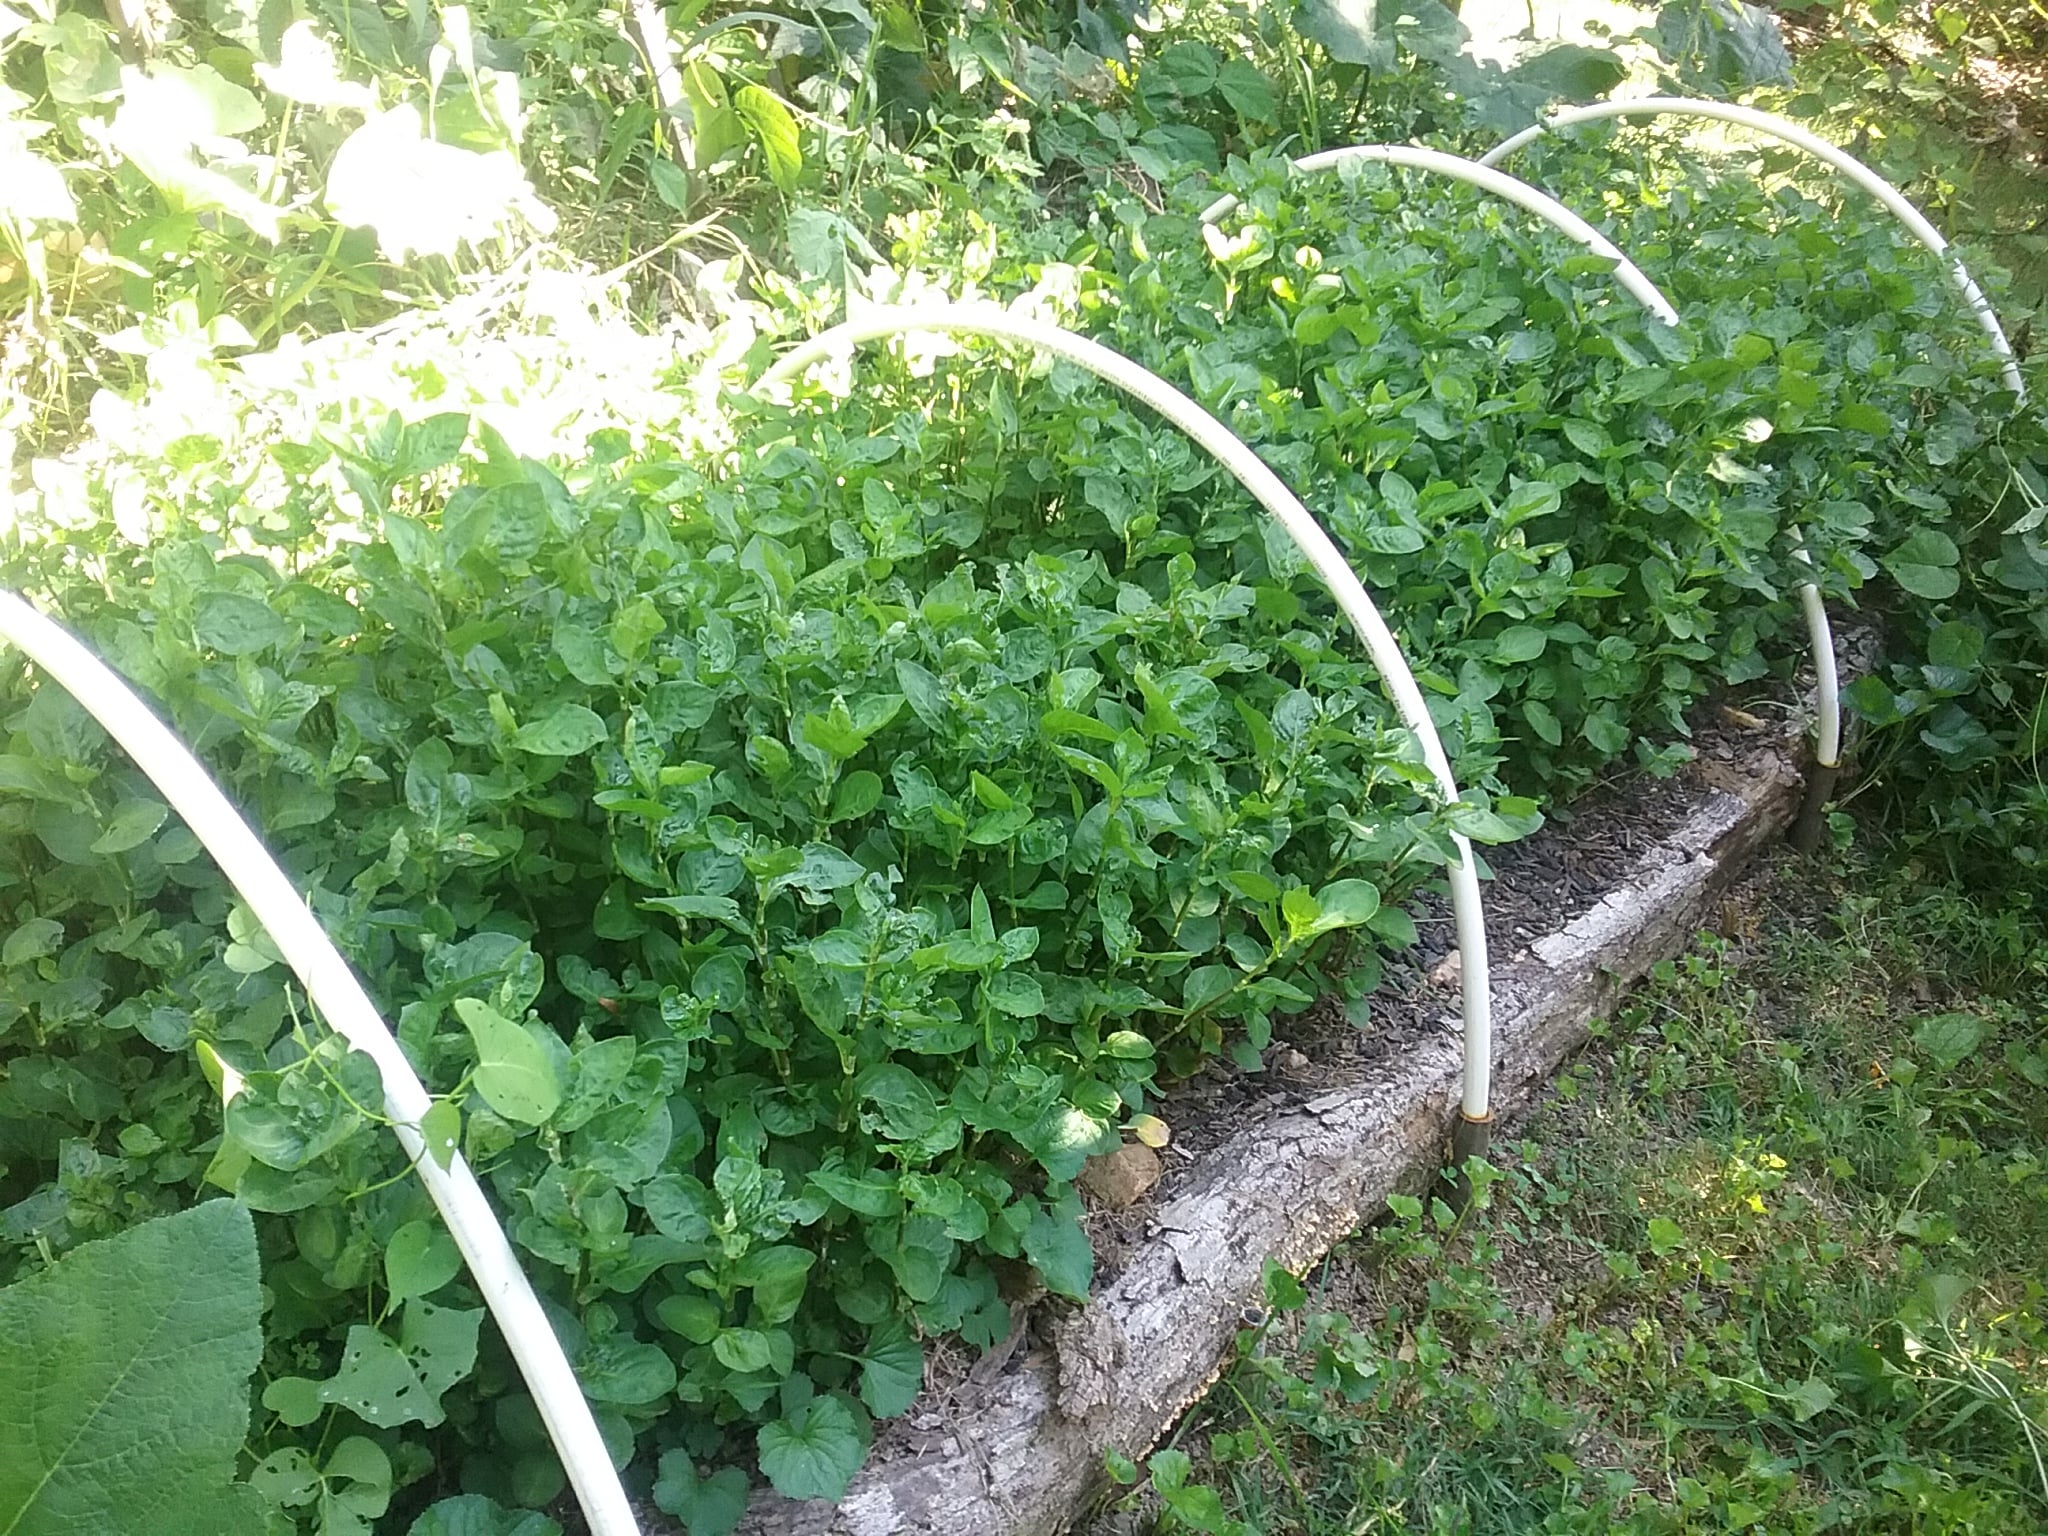
A small bed of Persicaria tinctoria in early summer
Indigo Chemistry
Indigo is unique among natural dyes. Lightfast blue dyes are rare in nature, and indigo is one of the oldest dyes known to man. It’s one of few substantive natural dyes; no mordant is required for a washfast dye that binds well to both animal fibers (wool, silk) and cellulose fibers (cotton, linen). Indigo dye is extracted from indican-bearing plants and rendered useful by way of a series of chemical reactions that historically speaking, have only recently been fully understood.
On a molecular level, indican is a glucoside. Think of a glucoside as a sort of two-part molecule with a loosely connected glucose and non-glucose component; indican is part glucose, part indoxyl. When held under water for some time, enzymes cleave the molecule into its two components where then bacteria consume the glucose, and the indoxyl component is left in solution. Under water, the soluble indoxyl is in itself colorless, but when exposed to oxygen it becomes the dark blue and insoluble pigment indigotin. If allowed adequate time to settle, water can be decanted and the remaining indigotin can be dried and stored as indigo cakes or powder.
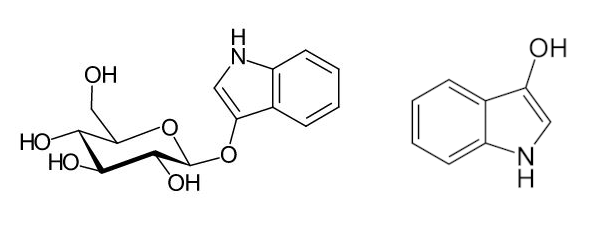
indican to indoxyl
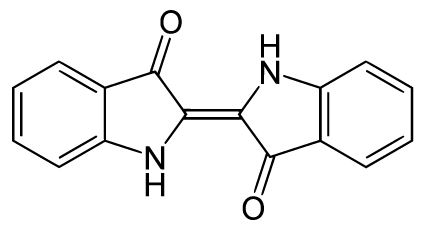
indigotin
Under the right conditions indigotin powder can be made soluble again in the concentrated amounts necessary for dyeing shades of deep blue. This a two-stage process: Insoluble indigotin must first be chemically reduced before it may dissolve in alkaline solutions.
Indigo dyers meet these conditions by preparing a vat of alkaline liquid that includes some sort of reducing agent. Indigo powder is added, and upon reduction the vat may turn a muddy yellow or green color. Now ready, the undyed material is lowered in the vat and soluble leucoindigo soaks in and mechanically adheres to the fibers, where then upon removal and exposure to air it reverts back to its insoluble form. Deep shades of blue are possible through a process of repeated dips following aeration. To watch this process is a one-of-a-kind, almost magical experience: immediately after removal from a well-reduced vat the fiber will be a grassy green hue that morphs into brilliant blue right before your eyes.
With the insight of modern chemistry, dyers can now choose between natural and synthetic indigo powders of varying purity, and among an array of alkaline powders and reducing agents from which to build their vats. In ancient times, however this was not the case – conditions for a suitable vat were made possible by bacterial action in aged urine
Urine
An excerpt in a circa 300 A.D. collection of ancient craft and dye recipes known as the Papyrus Graecus Holmiensis confirms that by this time urine was commonly used in Europe and Northern Africa for processing indican-bearing woad:
“105. Dyeing in Dark Blue. Put about a talent of woad in a tube, which stands in the sun and contains not less than 15 metretes, and pack it in well. Then pour urine in until the liquid rises over the woad and let it be warmed by the sun, but on the following day get the woad ready in a way so that you (can) tread around in it in the sun until it becomes well moistened. One must do this, however for 3 days together.”
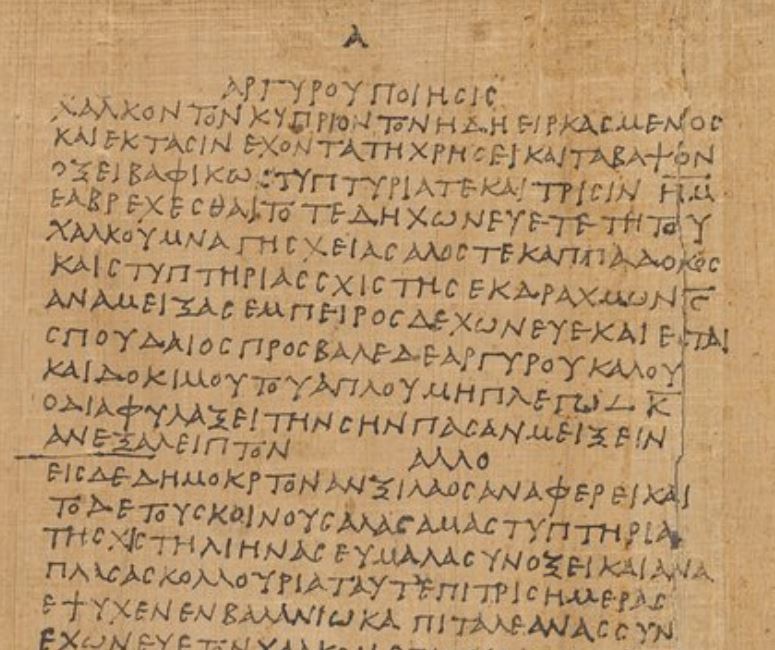
The ancient text of the Papyrus Graecus Holmiensis AKA Stockholm papyrus
In his book The Art and Craft of Natural Dyeing author J. N. Liles writes how some of the earliest indigo dyeing was done by using fresh plant material in containers of stale urine. Soap was unknown to the ancients; available cleaning agents would have largely been limited to alkaline liquids like wood ash lye and ammonia in aged urine. Niles writes that urine was:
“…collected and stored by literally all primitive cultures. If, by chance, some indican-bearing plant material found its way into a urine vat, the bacteria growing therein would render the vat in a reducing condition (use up the oxygen and release hydrogen) and the ammonia, being alkaline, would dissolve the resulting indigo white. Now, if some fiber fell in the vessel, and if it were retrieved later, the yellowish green material would turn blue before the eyes of the retriever, and the material would be dyed a permanent very pale blue”
It takes a lot of plant material to make shades of deep blue. A fresh leaf vat, certainly that of the relatively weak woad, would indeed yield a very light color. The deeper shades we now associate with blue jeans would certainly require concentrated vats, made possible by using extracted indigo pigment.
Indigo Pigment: Water Extraction Method
Powdered indigo pigment can be extracted from indican-bearing plants by a fermentation process that typically takes 3 to 5 days. Immediately upon harvest, leaves and stems should be rinsed and then placed in a suitable container and covered entirely with water. Warm water speeds up the reaction. It’s important to make sure leaves are clean and completely submerged; dirt and oxygen are not helpful here, their presence will decrease yields and contaminate the final product with the unwanted related compounds isatin and indirubin.
Preparing Japanese Indigo for water extraction
Over the 2020 growing season I was able to harvest my 40ft² bed of japanese indigo a total of three times. The fermentation step for each extraction took the expected 3 to 5 days. It’s during this time that enzymes are working to cleave the aforementioned indican molecule into its constituent parts: glucose and indoxyl. Here’s where things get interesting: Over the next few days glucose is consumed, indoxyl moves into solution, and the ferment takes on an antifreeze-like otherworldly neon blue/green color. The smell here is very apparent too. Odd, sweet and only slightly rank is what we’re working for. Over-fermentation leads to dramatically lower pigment yields, and this disappointment will be matched by a shift to an intense, distinctly putrid smell. I’ve read of one person who described the smell as ‘like a shrimp boat’. For me, it has a definite low-tide smell, but with the faintly sweet smell of tempura. When fermentation is complete, indoxyl is in solution and has not yet deteriorated. Smell really is your best cue here, and better judgment is said to come with experience.
Otherworldly hues from fermenting Indigo leaves
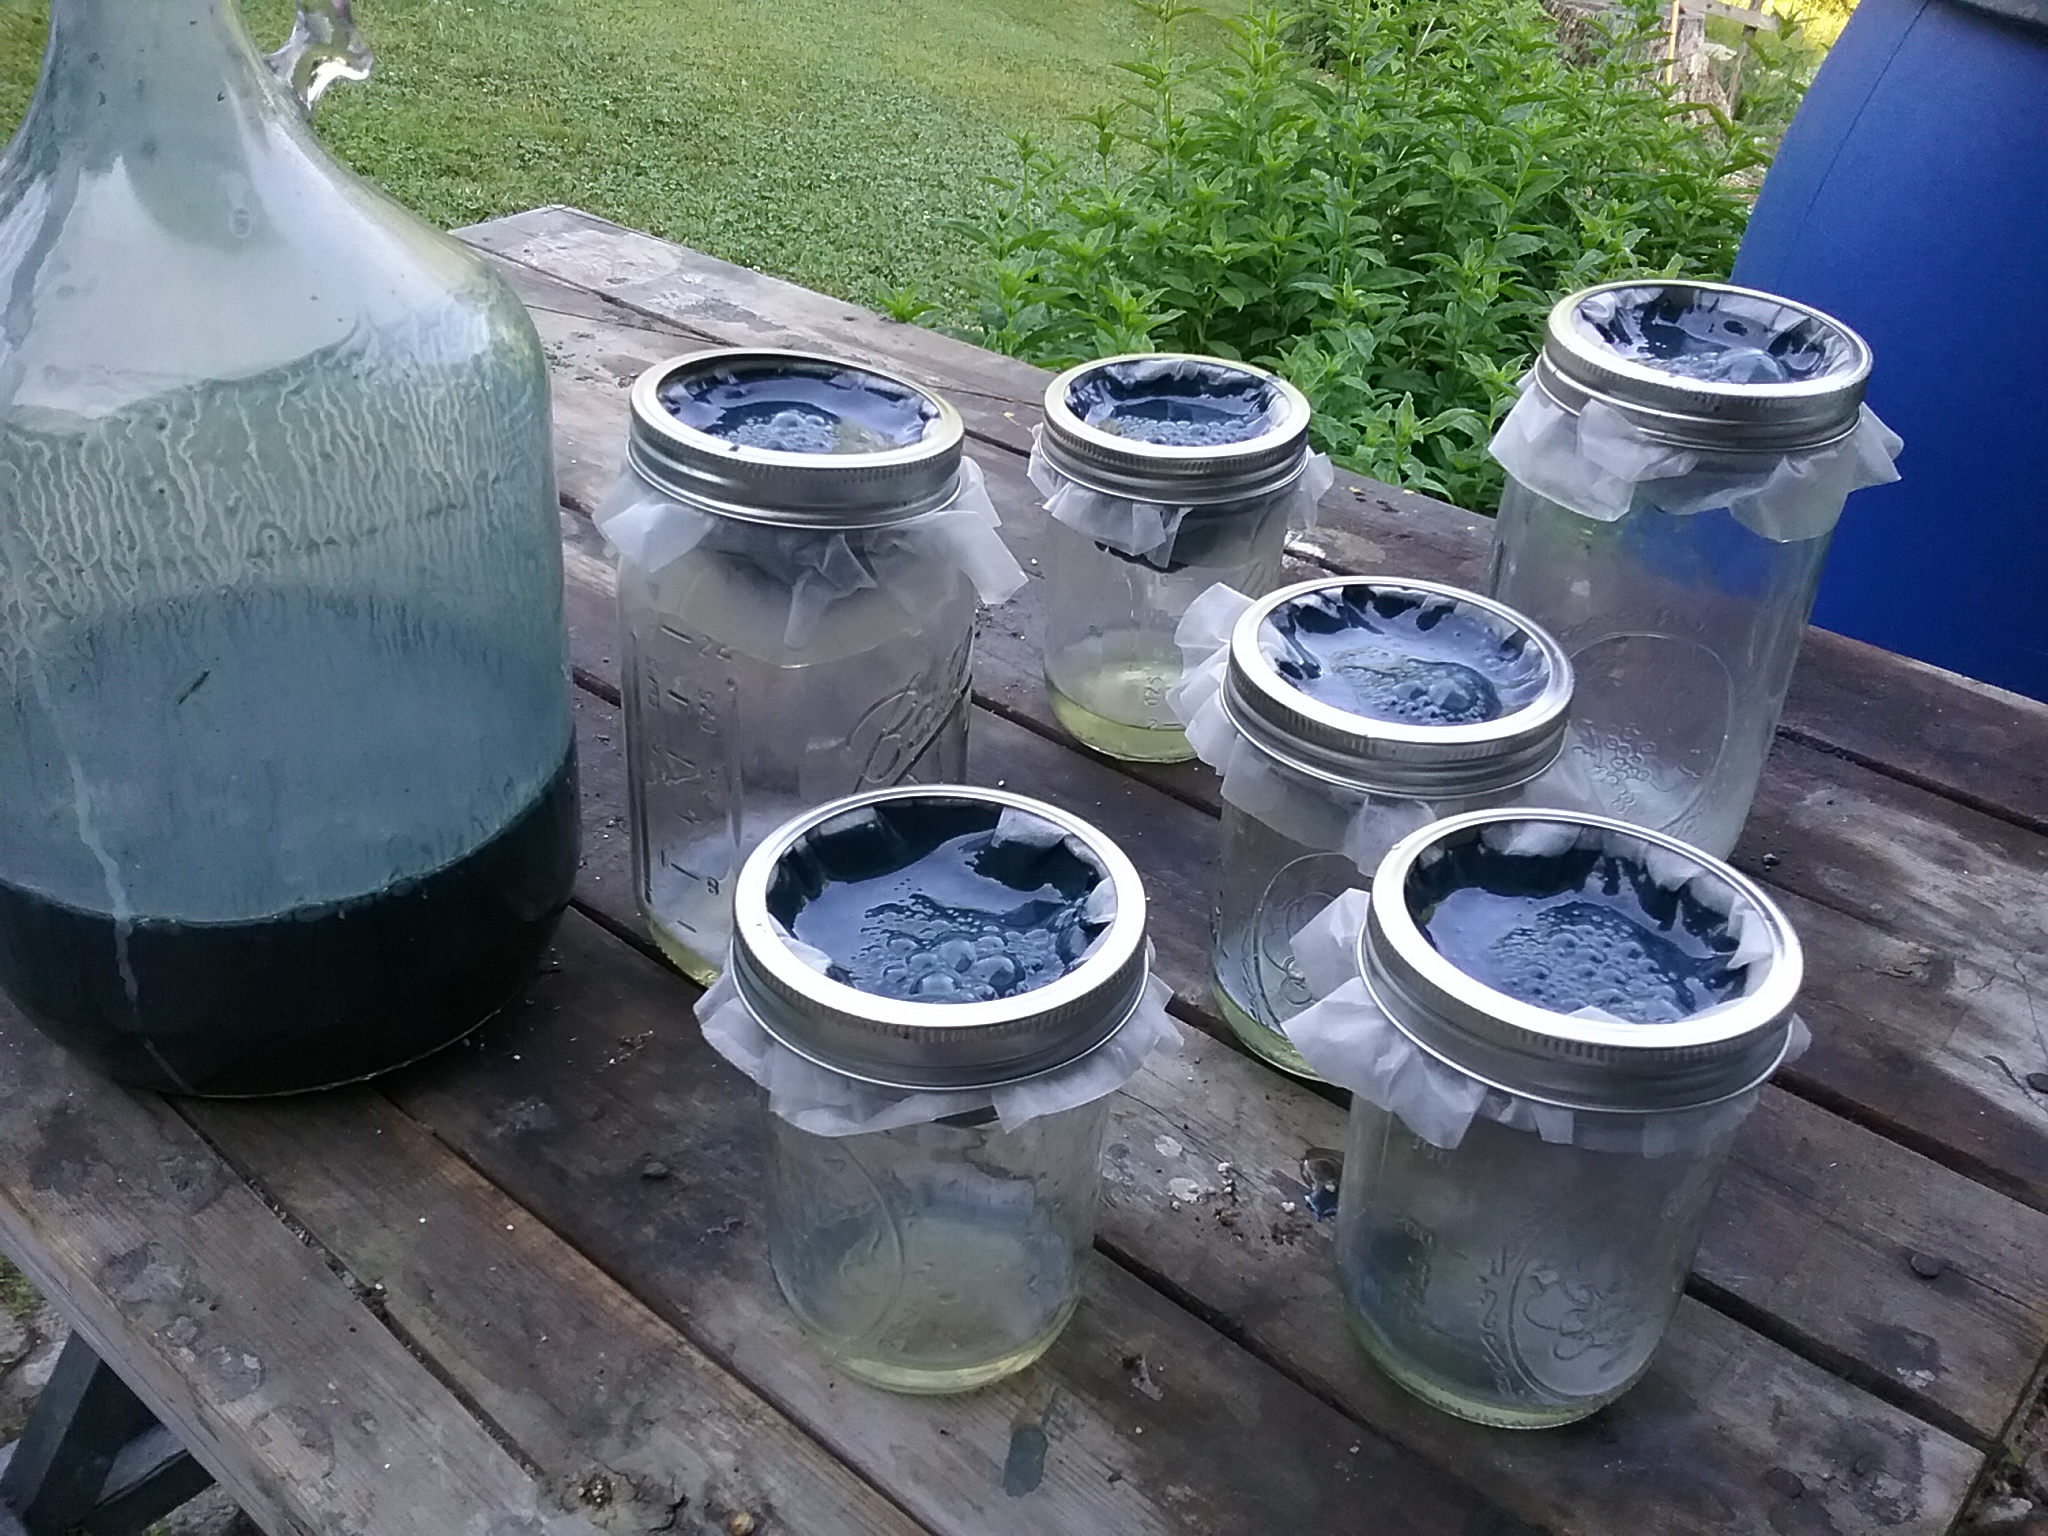
When fermentation reaches that sweet spot, pour the water into another vessel while straining the plant material. I go for as much liquid as I can and give the wet, slippery leaves a good squeeze before turning them under the compost pile. Recall that when indoxyl is exposed to air it shifts to the dark, insoluble blue pigment Indigotin. First, however, the solution should be brought up to a higher pH by addition of some alkalizing agent. Though some have said to have success obtaining pigment without adjusting pH, the settling process absolutely takes much longer and with likely lower yields. There are options here: wood-sourced potassium hydroxide/carbonate was almost certainly historically common, nowadays slaked lime (calcium hydroxide, sold in grocery stores as pickling lime) is a nice choice. Slaked lime doubles as a flocculant here, greatly speeding up precipitation, but also contributing to an impure product. It’s best to use as little as necessary – start with as little as .5 grams per gallon of solution. Aim for a pH between 9 and 10.
The blue/green water is now ready for oxidation and dependent on scale, there are multiple ways to go about this. In the days of the indigo plantations around the world it might be common for lower-caste workers, or even slaves, to literally stand in and kick air into alkaline pools of reduced indigo. On a small enough scale one can repeatedly pour the solution back and forth between containers. For my 10 gallon batches I use the same air pump and manifold I have for making aerated compost tea at home. With the air pump I can sufficiently oxidise the solution in a matter of a few minutes. Now, given enough time at rest, indigo pigment should settle down leaving behind a supernatant of clear, brown alkaline water.
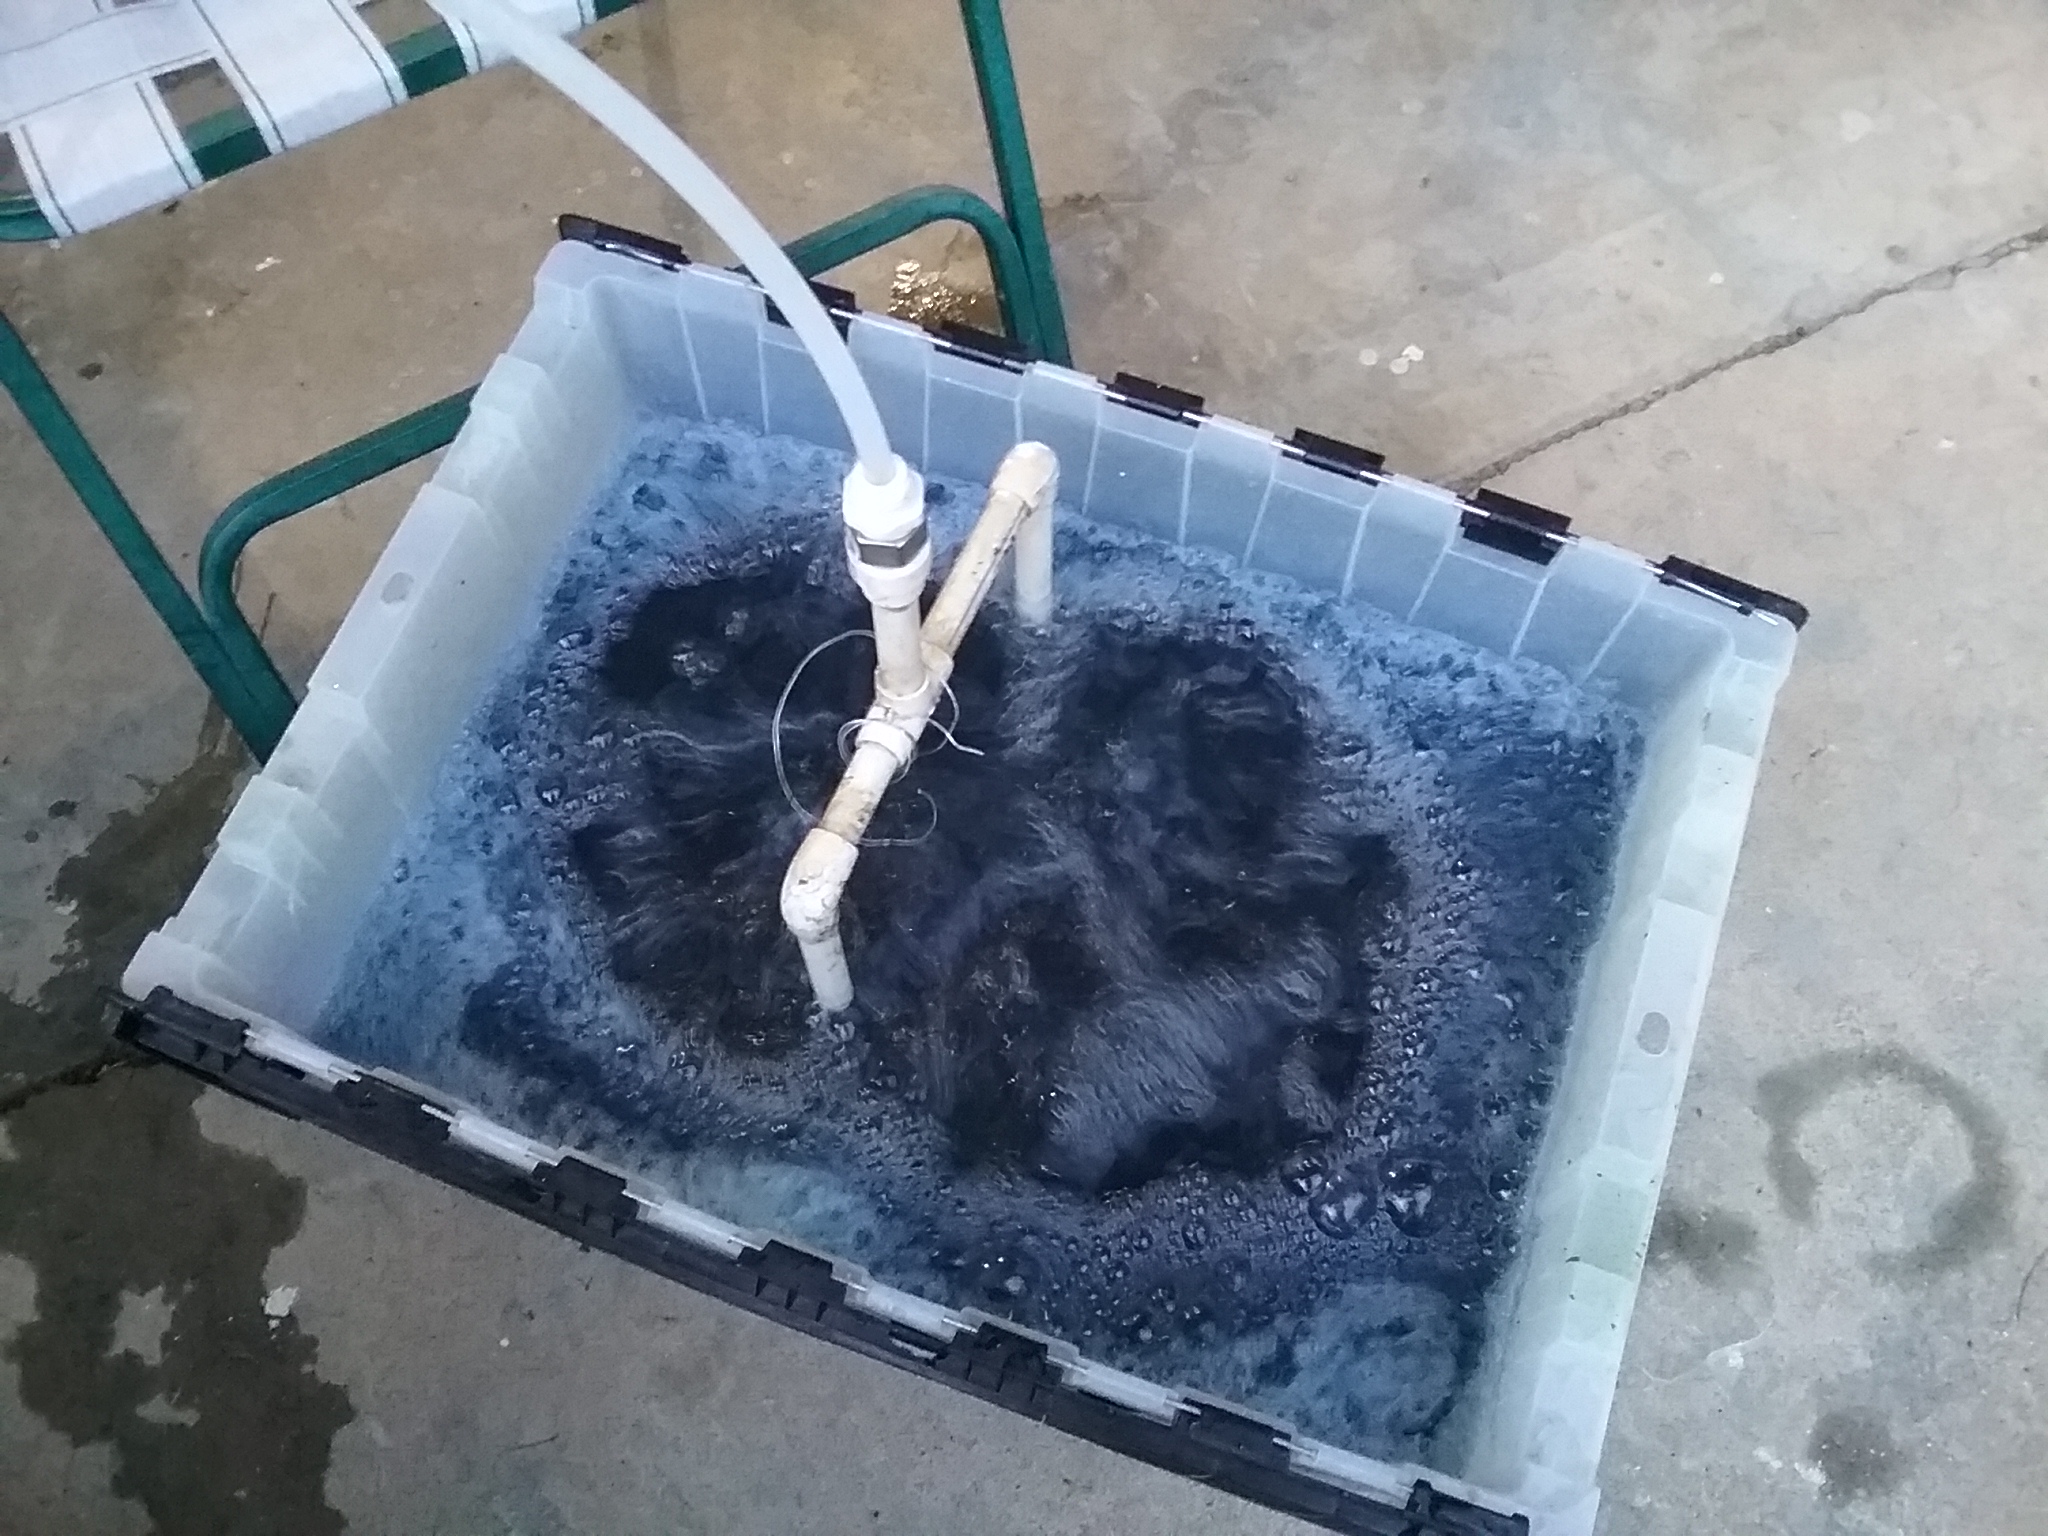
Introducing oxygen via air pump manifold
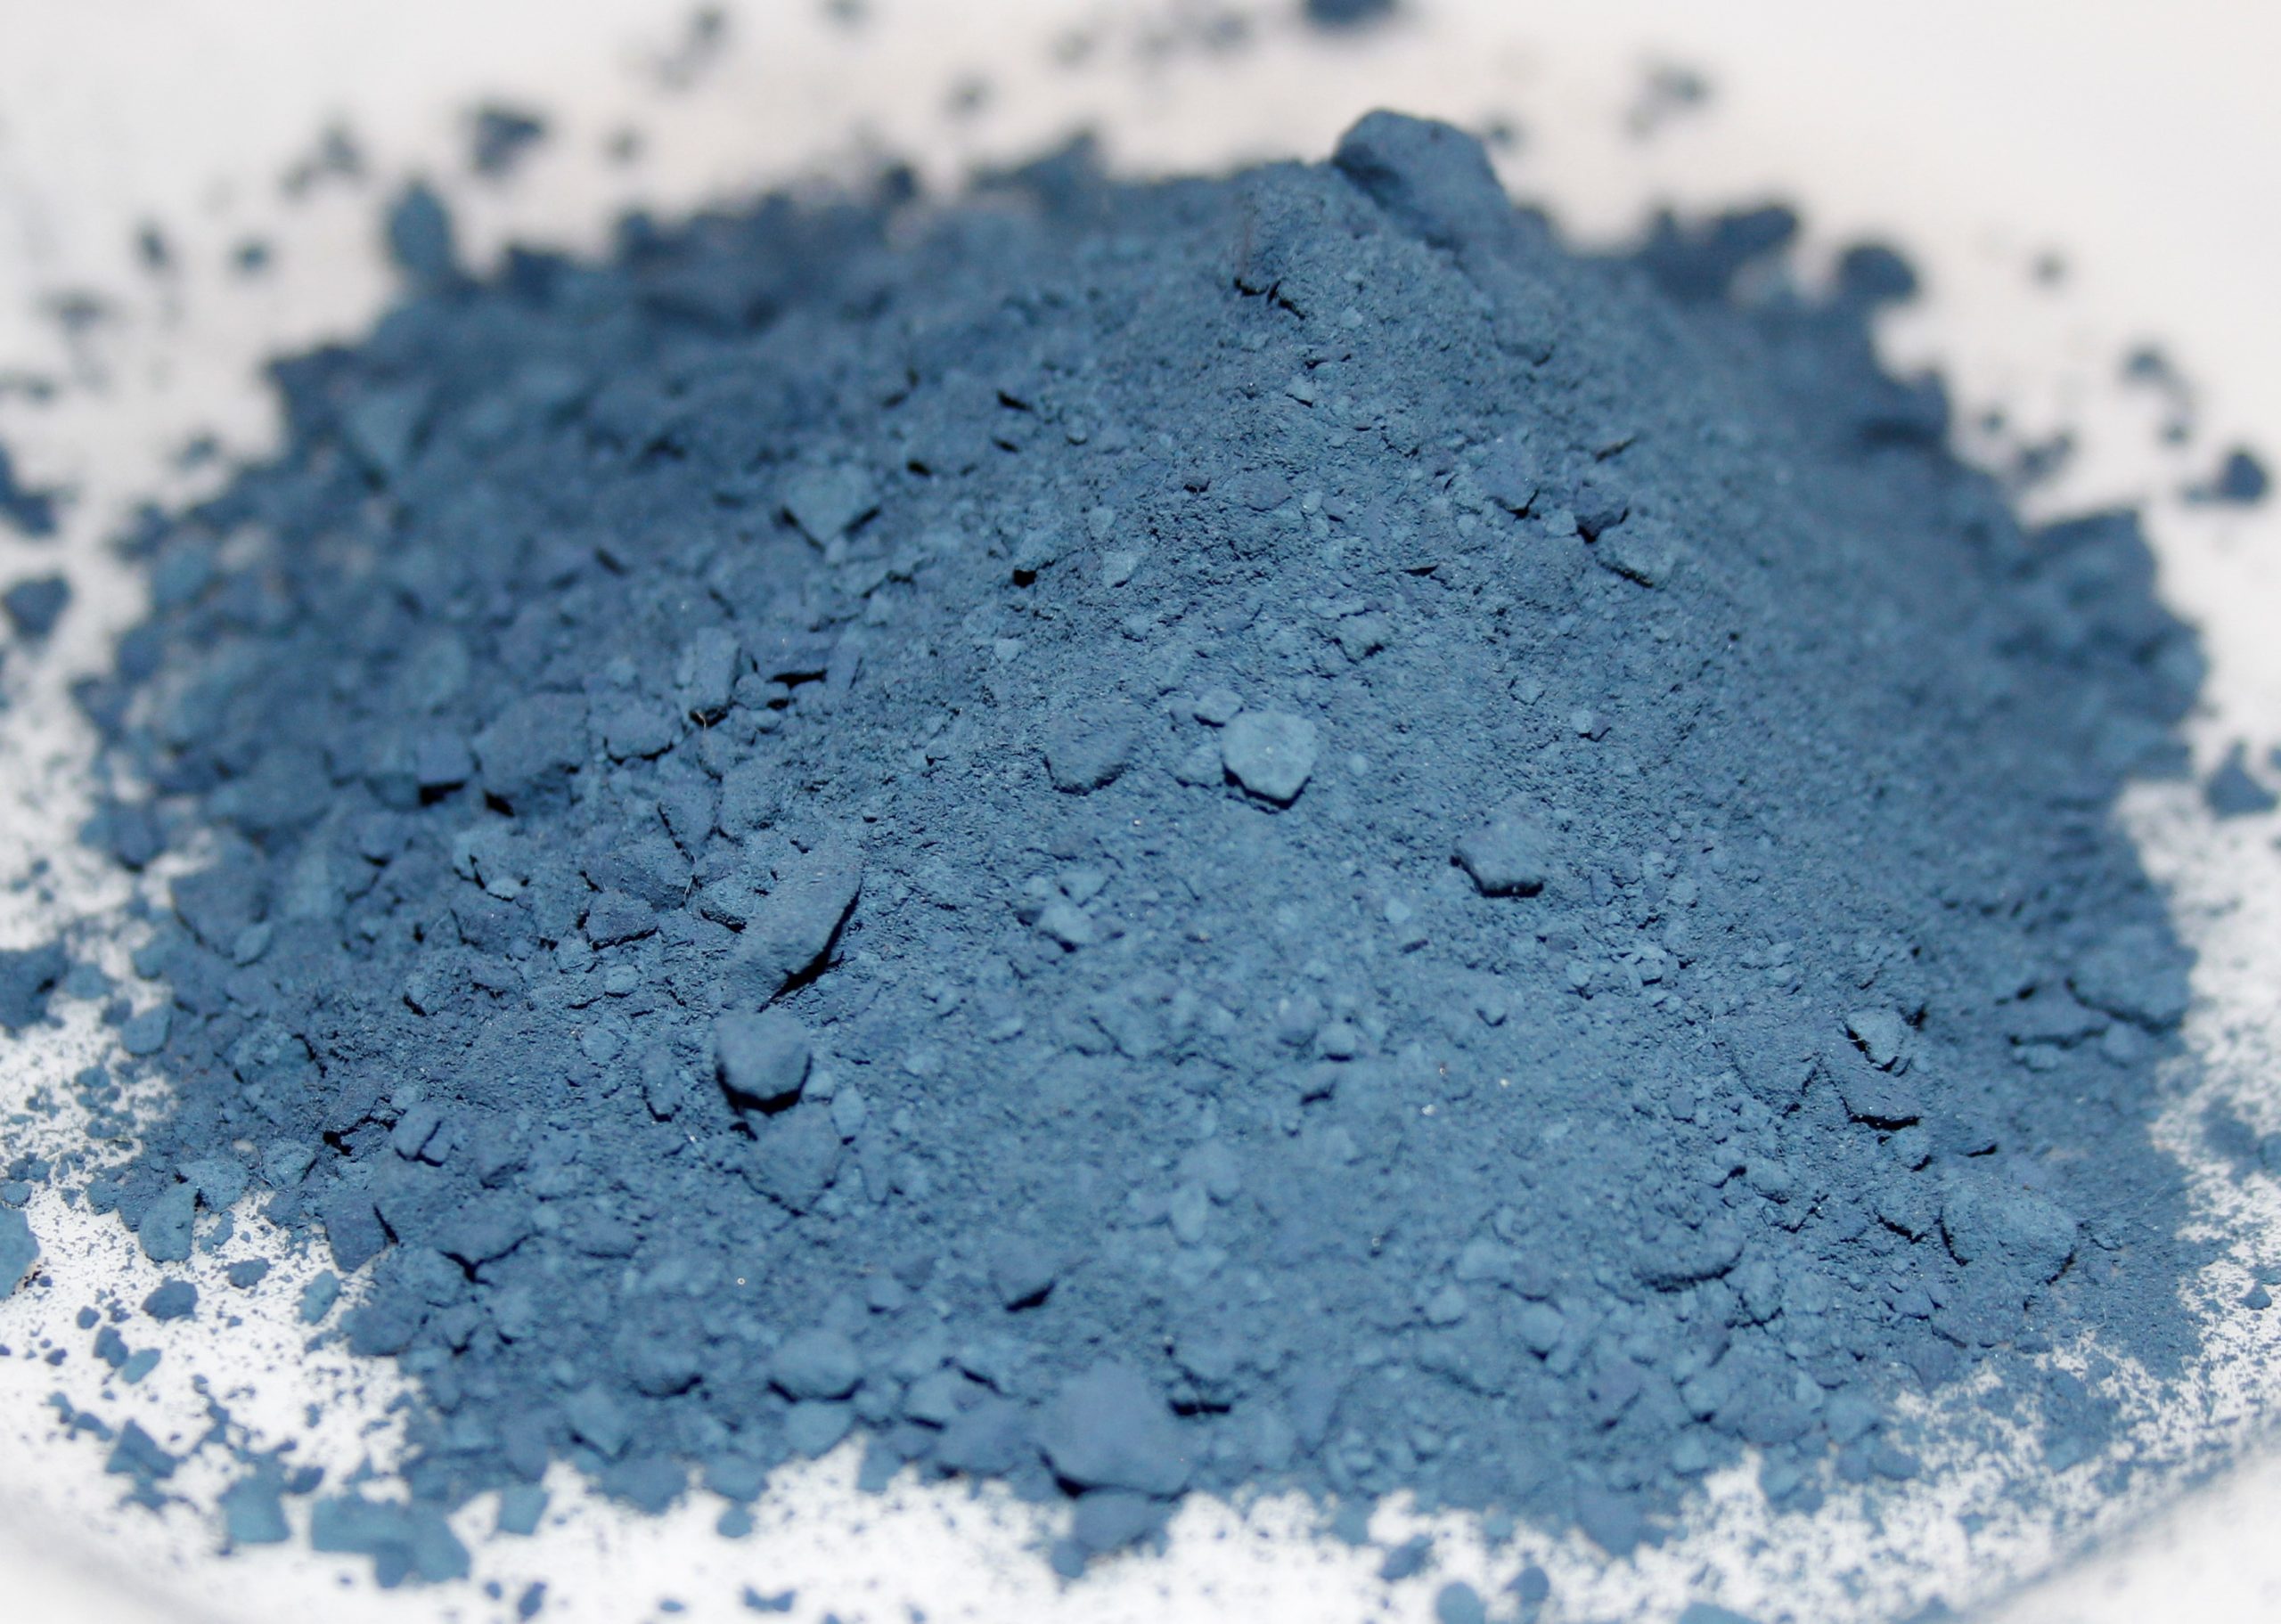
Precipitated indigo powder
At my scale it’s easy to start a siphon to decant the water into five gallon buckets. At a pH of 9, I’m not too concerned: this water goes over the compost pile. Once the excess water is carefully removed, I’ll consolidate the remaining watery paste and pour over coffee filters. Once water is fully drained out, Indigo pigment extraction is essentially done. The resulting paste can be stored in airtight containers in the refrigerator or dried completely and is indefinitely shelf stable.
Draining excess water from indigo paste
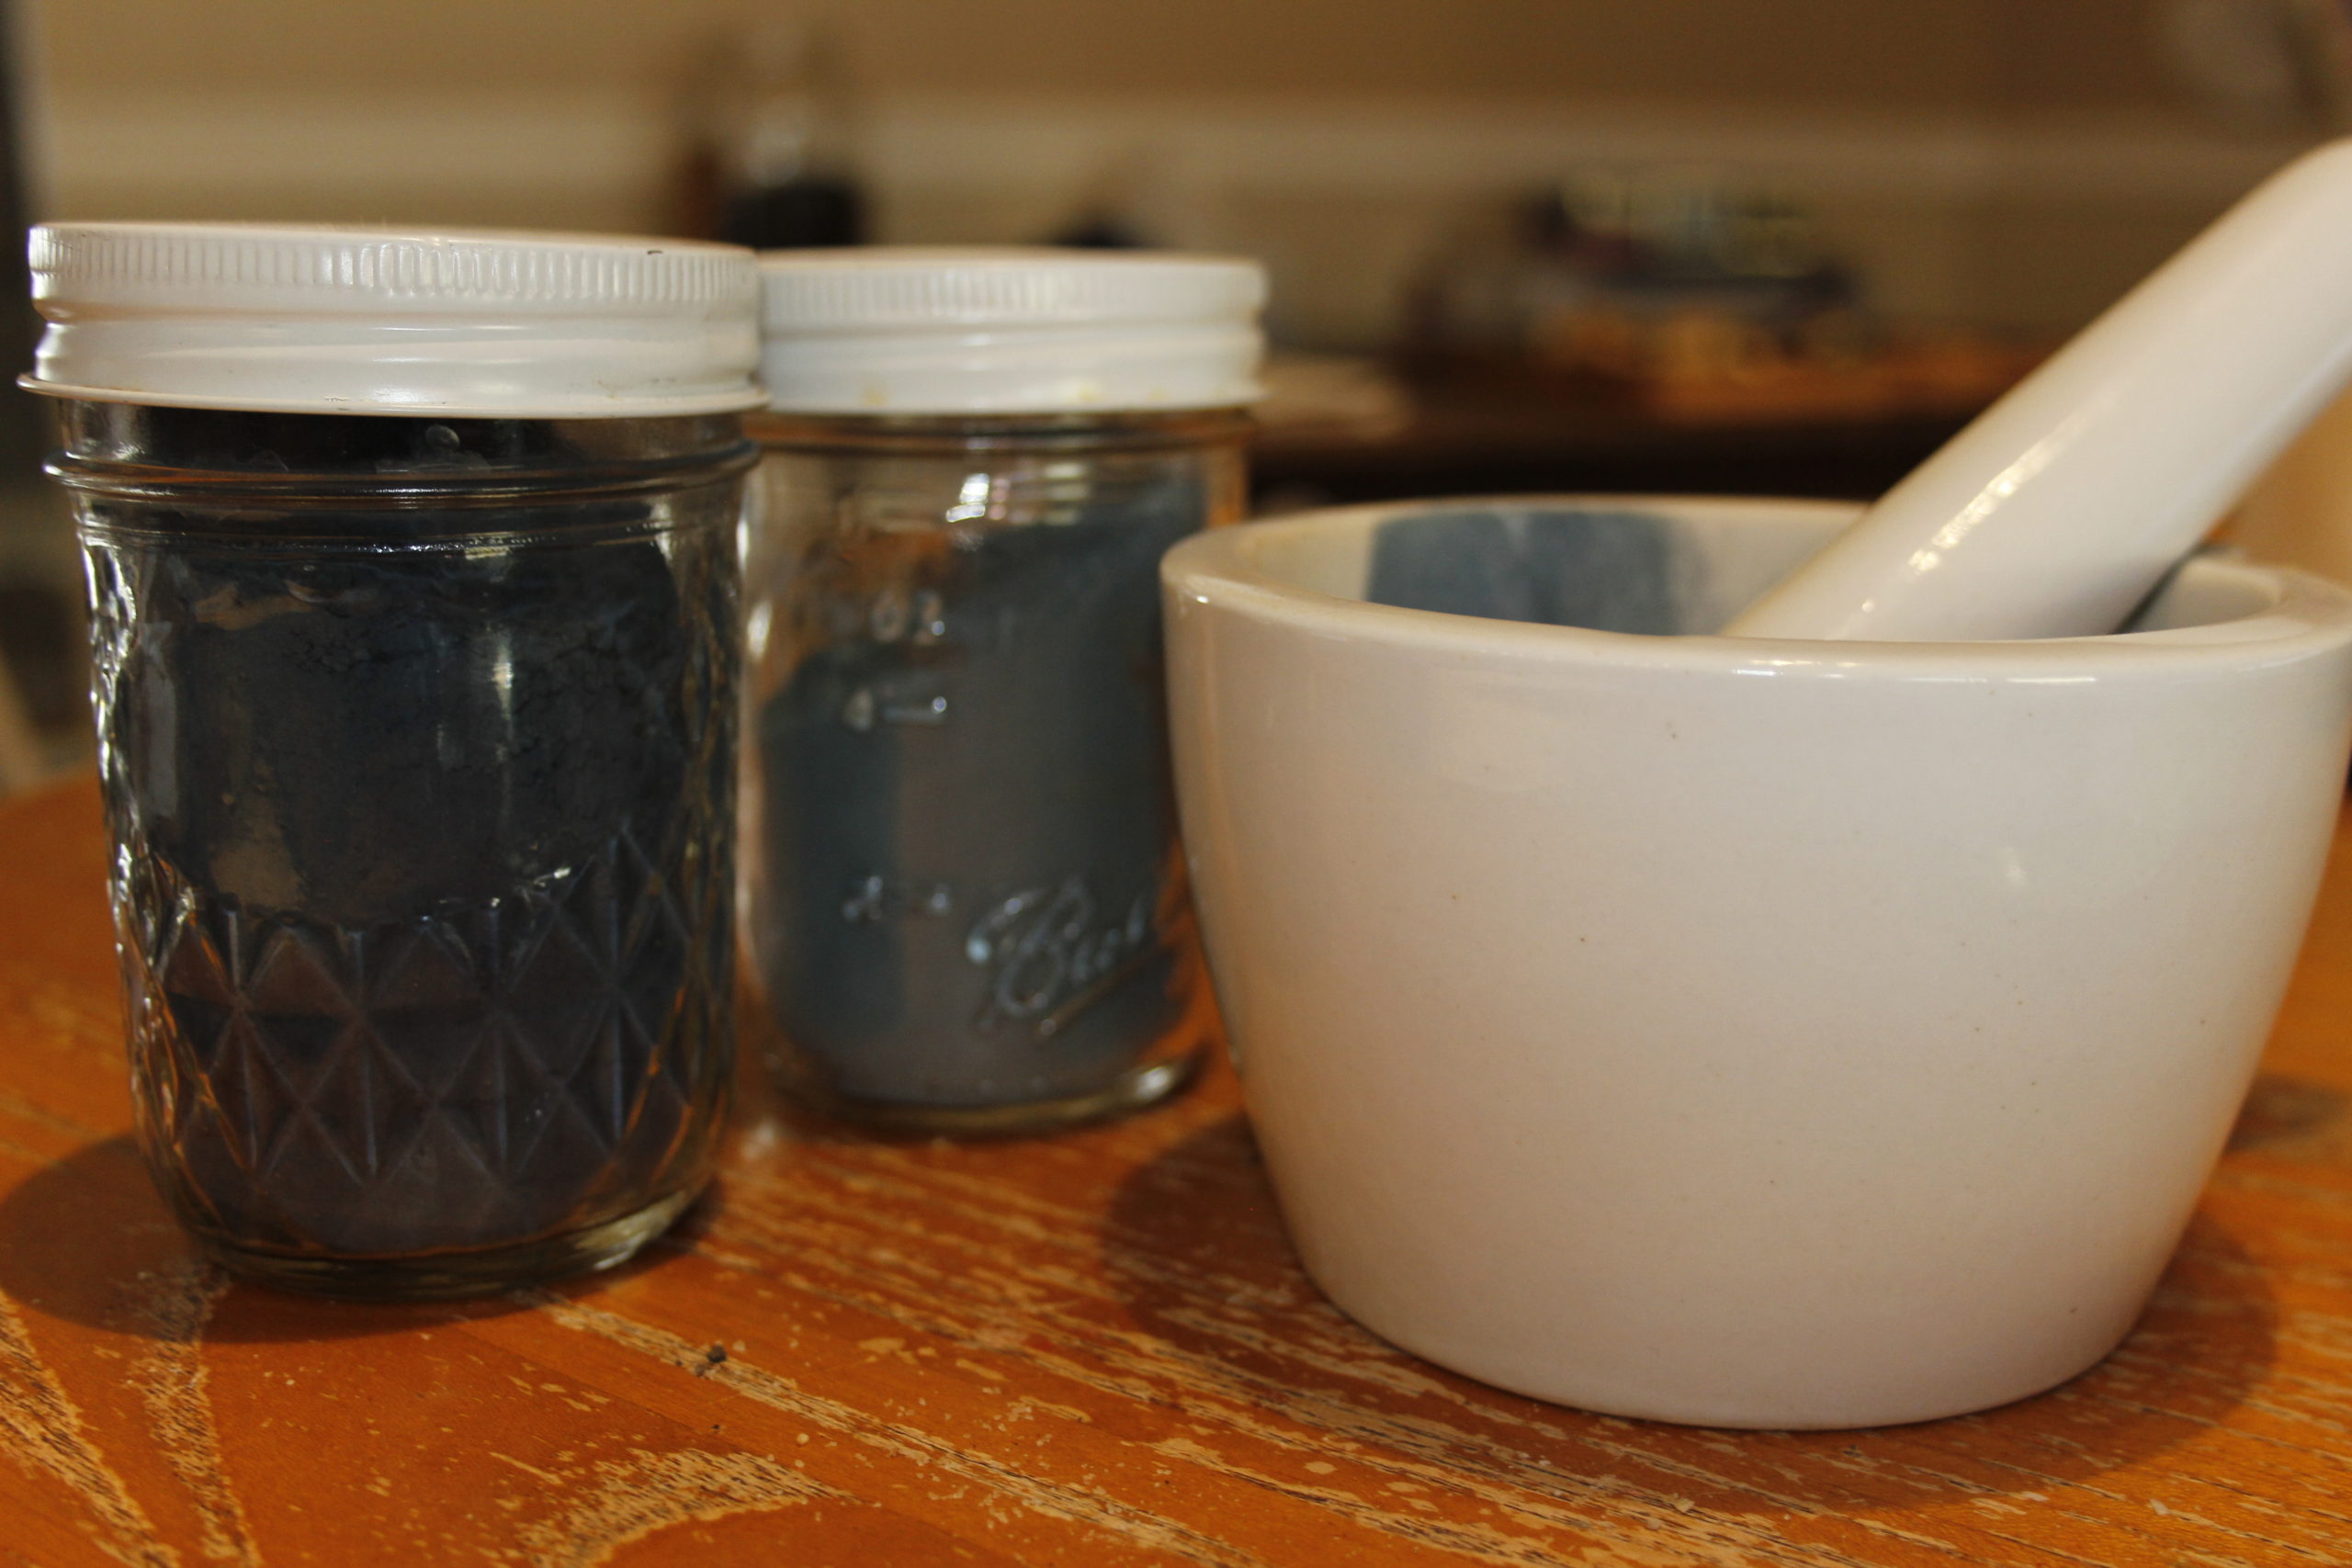
Dried indigo powder can be indefinitely stored in airtight containers
Much of the indigo pigment extraction process, with all its nuance, is detailed in this document from fibershed.org. A special thanks goes to the moderators and community at the Indigo pigment extraction methods facebook group – the kindhearted souls there bring hope for the future of social media.
Sig vat
The urine vat – referred to by practitioners as the Sig Vat (a name of obscure origin) – is certainly one of the oldest methods for dyeing with indigo. If you read my prior post, you may recall that urine is typically about 95% water and somewhere around 2 to 3% urea. As urine ages, the natural enzyme urease transforms urea into ammonium, hydroxide and carbonate ions which causes the pH to rise from it’s slightly acidic starting point to about 9. Now slightly alkaline, the urine is largely considered safe from pathogens (e.coli, among others), but it is certainly not a sterile environment. Bacteria are already at work here contributing to urea transformation, and all the while also consuming organic compounds and additional nutrients in the urine. Bacterial action releases CO₂, therefore creating the alkaline and low oxygen environment necessary for reducing indigo pigment. Compared to urine collected throughout the or from that of beer and coffee drinkers, the relatively higher urea concentration in morning urine contributes to a more potent vat. Allegedly, the urine from diabetics is best – this makes sense – higher glucose levels would promote more robust bacterial-induced oxygen-reduction.
Compared to other indigo processes involving chemical reductants, my experience is that a sig vat is a comparatively weak, slow and fickle process. Maintaining a functioning vat takes effort: the vat must be kept warm, introduction of air should be kept minimal, and special care must be taken to keep out chemical contaminants lest they disturb the active biology. Japanese researchers have worked to isolate the specific bacteria that are well-suited to this alkaline, oxygen-free environment. In this research, they determined that acidic ‘micro-environments’ may form, that can be mitigated through daily stirring. Additionally, Indigo powder must be ground very finely. Some suggest introducing powder to the vat by means of a suspended filter – imagine an indigo tea bag – kneaded on occasion, where then only the fine indigo particles are able to pass through.
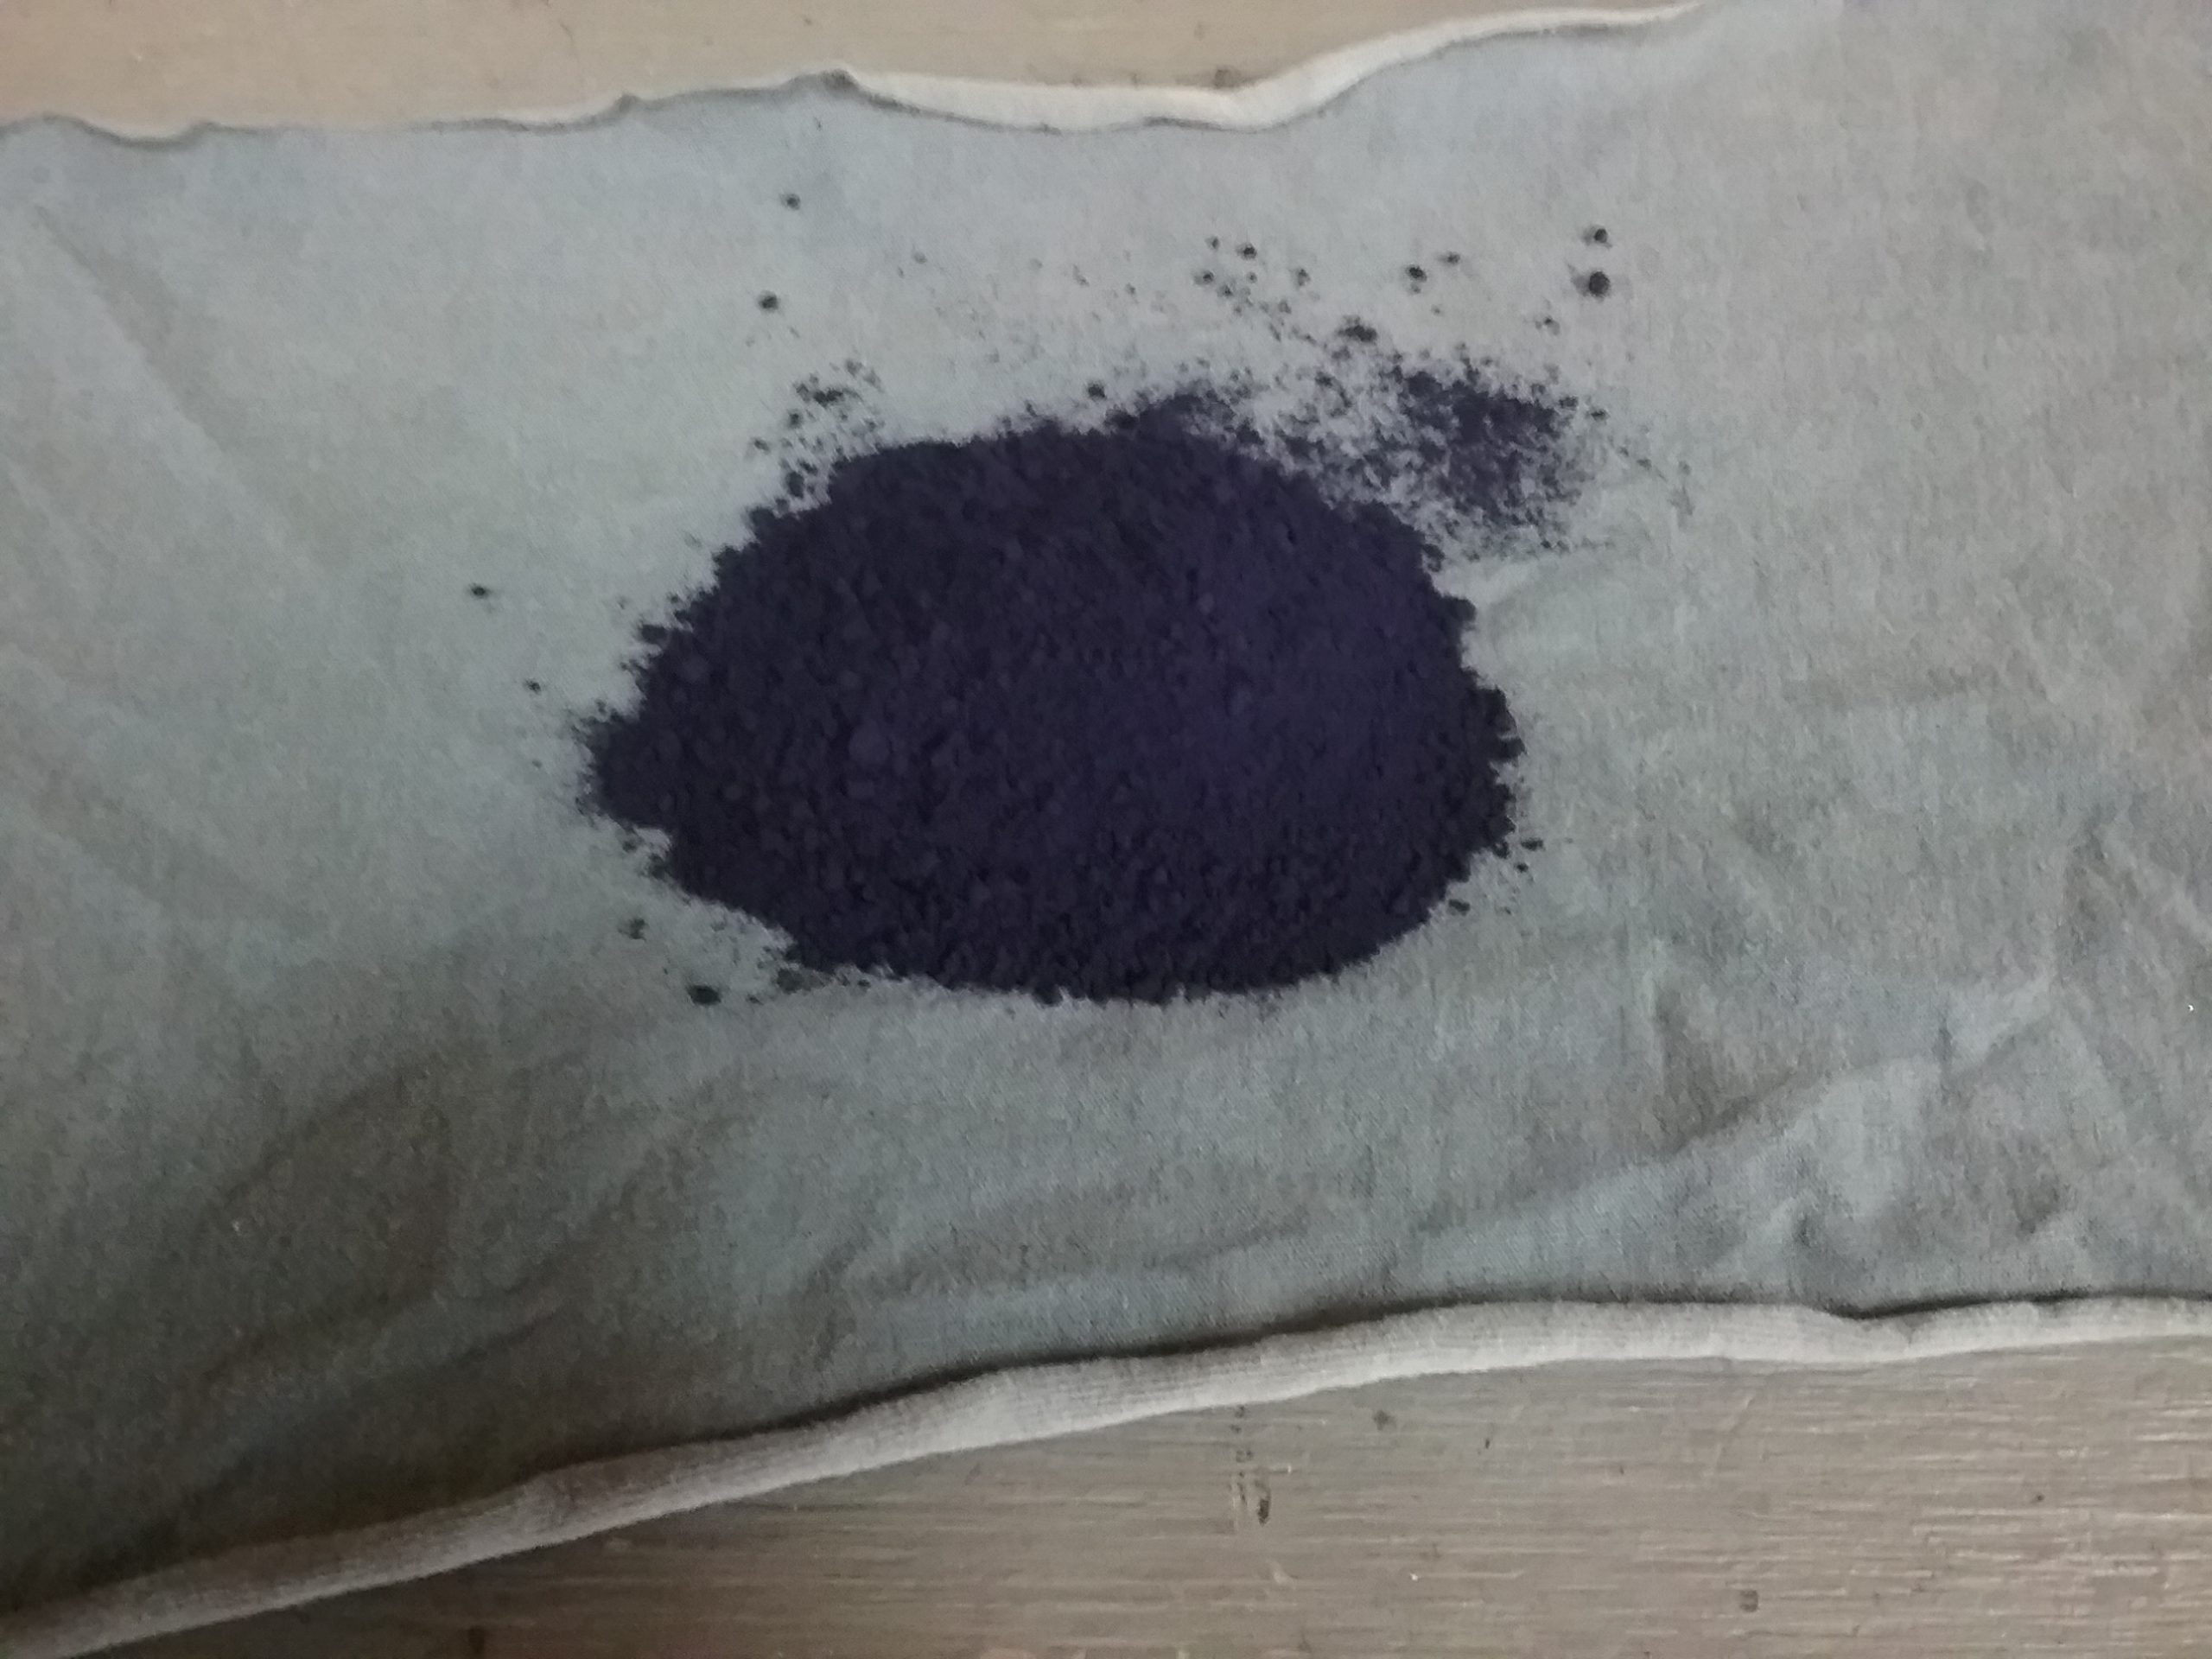
Preparing a slow-release indigo ‘tea-bag’
The inherent weakness of the vat does have its advantages. There is the personal satisfaction of learning a process that is very old, that no doubt must have seemed quite magical to the ancients. Atavistic tendencies aside, the lack of harsh chemicals here does reduce the risk of damaging fabrics. When building shade a weak reducing environment prevents re-reduction of pigment on the fiber during re-dips. Some fabrics can be left in the vat for extended periods of time, ensuring very deep and permanent penetration of dye into the fiber matrix. In fact, as J.N. Liles points out in another excerpt from The Art and Craft of Natural Dyeing:
“The alkali of the urine vat is the least damaging of all alkaline substances to wool, and for the reason buyers of indigo-dyed woolen yarns and woolen articles often would not purchase such items if they did not smell right”
Sig Vat attempt #1
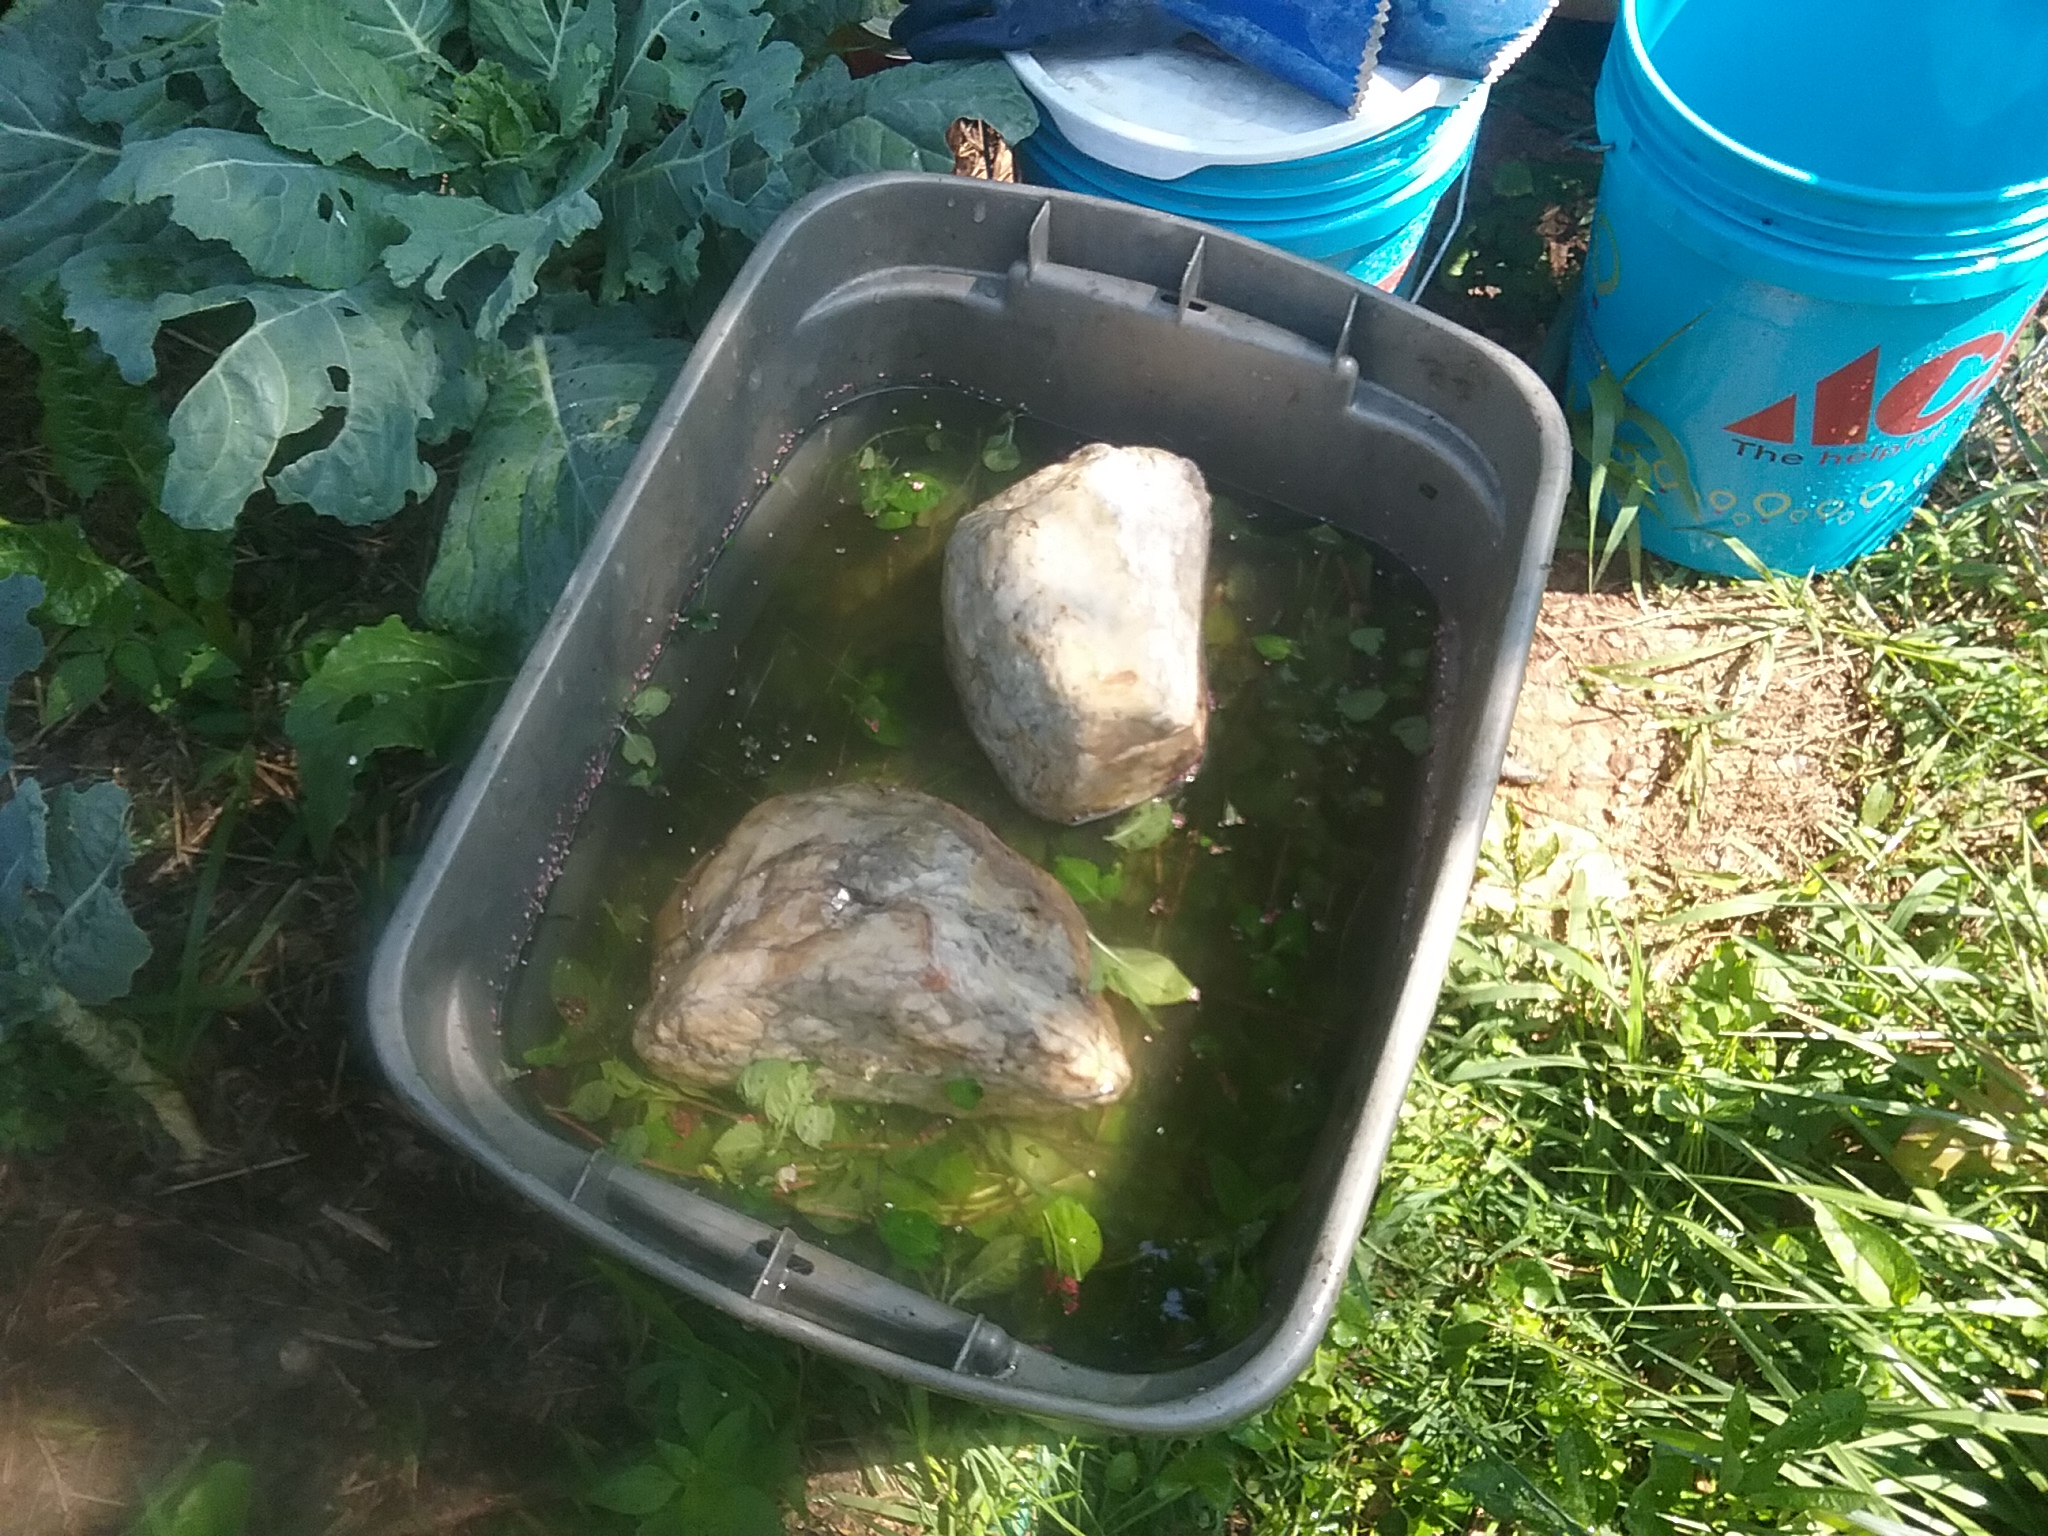
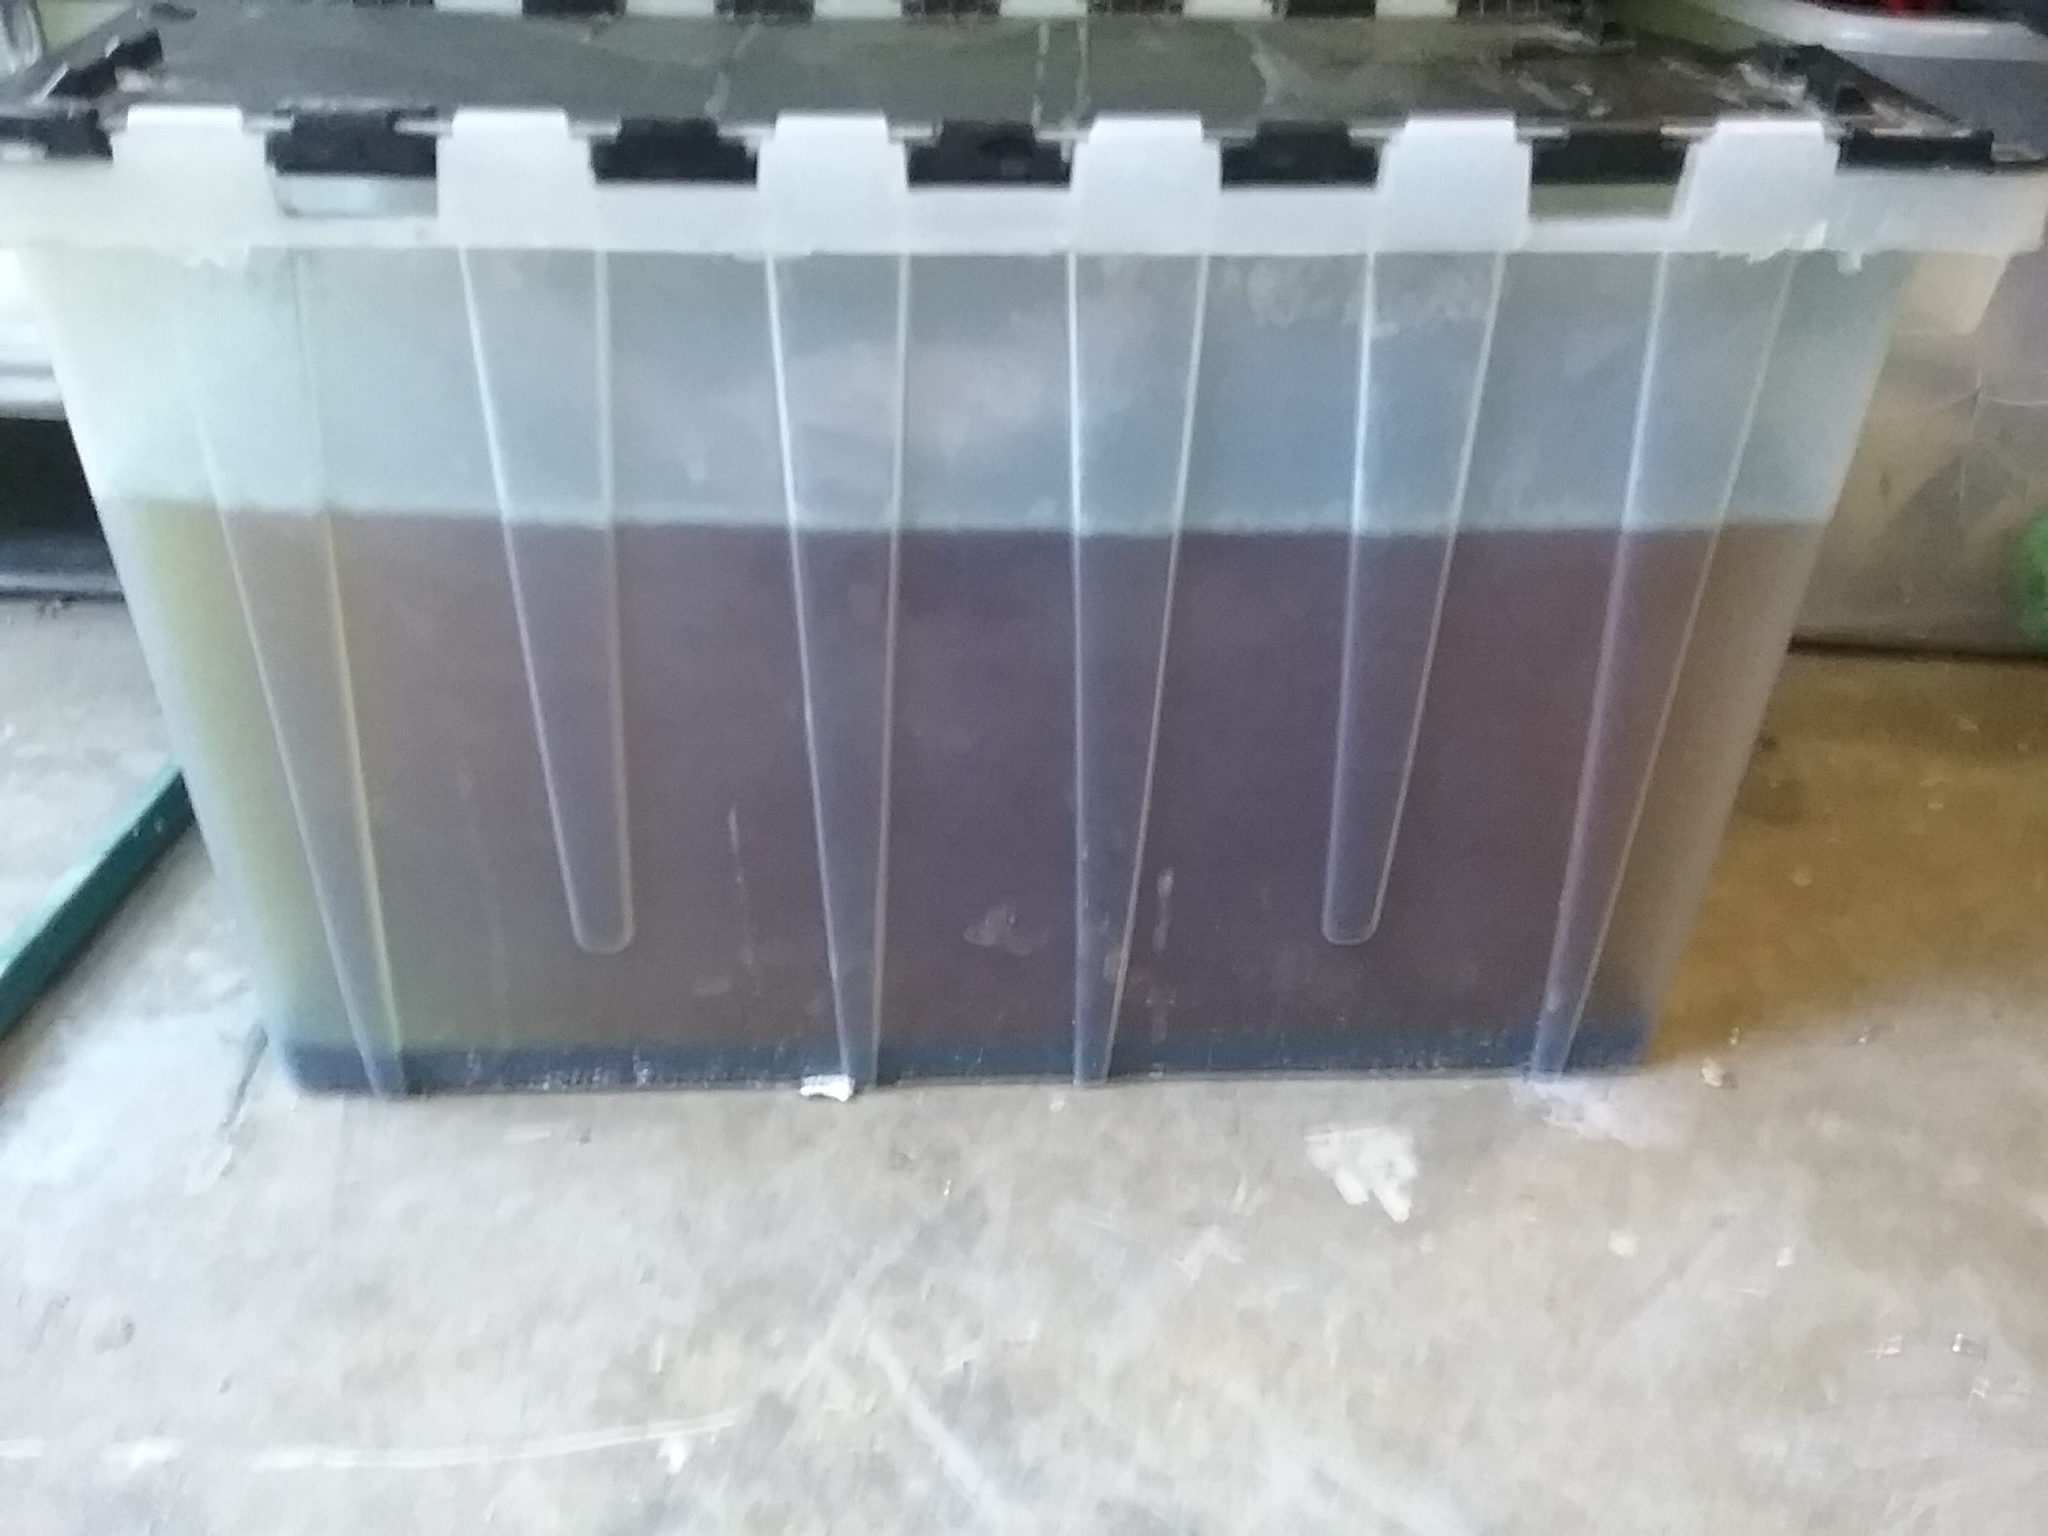
My first attempt at a sig vat was in the early months of 2020 – long before I had any of my own homegrown pigment. Instead, I was using a 45% purity indigofera tinctoria sourced pigment, found here for sale in small quantities. I collected enough daytime urine to fill a 2-gallon wide-mouth jar within 2 inches of the top. Then, I loosely covered the jar with an old t-shirt and moved it into a back corner of our biocharprocess-heated shipping container. This is a multi-functional space that we had originally setup for rearing black-soldier larvae and at this time in late winter, temperatures for the most part were maintained around 70 degrees. At this time of year it is not unusual for daytime temperatures here to climb up to 80 degrees.
Using the 1 tsp/liter ratio described in Kevin M. Dunn’s Caveman Chemistry, I measured out 2.5 tablespoons of pigment for my 2 gallon vat. Using this blog post as my guide, I made a ‘sock’ from a scrap of old t-shirt and mason twine, weighted with a stainless steel nut. As Dunn describes, using smell as my guide, the urine was already turning after only a few days at this temperature. I dropped in the ‘sock’ and, while wearing gloves, gently ‘massaged’ it to slowly release indigo – the color change in the vat was nearly immediate. A few more times throughout the next week I gently stirred and released more indigo into solution. After a week or so, essentially guessing, I made a determination the vat was ready.
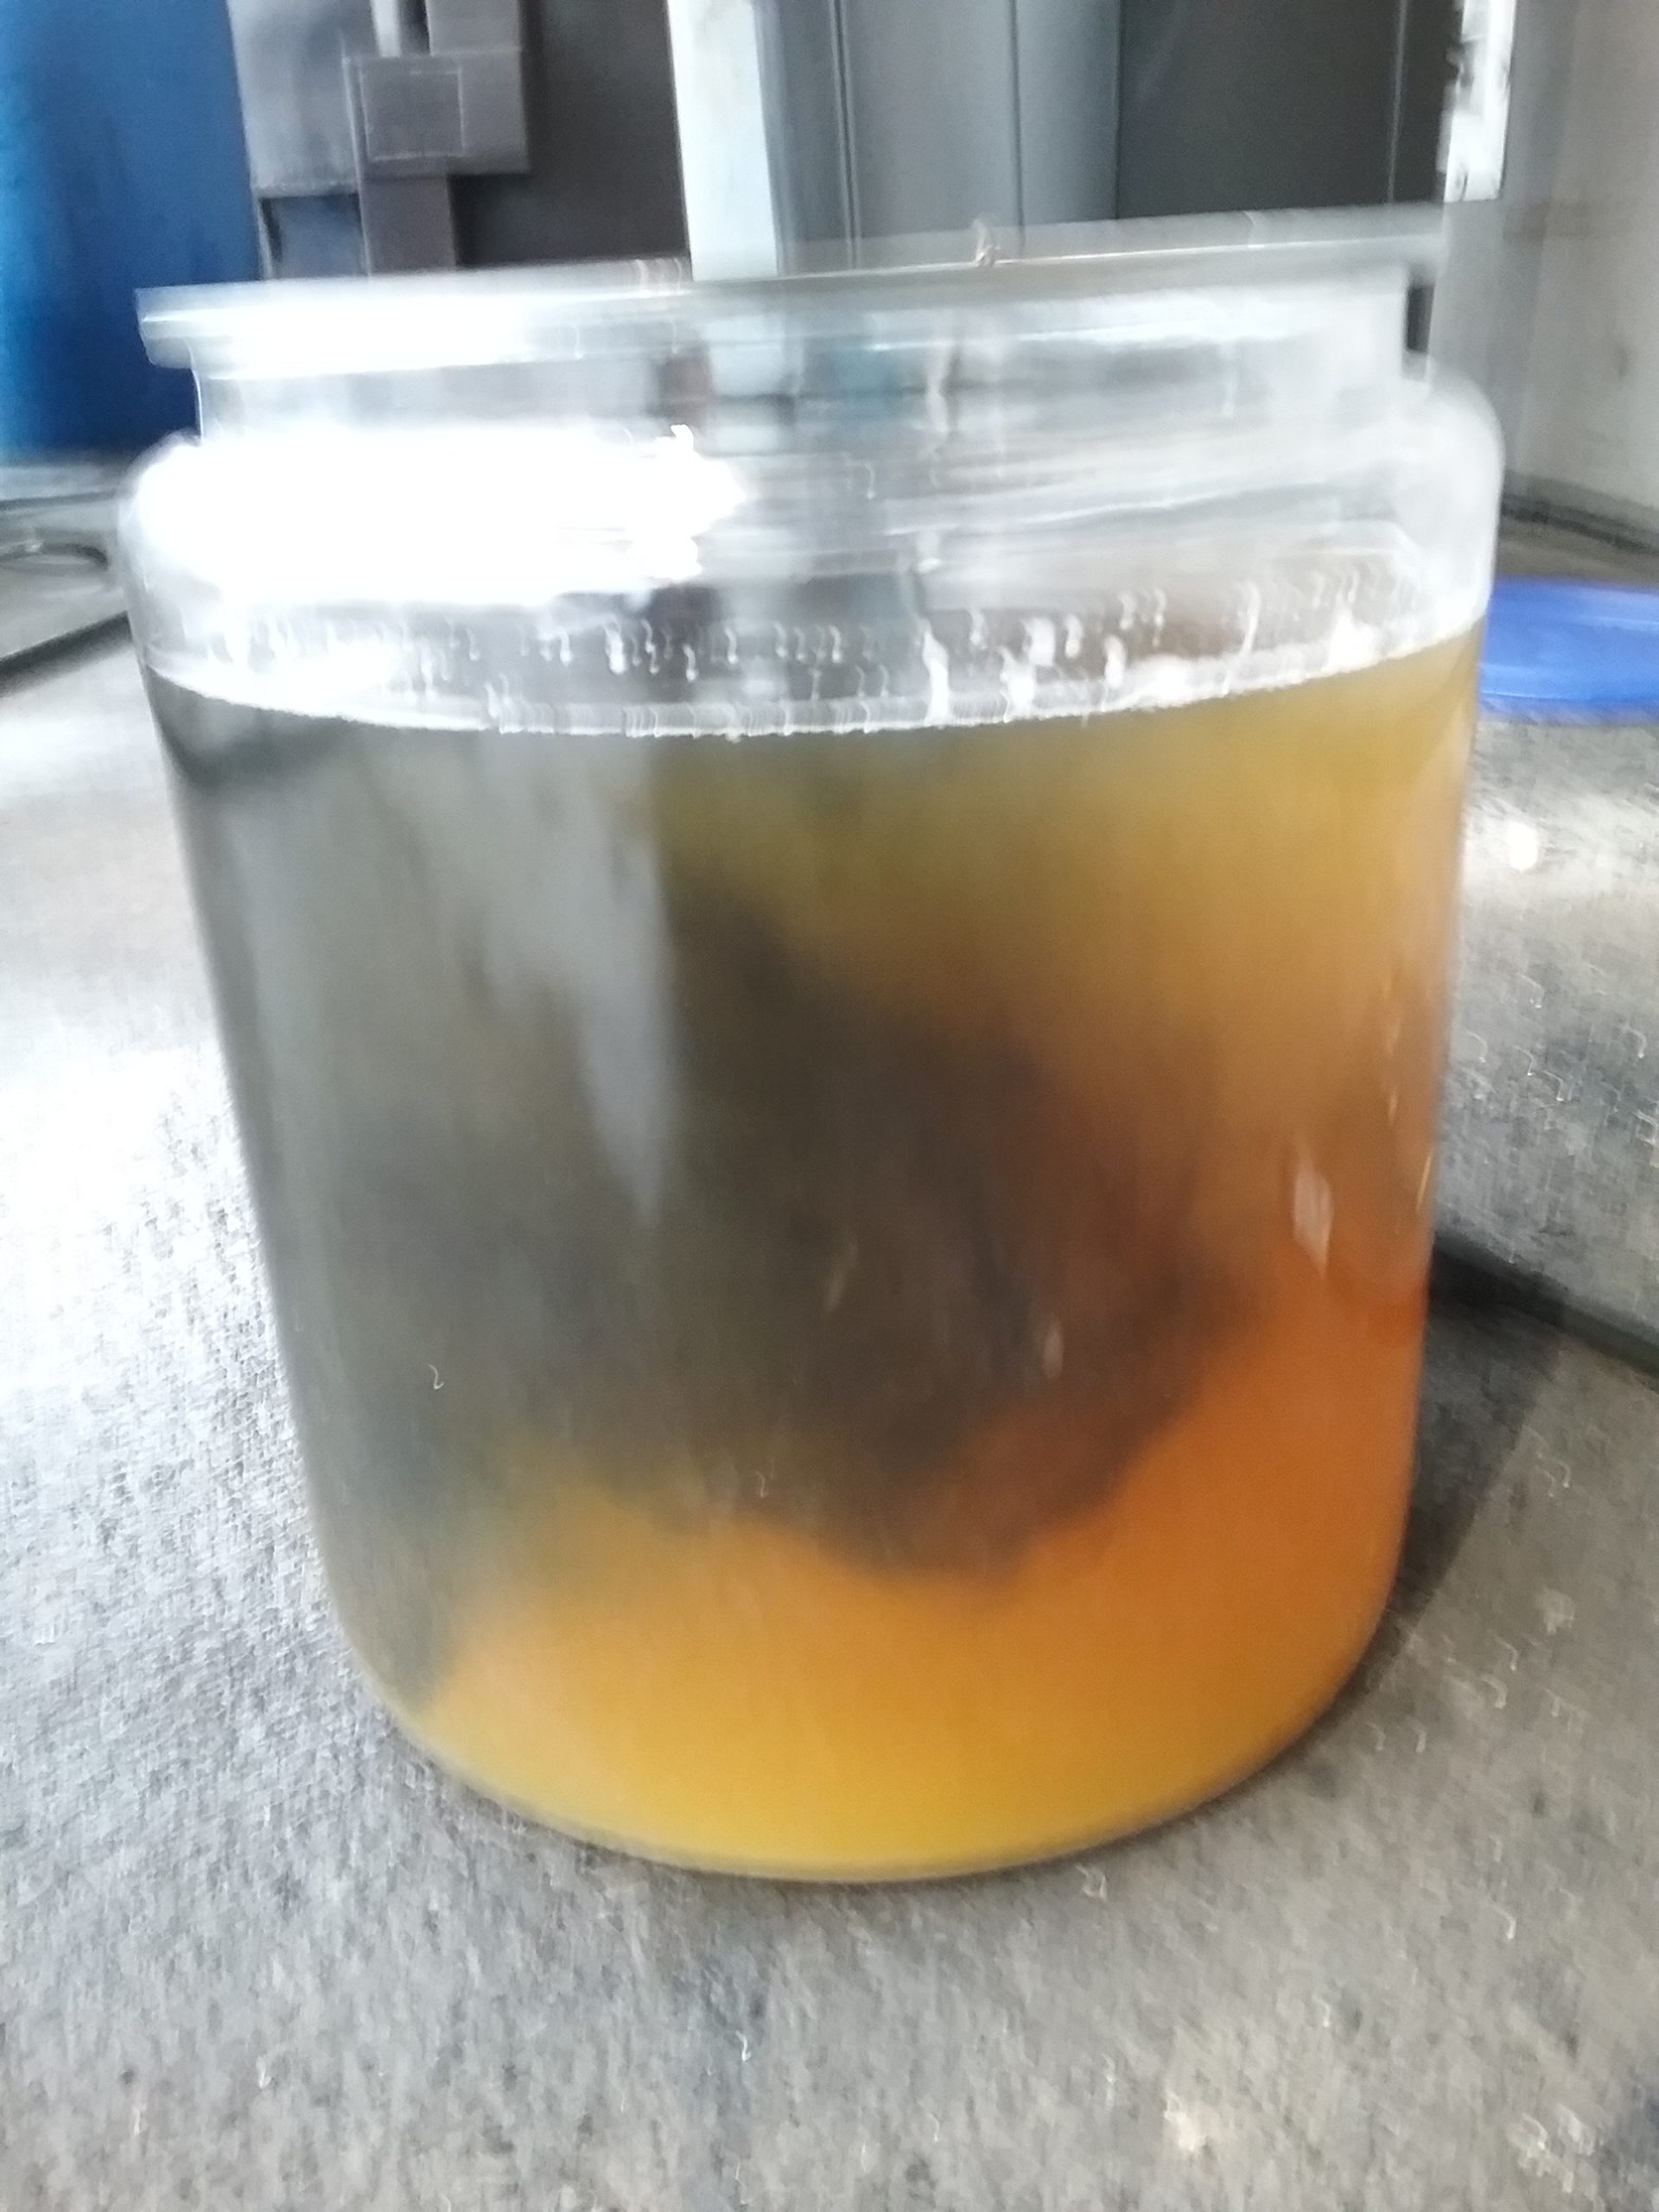
Adding indigo powder to my first sig vat. Blurry photo taken ‘in the moment’
Dyeing with this first vat was quite successful, but still slow when compared to the more common hydrosulfite vat. I started with a set of 6, 2 oz cotton napkins, and found I had room to dip 2 at a time, where I kept them submerged for 20 minutes. I found I could dip and wring-out each pair only once before a noticeable color shift in the vat – the deep green, reduced vat would shift to blue after introducing too much oxygen. At this point, I would need to wait at least another day for reduction to take place before my next dip.
Some of the cotton pieces were dipped up to 8 times, at which I was able to build some fairly dark shades. Once I was satisfied, I poured the nearly exhausted vat over large wood chip piles and thoroughly rinsed the all 8 cotton cloth napkins in cold water until the rinse water ran completely clear. The entire process took me about 3 weeks, although I suspect shorter reduction intervals would have been possible. Lastly, I should mention the smell vanished after a single wash in a machine and after almost a year of occasional use these pieces have maintained nearly all of their original color.
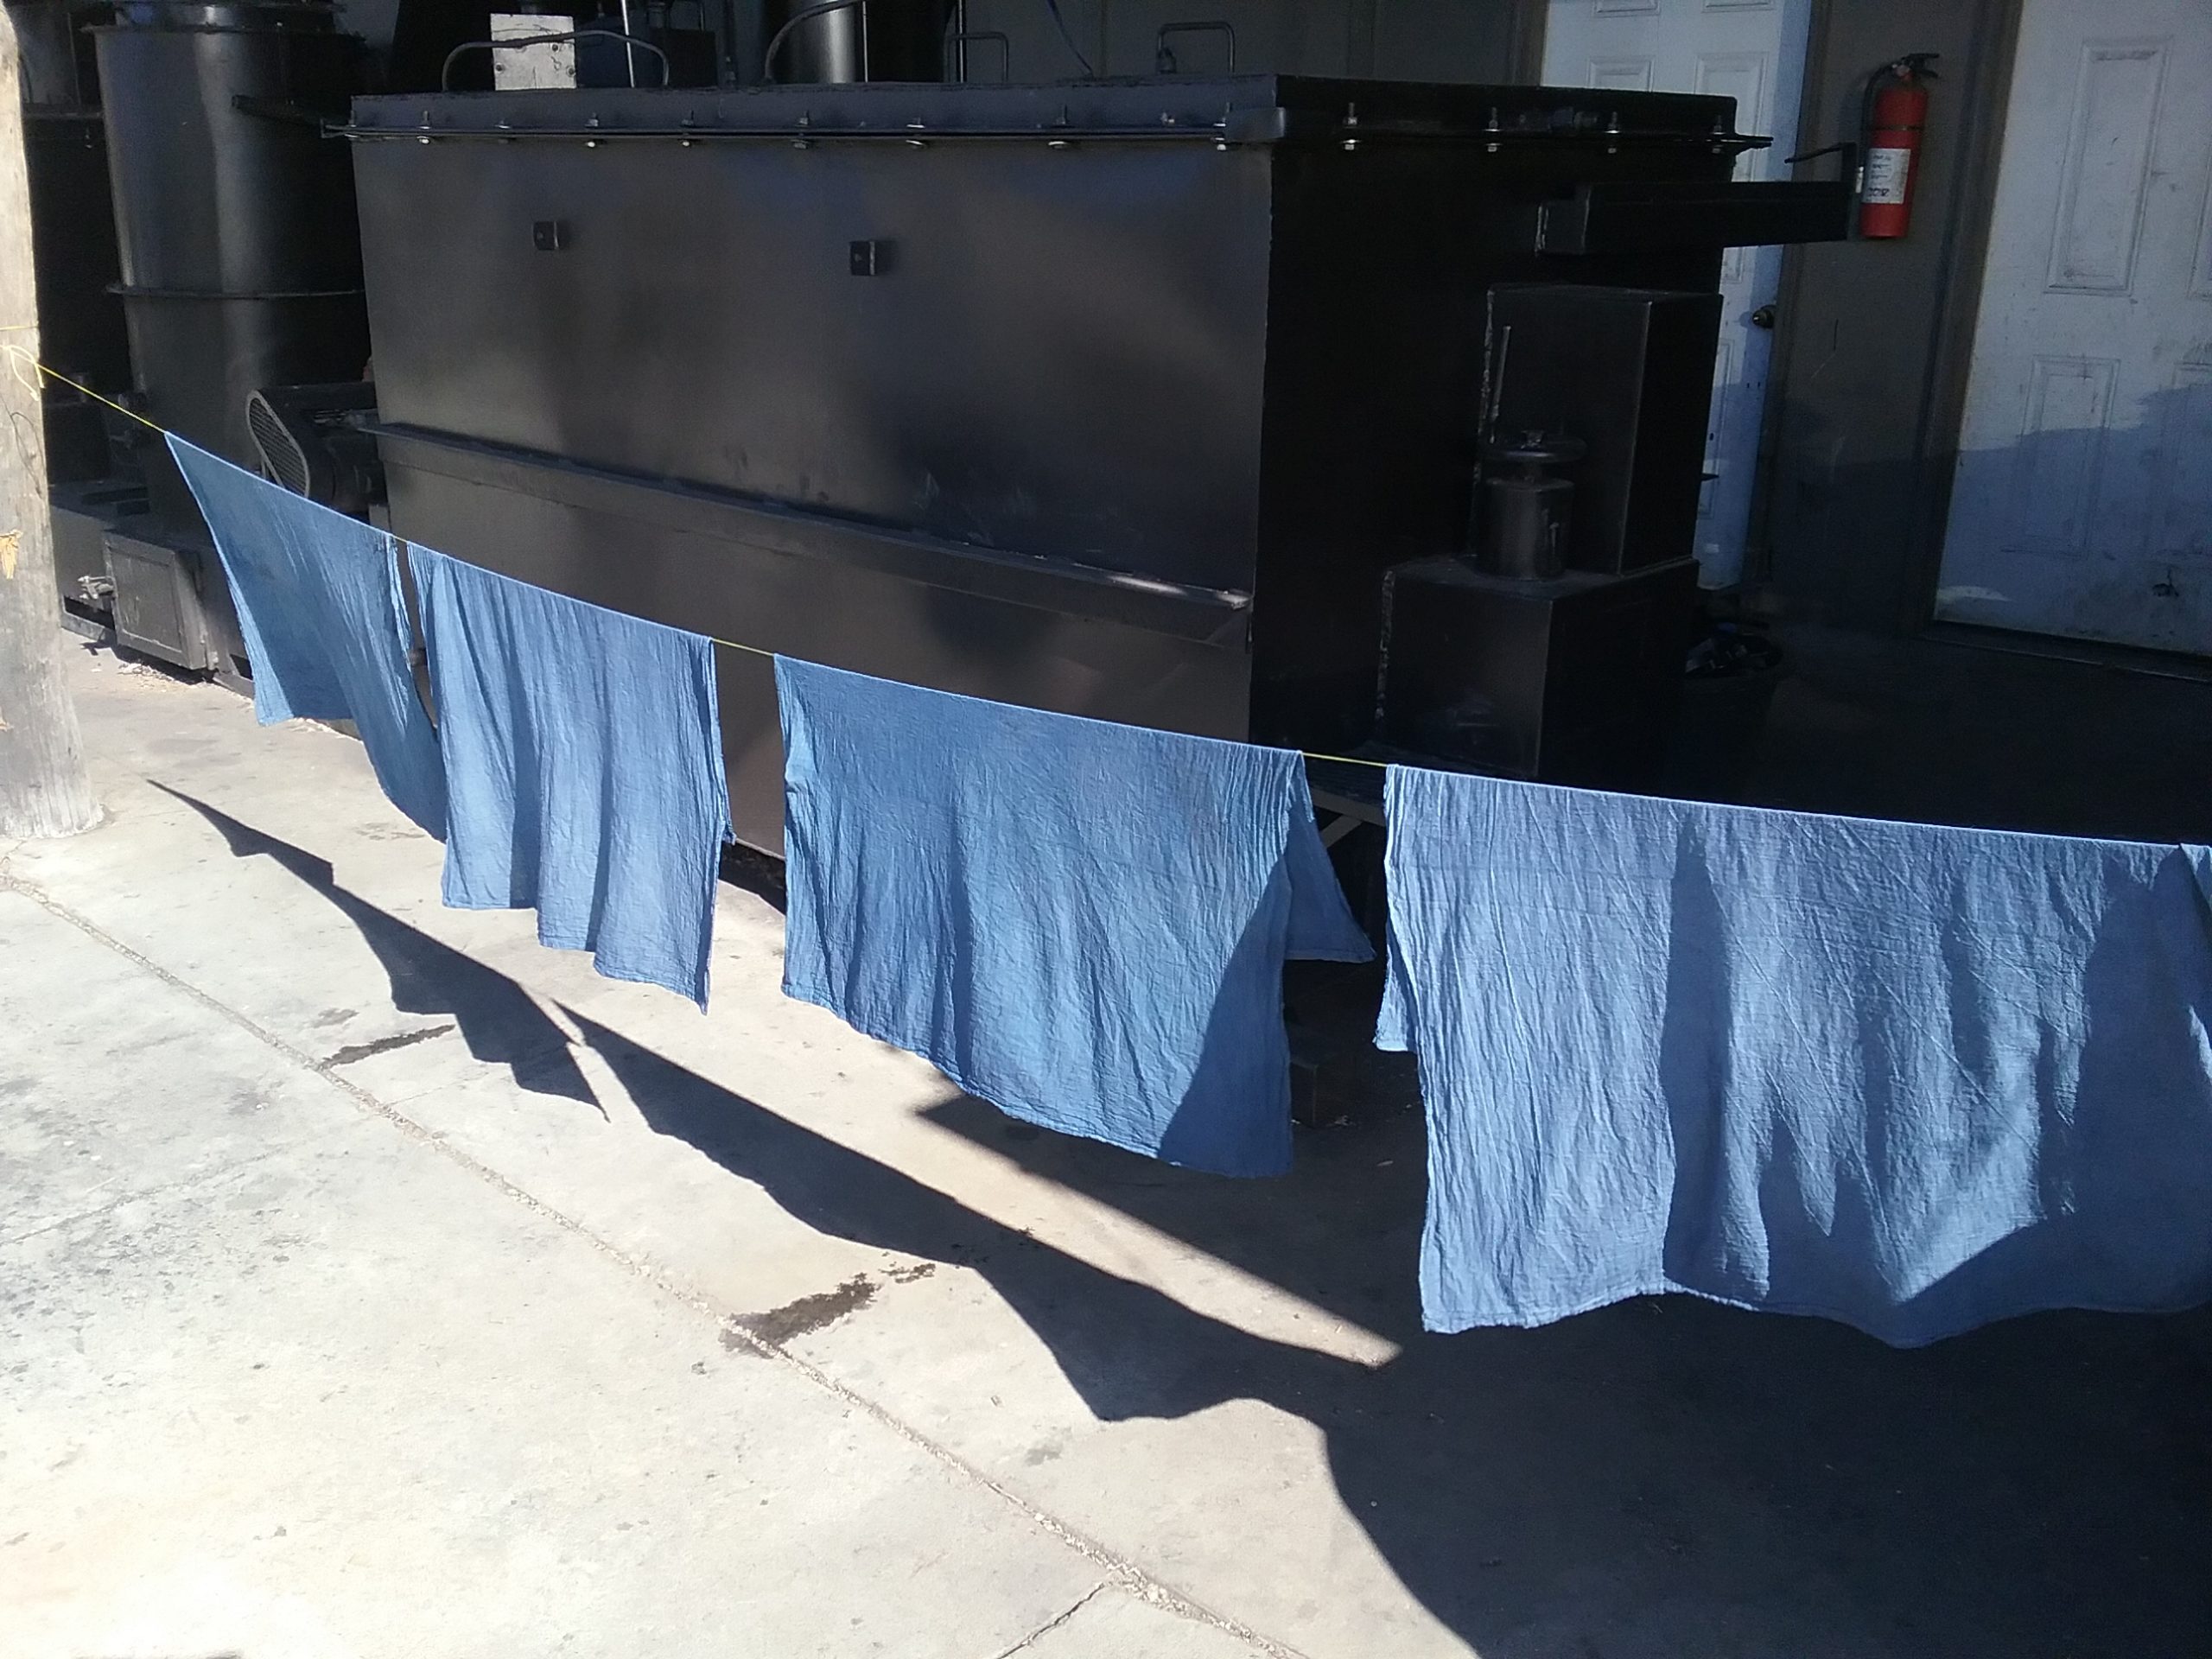
Building shade in early winter at the biochar facility
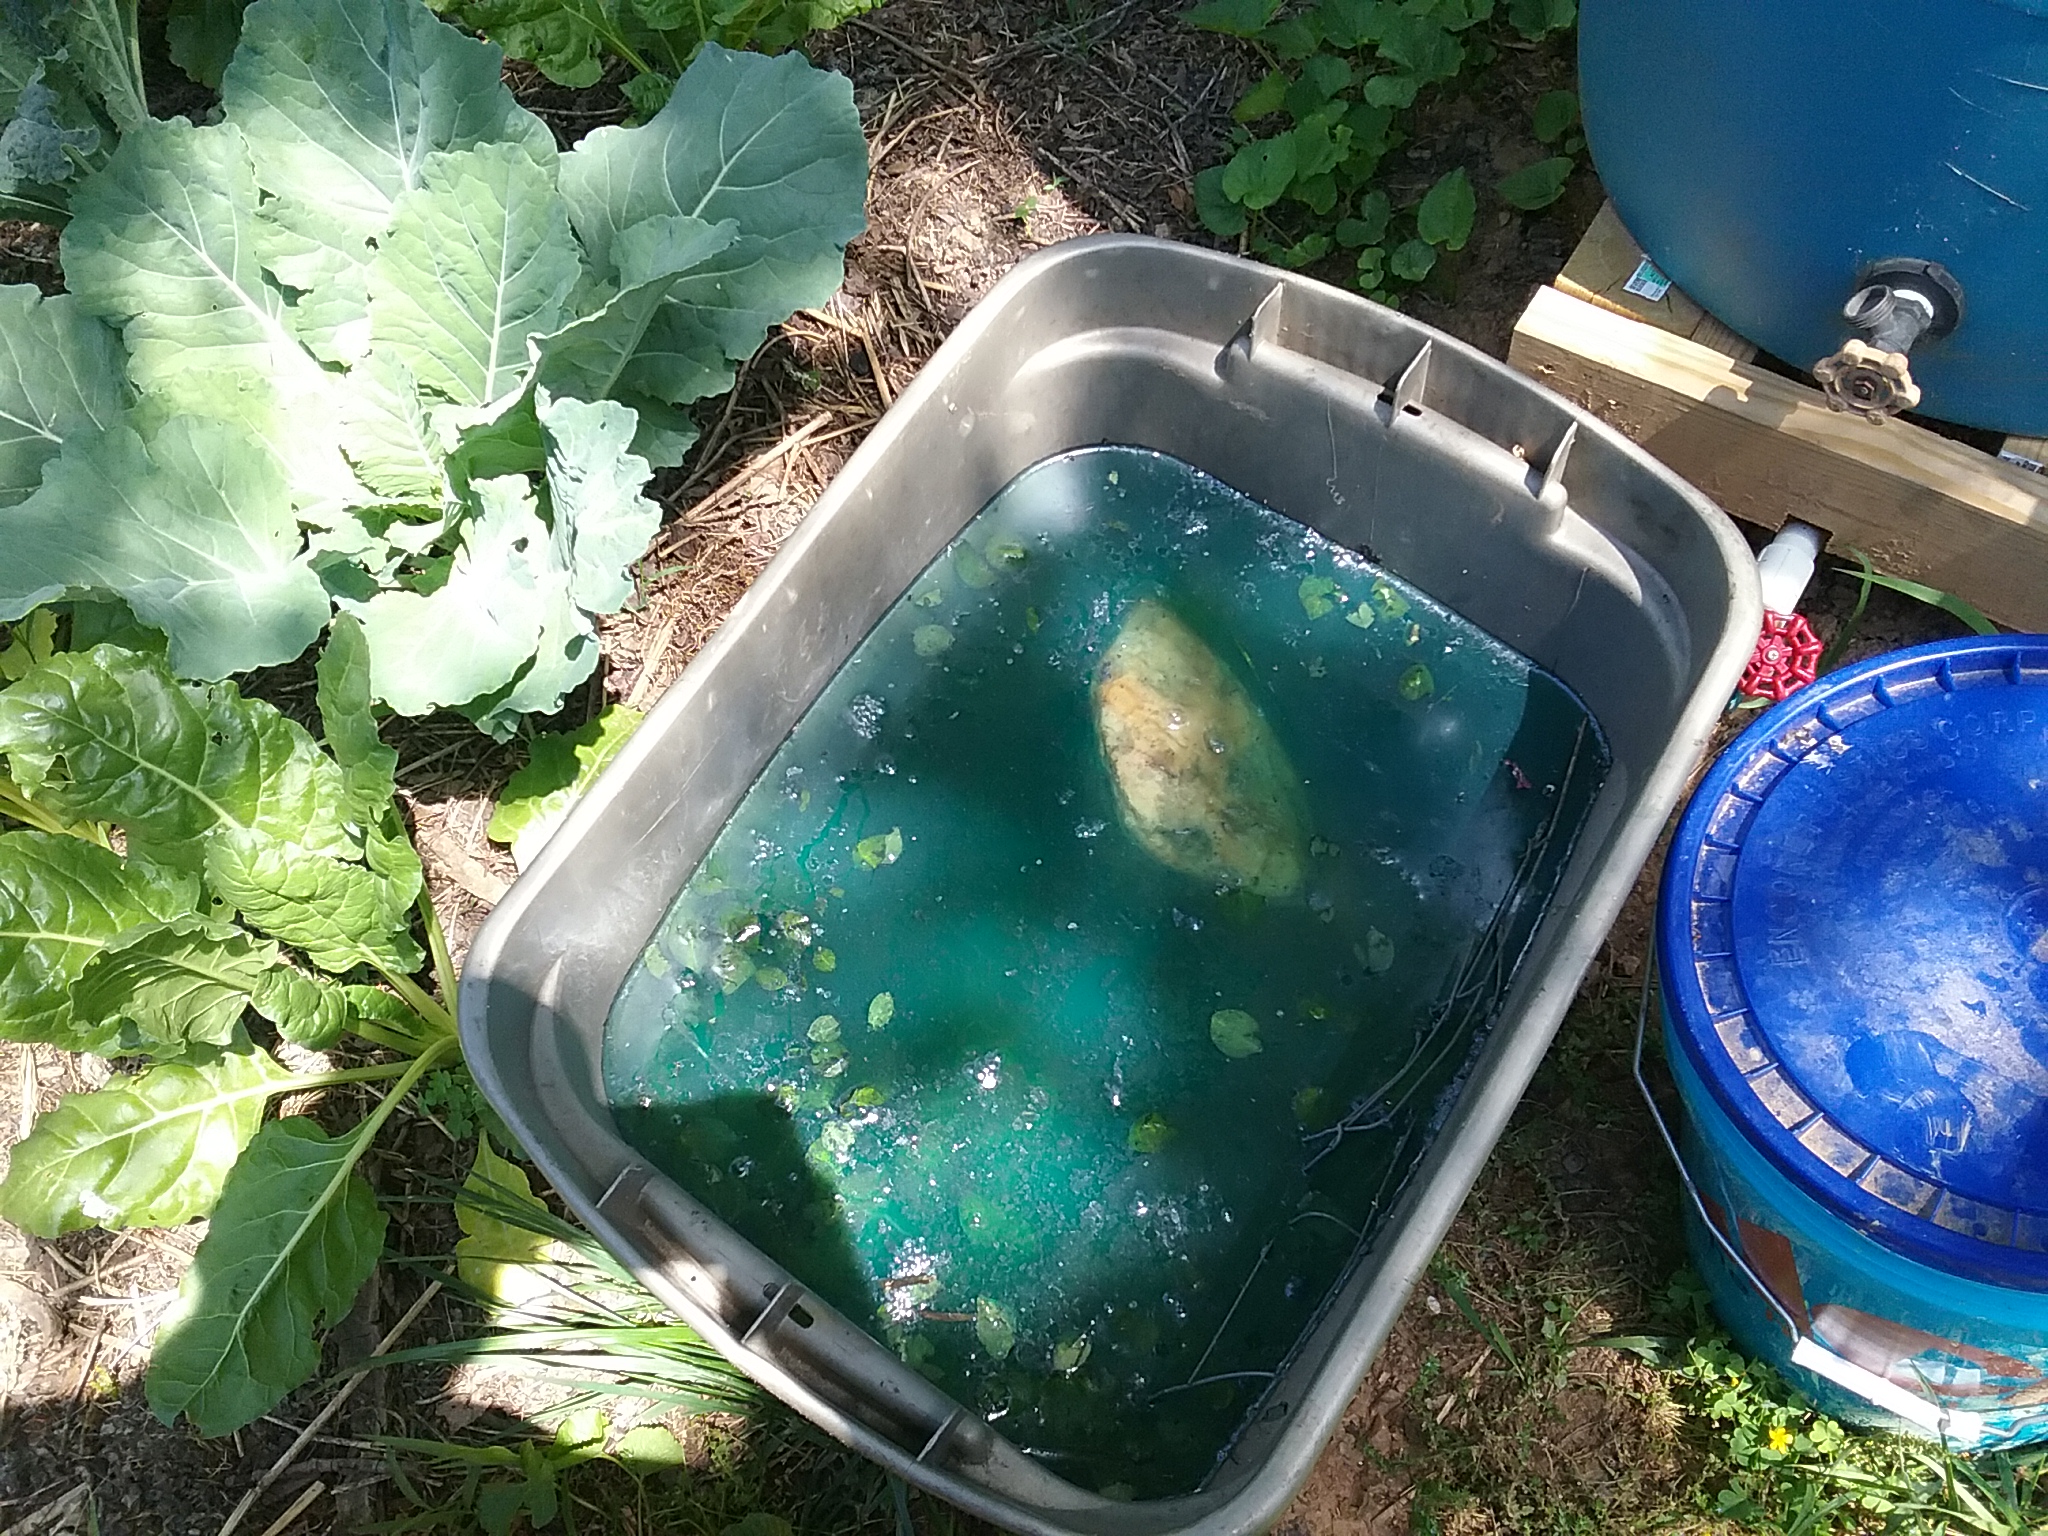
Sig Vat attempt #2
By mid-summer of 2020 I was ready to try another sig vat with my homegrown indigo pigment. This was the pigment from my second extraction – and no doubt the indigotin concentration (purity) of each extraction increased with experience – the purity of this batch was indeed quite low.
Again, I collected two gallons of ‘normal’ daytime stored in the same glass jar. Outdoor temperatures now modulated between an average nighttime 60 and 80. I placed the glass jar inside a five gallon bucket with a lid and kept in a sunny location in the garden. After a week I added ½ cup of refrigerated indigo-paste directly to the vat. For me, the ½ cup was a bit of guess – Assuming at the time that I had both accounted for lower purity and additional moisture content, this concentration ultimately proved to be quite dilute. Nonetheless, I was able to dye light shades on a pair of lightweight cotton batik dish towels.
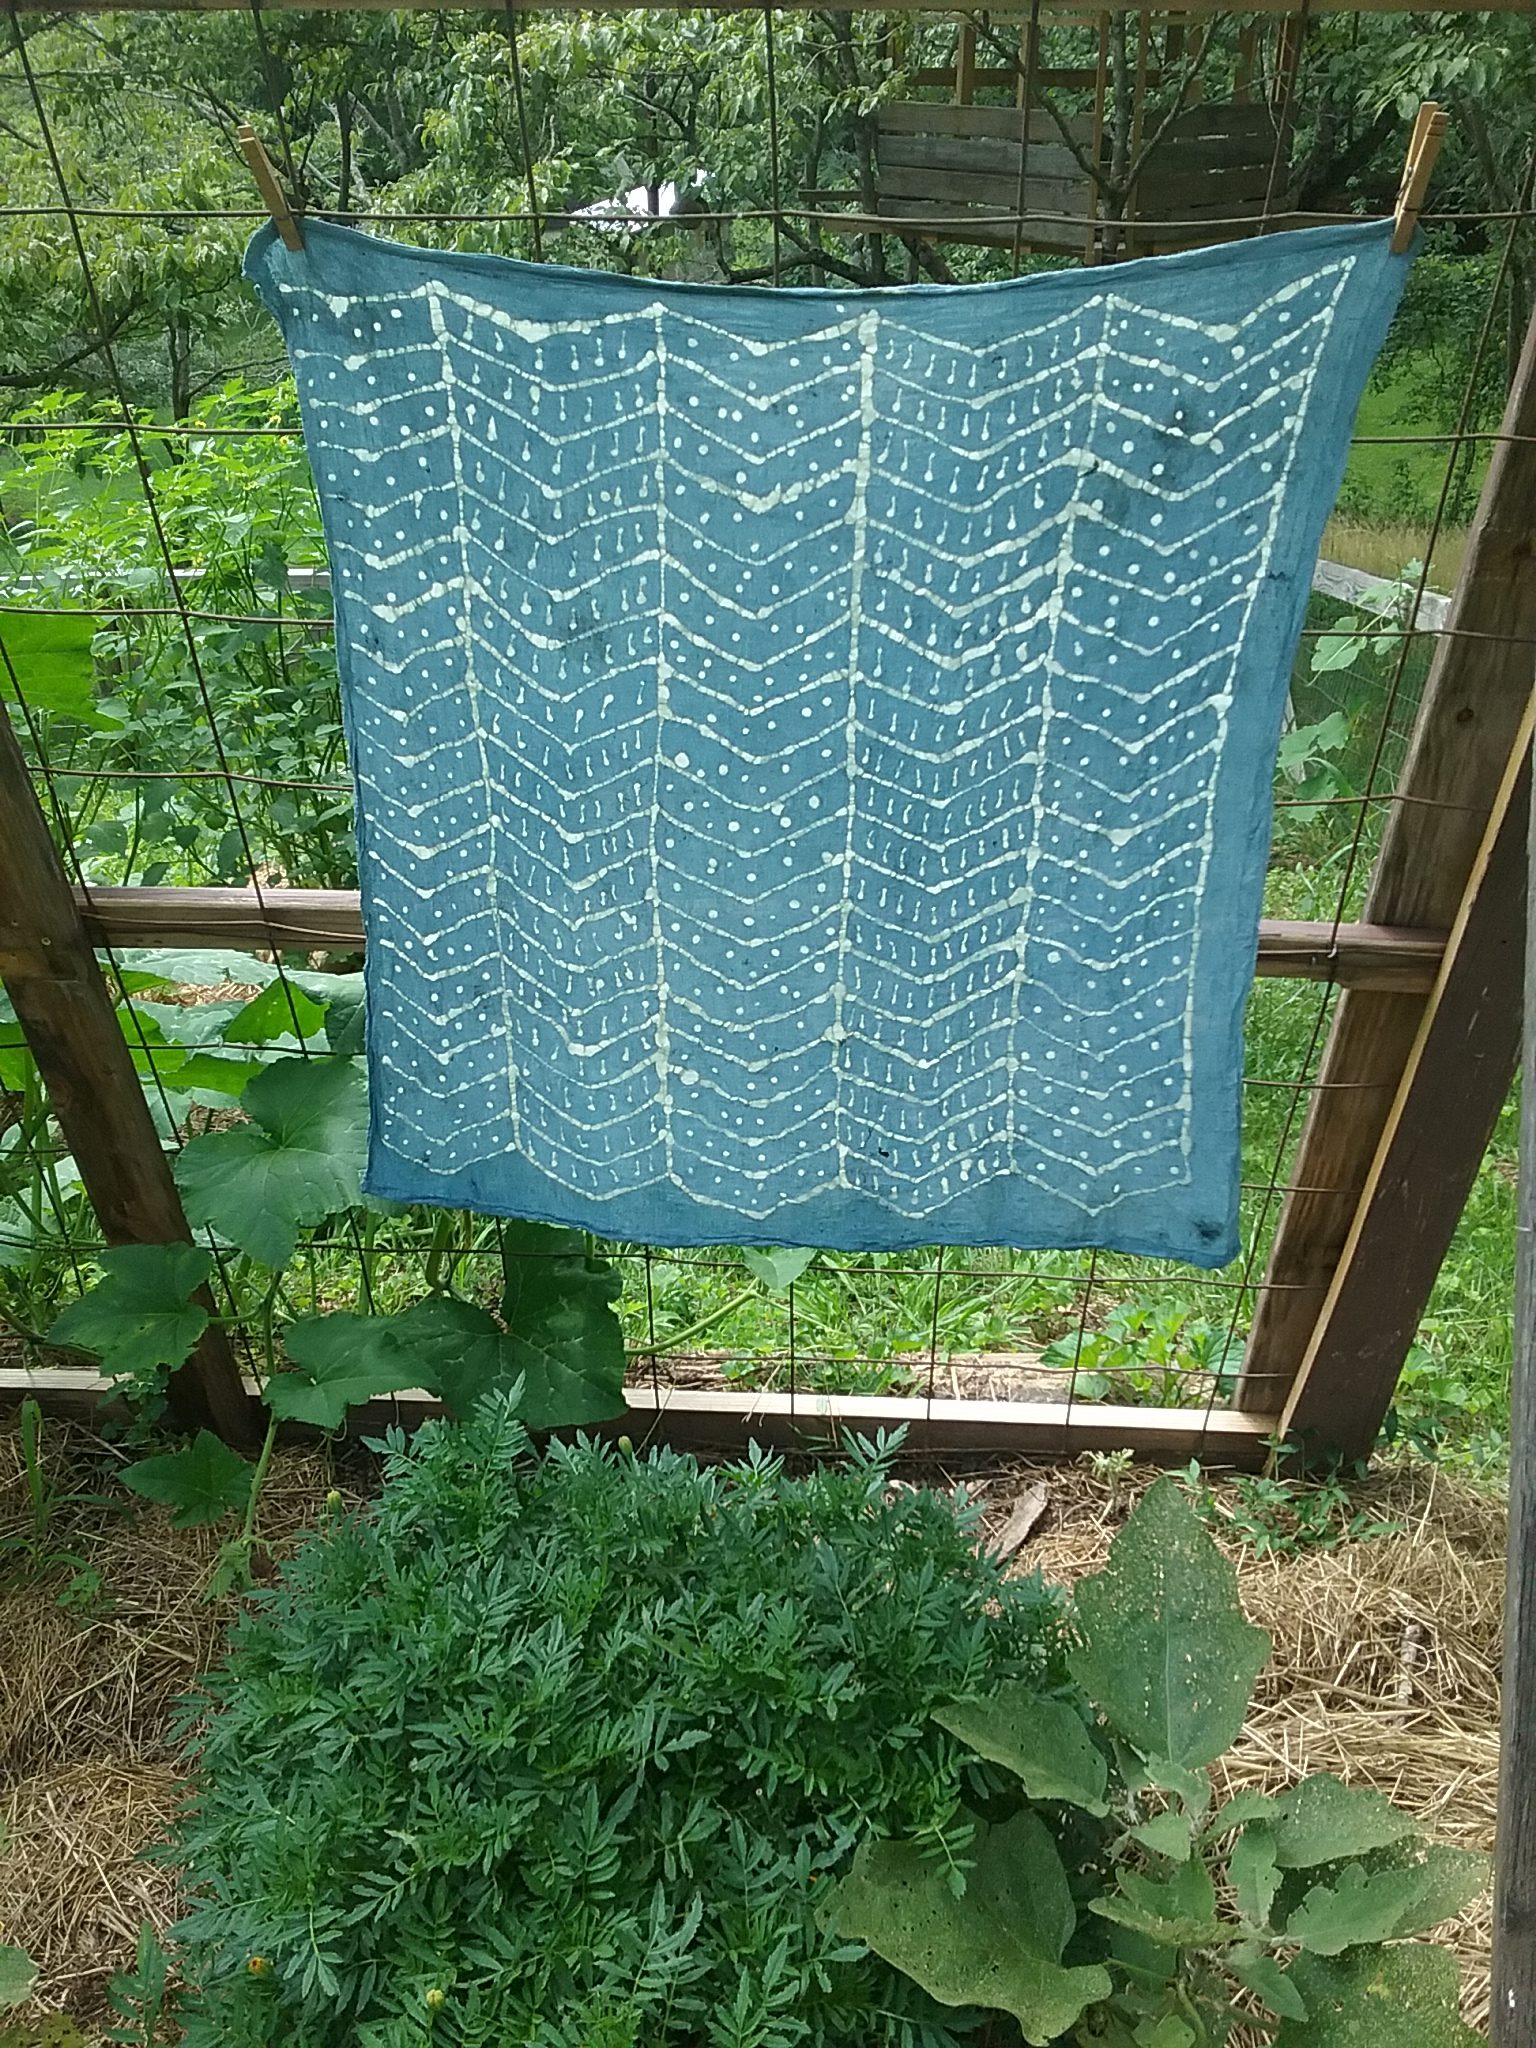
A first attempt at a simple batik, sig vat dyed in the garden
Resources
Historical context and detailed ‘recipes’ all kinds for natural dyers, including in great detail the construction of indigo vats, preparing fibers and troubleshooting: J.N. Niles: The Art and Craft of Natural Dyeing: Traditional Recipes for Modern Use
An amusing and eccentric history of the chemical industry, with project-based lesson plans: Kevin M Dunn: Caveman Chemistry
A very helpful and active community of natural Indigo processors
A detailed account of both composting and water-extraction methods for isolating indigo dye from plants: The Production of Indigo Dye from Plants