Kitchen Allies

By Greta Dietrich

Plants are intrinsically woven into our existence and have been throughout time.  All cultures and histories have depended on plants for survival, for nutrition and healing.  Many modern kitchen herbs have originated from other parts of the world and are not native to Western North Carolina.  Their uses and stories have been shared between cultures and passed down through generations.

Many of these herbs are in our kitchens right now and still used today much in the same or similar ways as our ancestors.  Each plant holds a unique story reminding us that healing is accessible and begins right outside our door.  The human/plant relationship and intertwined histories are essential wisdom that is vital to preserve.  By bringing the green world into our kitchens we broaden our connection with the natural world and deepen our relationship to our own healing and health.

The herbal allies mentioned here are easily found at any grocery store.  Without even knowing it you may have already been integrating many of these herbs into your culinary pursuit.  A reintroduction to these plants may be revealing as to the spectrum of healing they may offer; sometimes we just need a reminder of the abundance of what we are already acquainted with.

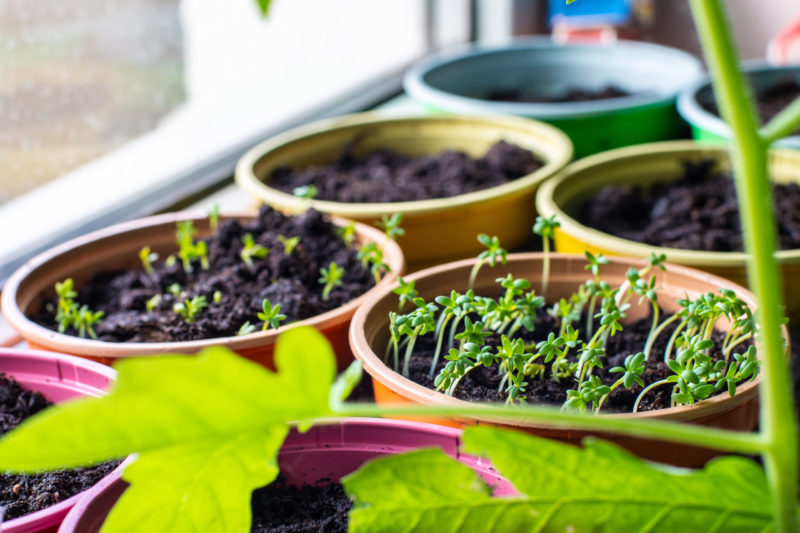
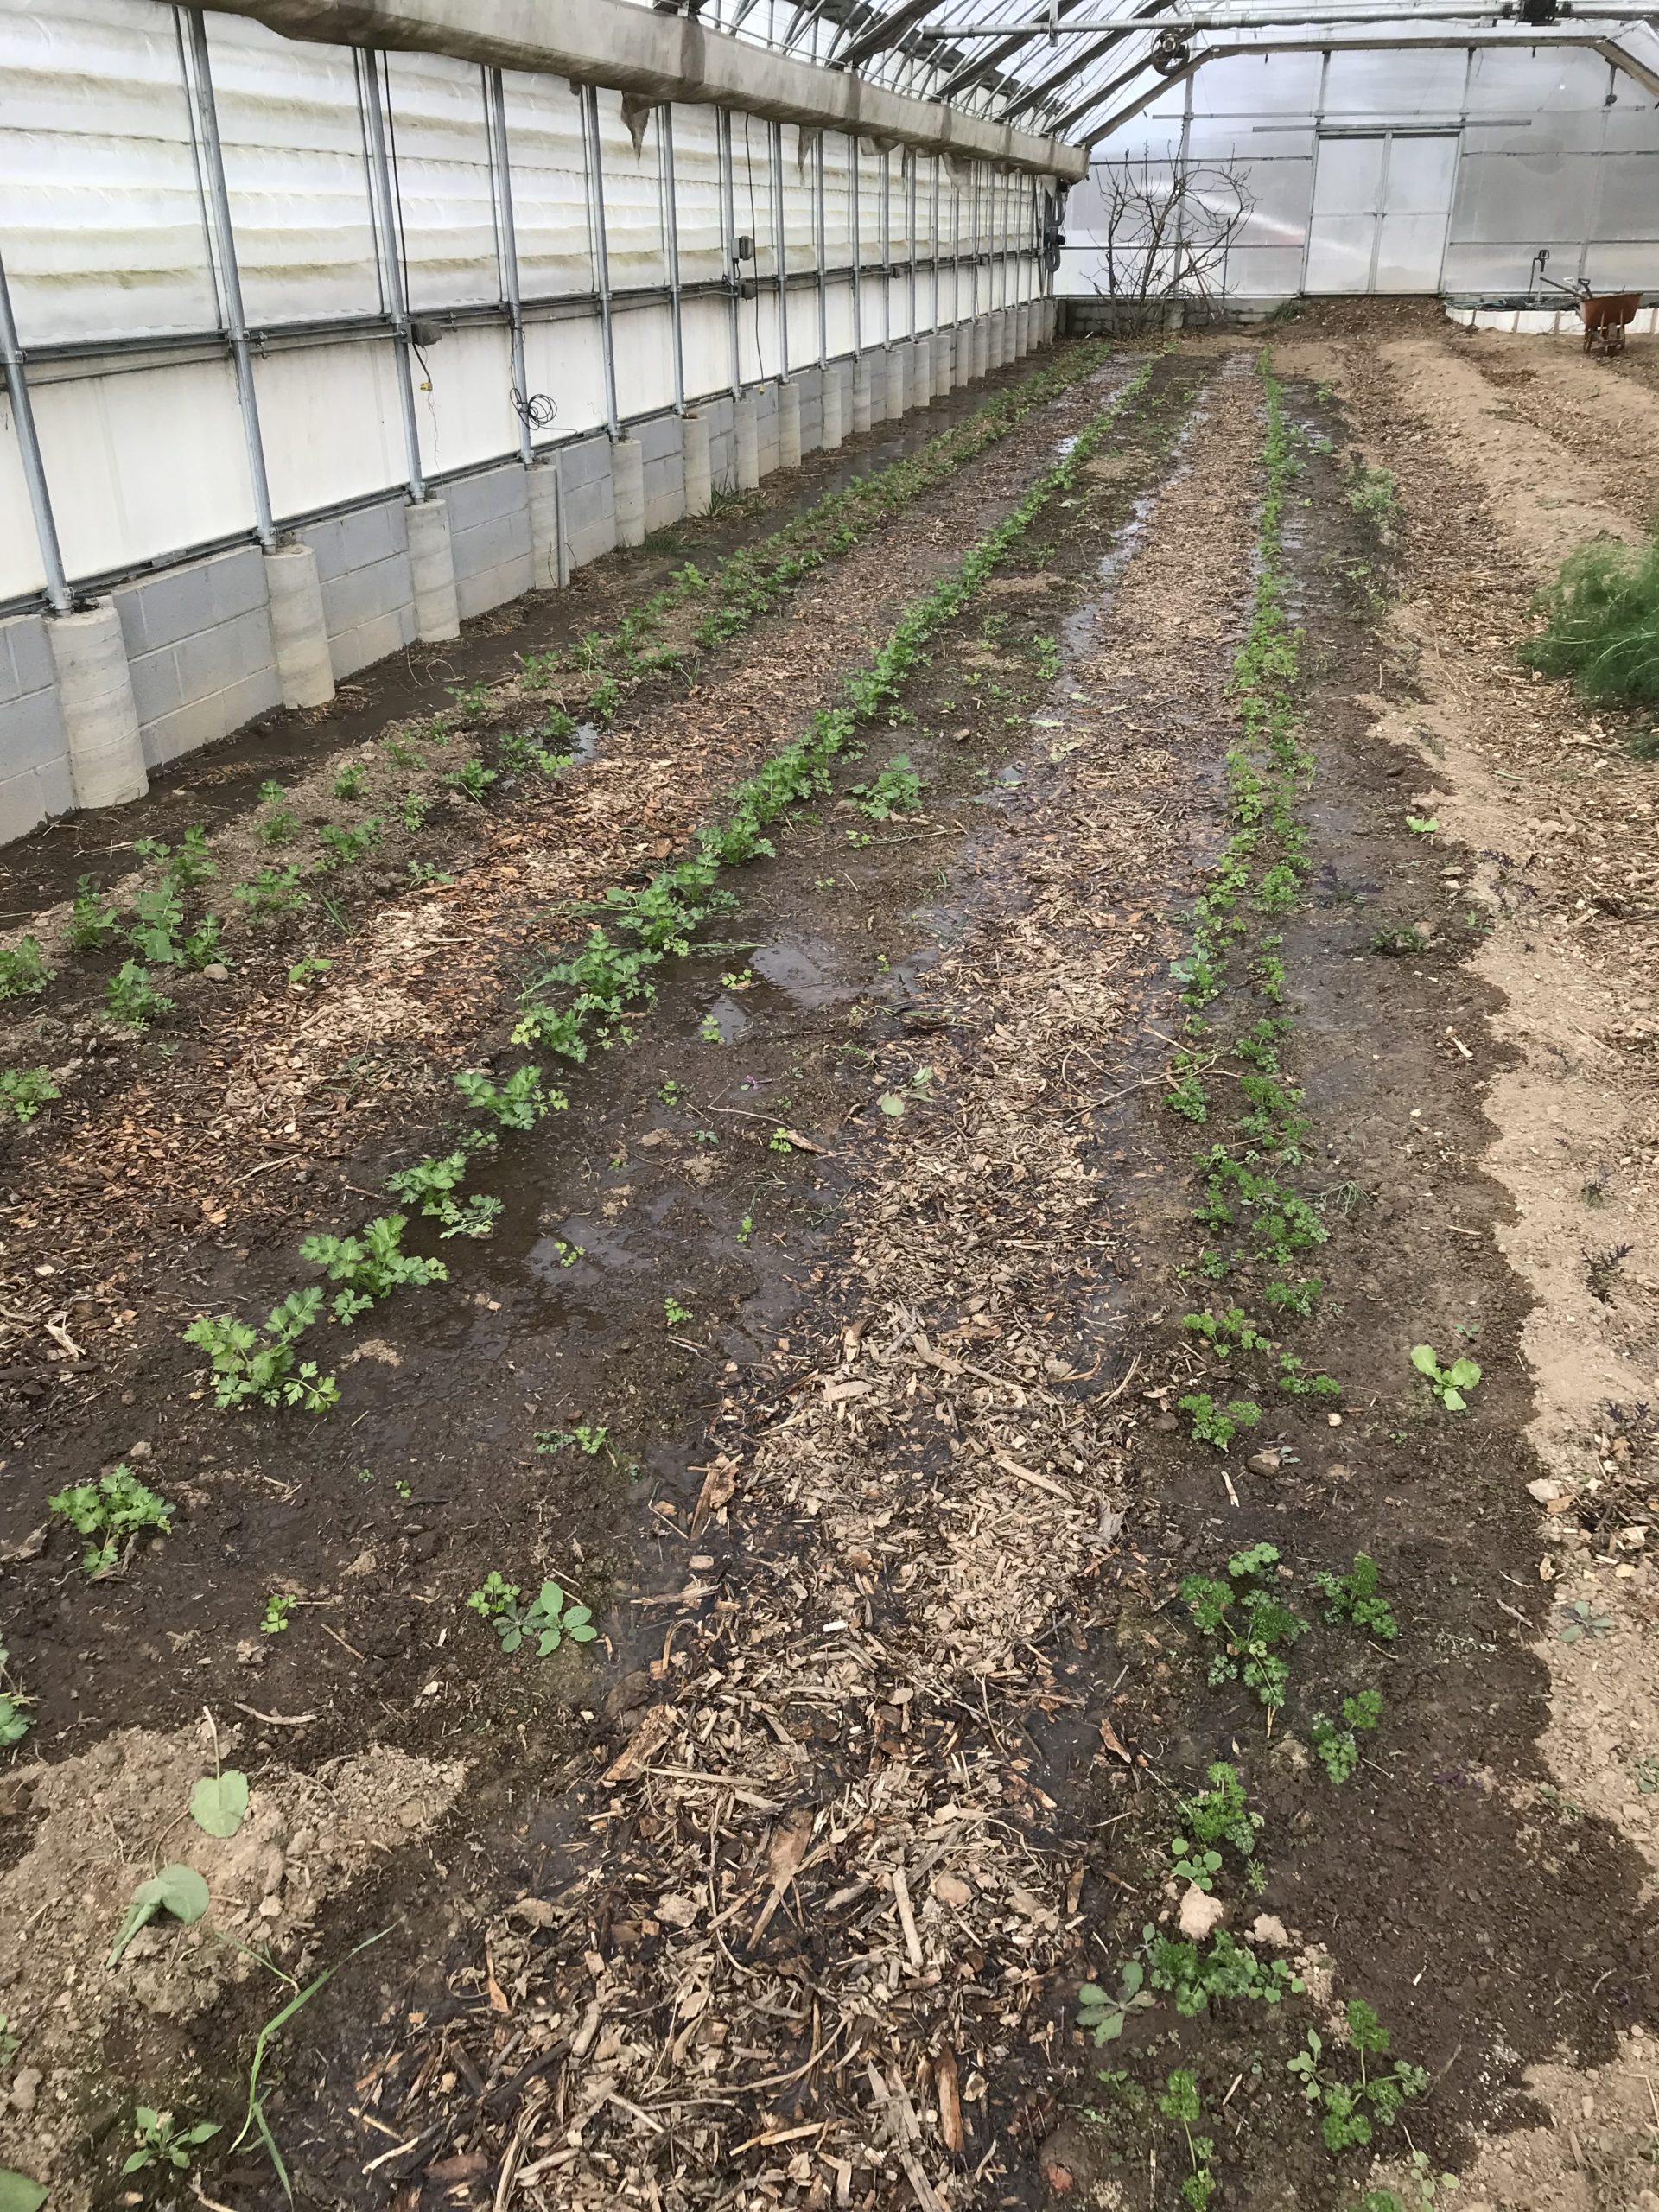
These common herbs, many of which belong to the mint family, can be easily grown and very adaptable if you have the space.  If you live in a city or apartment and do not have the space to garden, try container gardening.  If that is not realistic, try a community garden or CSA (community supported agriculture) or your local community co-op.  Consuming plants grown in your bioregion (locally grown) have a rich phytochemistry of active constituents specific to that place they grow.  The specific ecology of these locally grown plant allies can aid the body in its adaptability and immune function.  Get to know these plants and they will be allies.  Growing your own herbs and/or learning to wild forage is good practice in sustainable health and  preventative medicine.

Garlic: Allium sativum

Garlic is native to Central Asia and Northeastern Iran. Garlic has been found in ancient Egyptian tombs, Greek religious temples, and it has been mentioned in ancient Traditional Chinese and Ayurvedic materia medica.  It has been prized for its medicinal uses for 5,000 years.  This classic staple, also known as “stinking rose”, has been used around the world on every continent for thousands of years.  Our ancestors used it often as a blood cleanser and anti-parasitic,  with reference to its ability to increase stamina in athletes, soldiers and the working class.  Its odiferous qualities can be contributed to the strong concentration of sulphur compounds.  The medicinal benefits of its culinary uses can be enjoyed on a daily basis to heal and increase immunity.  As an herbal ally it acts as a circulatory stimulant, which aids the heart in moving blood through the body and tissues, while also reducing cholesterol.

Garlic’s immune modulating actions refer to its ability to enhance the body’s ability to create natural killer (NK) cells.  The antimicrobial and antiviral actions of garlic have been shown in studies to be an anti-inflammatory powerhouse.  Similar to the action of antibiotics, garlic acts as an immune stimulant and also decreases pathogens in the body without killing or modifying the gut flora.  Lastly, but certainly not least in it’s repertoire of actions on the body,  garlic is a stimulating expectorant.  An expectorant aids the respiratory system in releasing mucus and phlegm, acting as a stimulant when lung congestion is present by assisting in the release of mucous through the action of coughing.  Garlic is a sure ally during cold and flu season.

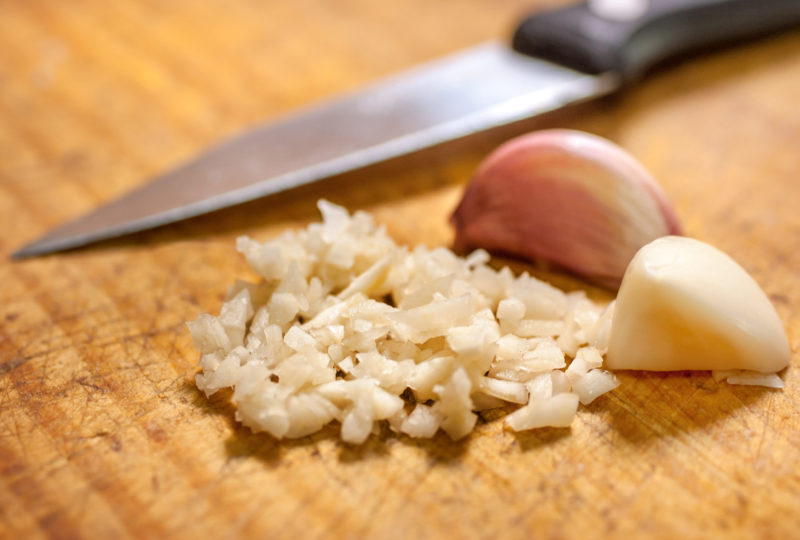
Taken daily as a tonic, garlic is a beneficial plant with a broad spectrum of uses.  You can do this by adding it to meals.  It is suggested that upon mincing garlic, let it sit after chopping on the cutting board for 15-20 minutes to maximize health benefits.  This “resting” period for the garlic activates an enzyme called Allicin which boosts the immune system.

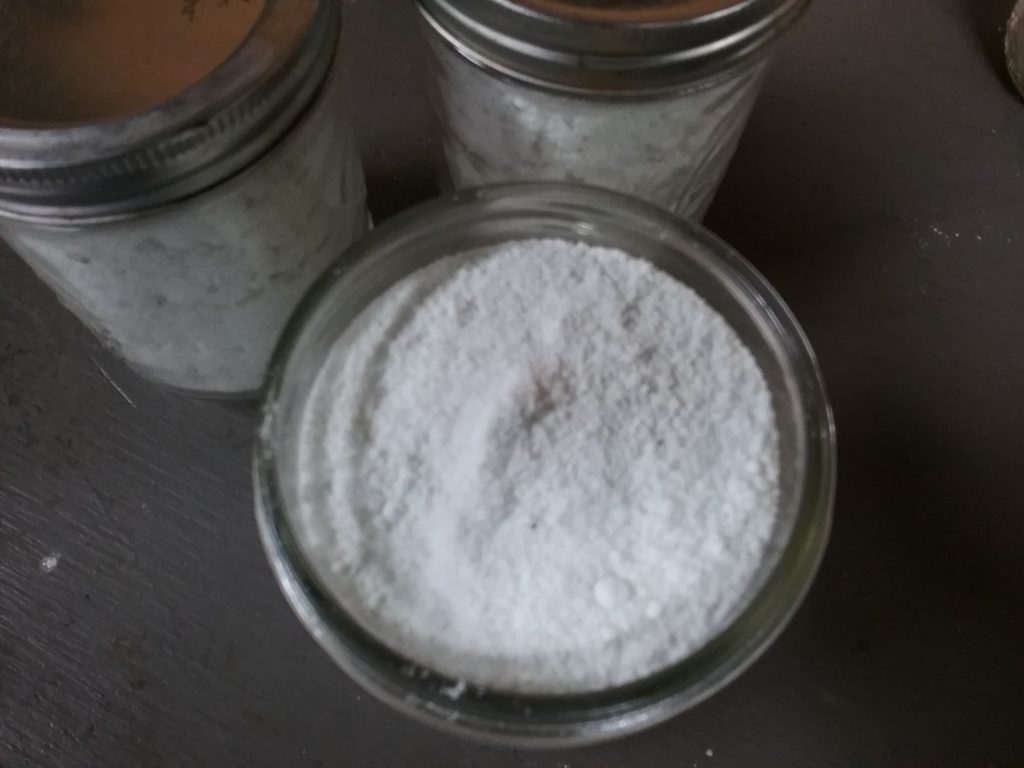
Finer chopping yields more allicin, which is responsible for its antibacterial and antifungal actions.  It is considered preventative for heart health, diabetes, and immune support.  It commonly has innumerable applications to be used in food.  The addition of garlic as a daily condiment when used fresh, sautéed, fermented or as an infused garlic in honey, is a great way to use garlic into your diet for additional health benefits.

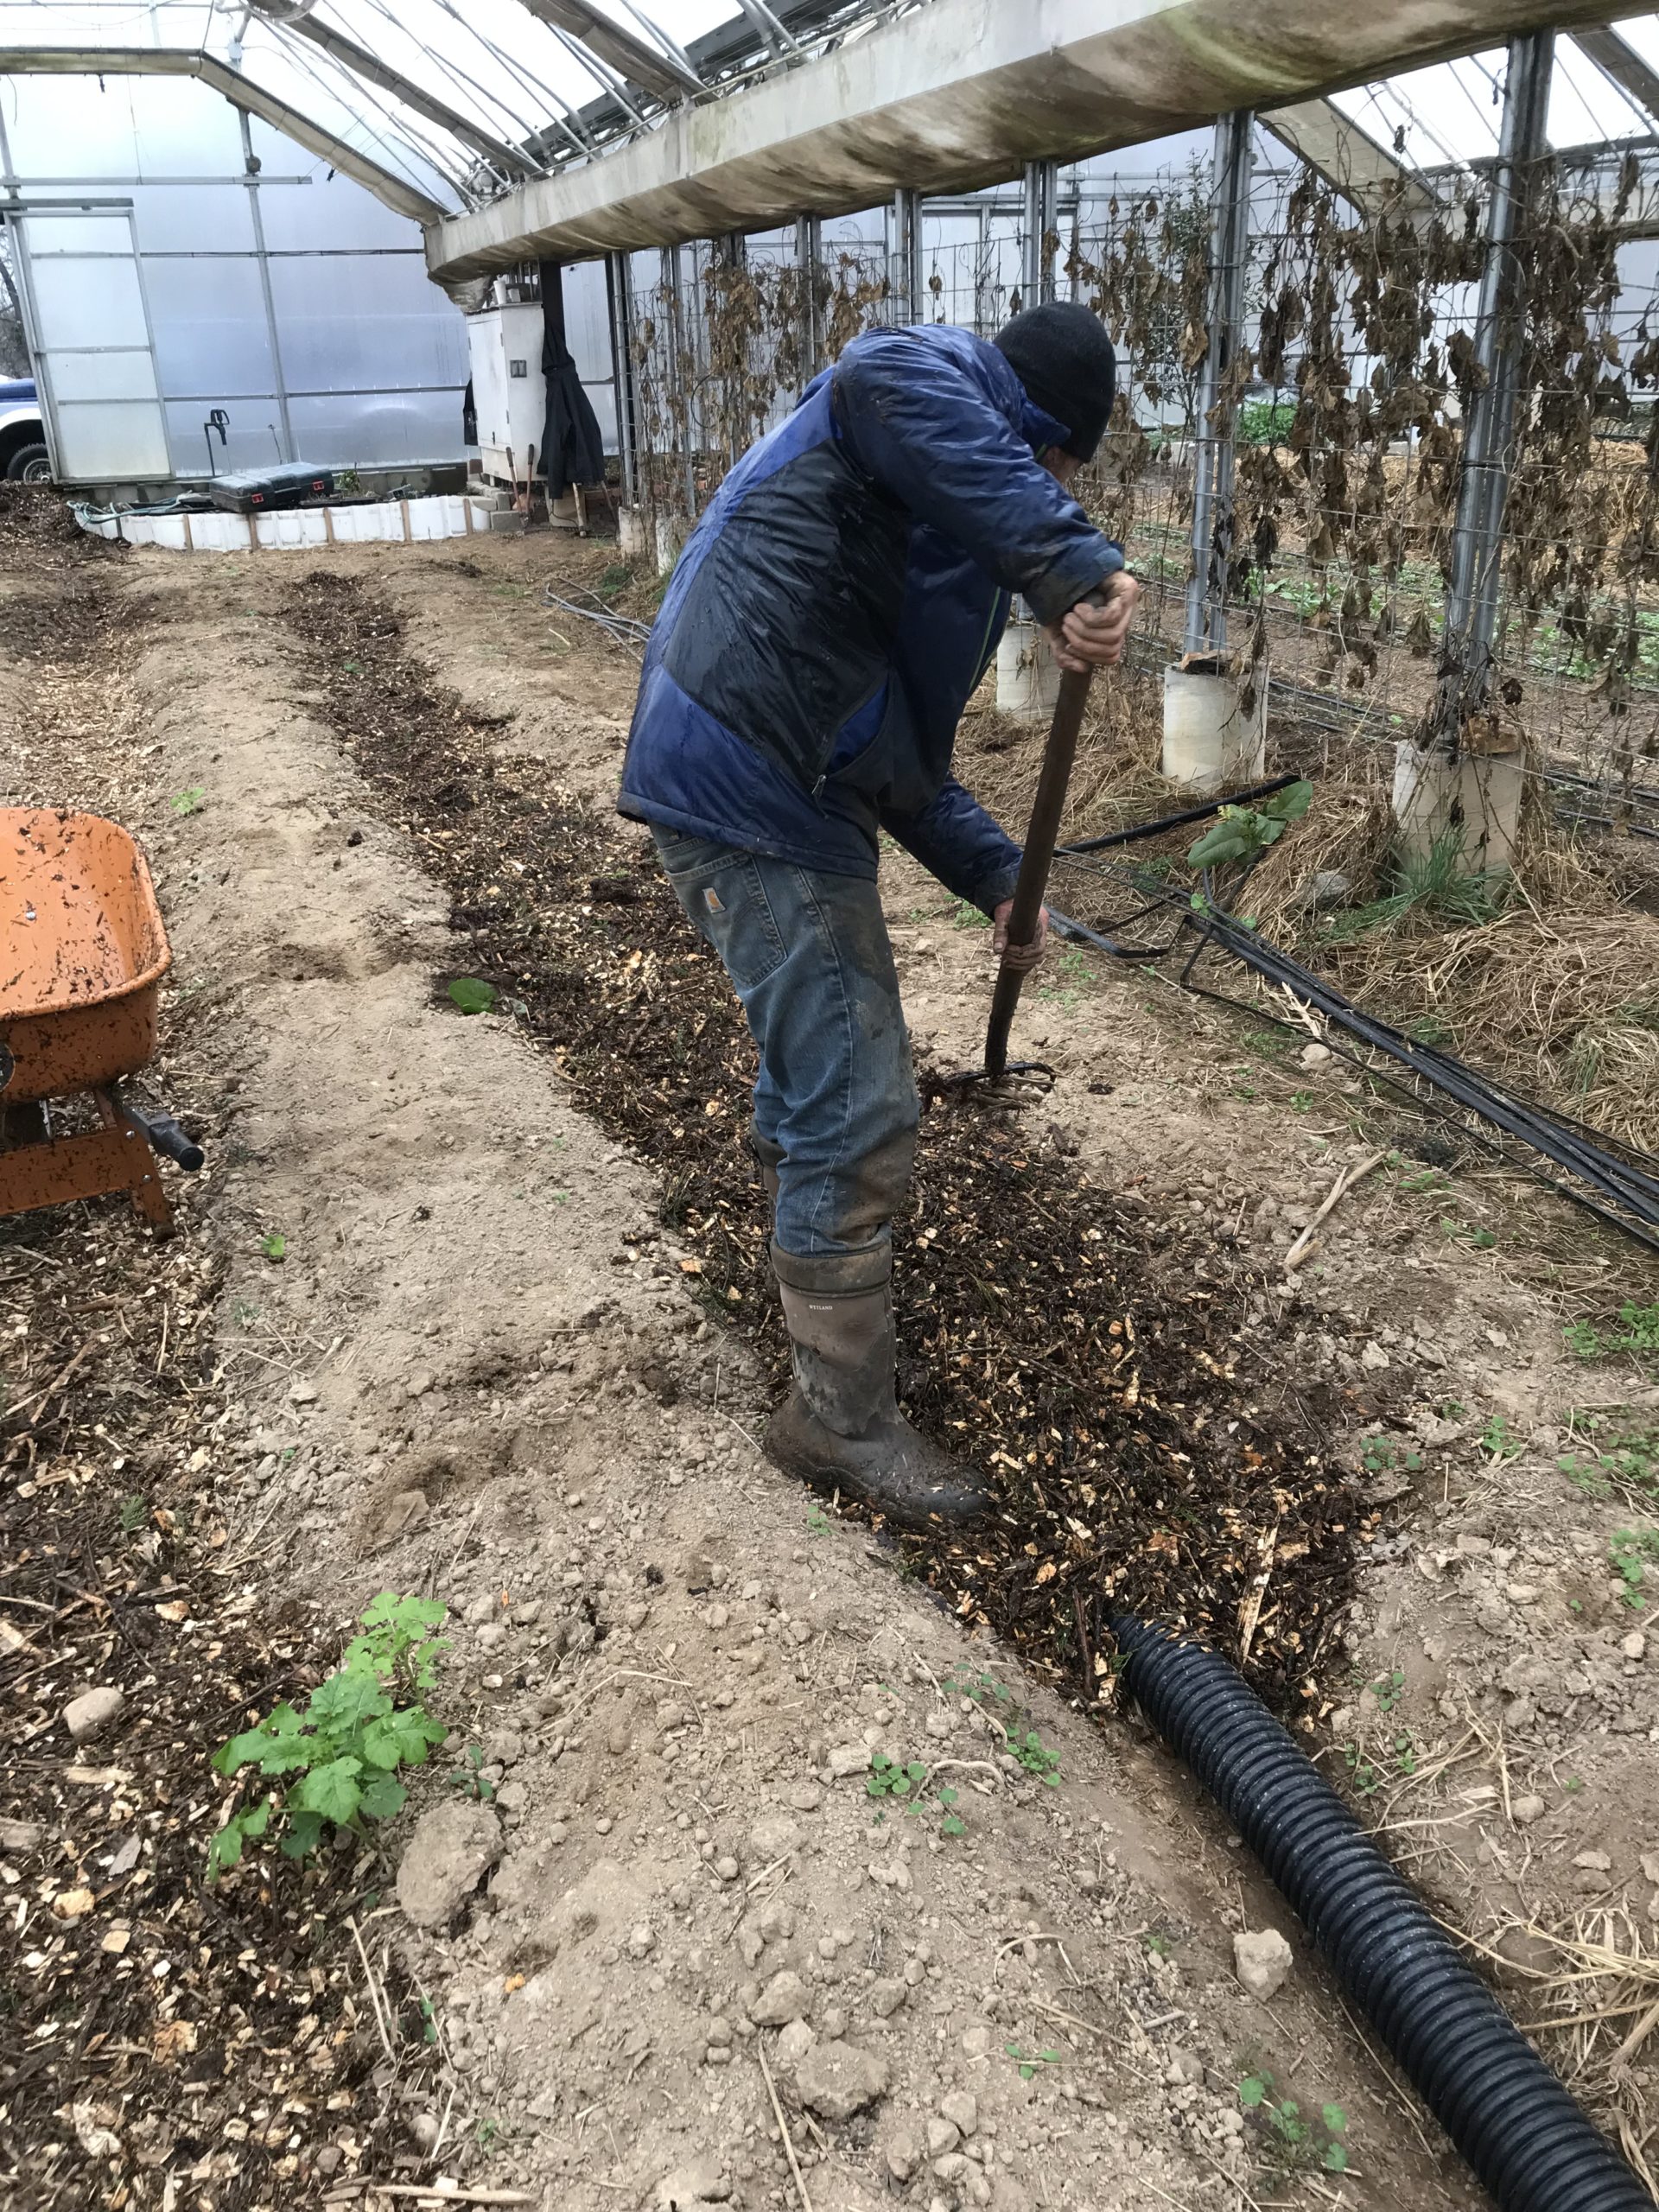
Garlic is an easy and rewarding crop to grow at home either in containers or in your garden.  Garlic is planted in fall or early winter and harvested in mid summer.

Thyme: Thymus vulgaris

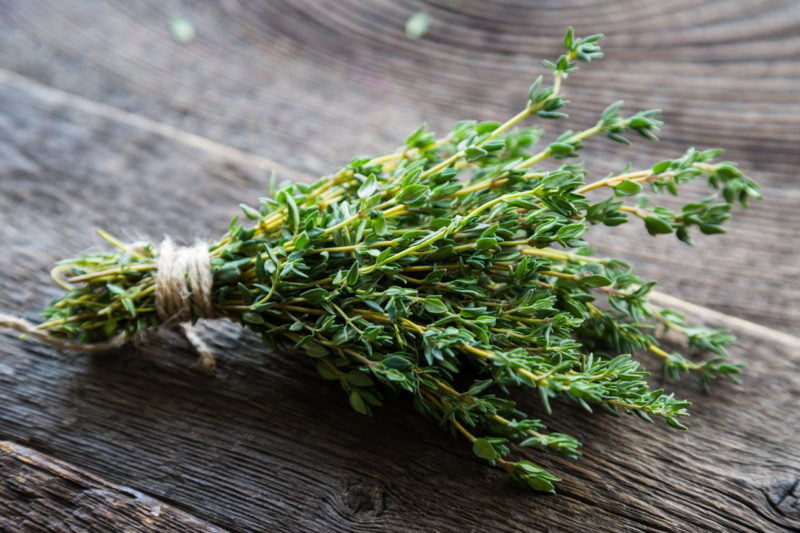
This ancient culinary herb is a perennial native of Southern Europe and Western Mediteranean. There are around 300 varieties of this very aromatic plant. Thyme is a member of the mint family as well. The scent of thyme is characterized by the phenols Thymol and Carvacrol. The name originates from the Greek word thumos meaning courage.  Warriors and knights alike would wear sprigs of thyme when entering battle, as it was believed to give them added strength.

An infused honey can be made by harvesting the vitamin A and C rich sprigs in the spring before flowering.  It is handy to have on hand by fall to aid in treating coughs.  Thyme can be utilized through steam inhalation to treat upper respiratory infection.  As a tincture, it can be taken internally for its antimicrobial and antibacterial actions.  Thyme makes a wonderful infused vinegar used to make salad dressings or as a tea.

Thyme is one that is easy to grow, and I have found it is forgiving.  No matter the size of your garden, there is room for thyme.  It also grows well in pots.  You can grow easily from seed by cuttings or layering in a rich well draining soil in spring either in pots or directly in the soil.   Harvesting can be done throughout the entire growing season.

Rosemary: Rosmarinus officinalis

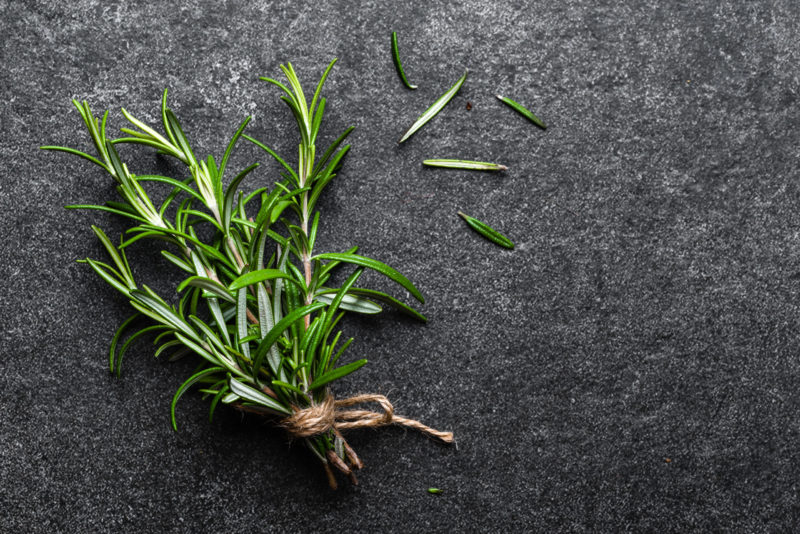
Rosemary is a mediterranean shrub and a member of the mint family.  Medicinally it is used as a mental stimulator, circulatory stimulant, anti-microbial, stimulating/relaxing Nervine, and as a treatment for fungal infections.  As an evergreen shrub ( in warmer climates) with needle-like leaves, rosemary has a reputation as an herb for remembrance.  The scent is a deep robust lemony pine woodsy aroma, refreshing to the mind.  Rosmarinus means “dew of the sea”.  The ancients revered this herb for strengthening the memory.  Rosemary was traditionally worn by brides in their hair so as to always remember their families, and the dead would be buried with it so as not to be forgotten after they were gone.

As the ‘memory’ plant, or ‘remembrance’ plant, has approached present day, research has shown that the essential oil of rosemary aids in short term memory.  The blend of rosmarinic, acid, carnosol and carnosic acid helps with oxidative stresses in the brain.  In the scientific community there is recent interest to further study this plant for all of its cognitive enhancing and antioxidant functions.  The inhalation of the essential oil either in a steam bath or humidifier is shown to be beneficial in aiding in remembering and recovery.

Research has been done revealing that rosemary’s essential oil and tea has been used to reduce side effects of radiation damage.  In many studies done, it is shown the consumption of rosemary drastically reduces the side effects of radiation sickness.  It is used as a fervent heart health herb because of its circulatory stimulant actions and ability to improve inflammation in the cardio-vascular system.

As with many plants in the mint family,  rosemary is also an ally for colds and flus. It aids in relieving symptoms of congestion in the sinuses by steam, teas or tincture.  According to The Treasury of Botany, a popular dictionary of the vegetable kingdom published in 1866 by John Lindley and Thomas Moore:

‘There is a vulgar belief in Gloucestershire and other countries, that Rosemary will not grow well unless where the mistress is ‘master’; and so touchy are some of the lords of creation upon this point, that we have more than once had reason to suspect them of privately injuring a growing rosemary in order destroy this evidence of their want of authority.’

The leaves can be harvested at any time during the growing season and used fresh, dried or frozen to use during colder months.  Rosemary is easy to grow in warmer climates. It prefers full sun, south facing against a wall to protect from the North wind especially in winter months. Mulching is essential if grown in colder climates outdoors or can be brought indoors easily in a pot and placed in a window in full sun.

Parsley: Petroselinum crispum

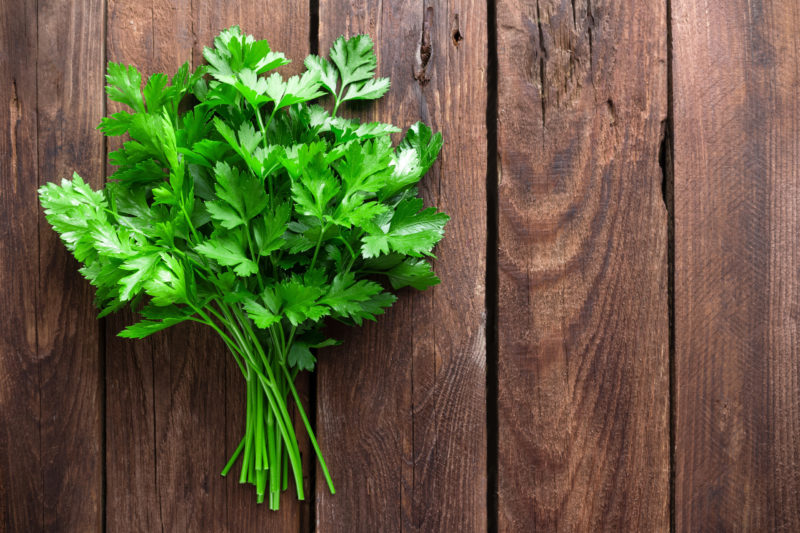
Another native to the Mediterranean region, Parsley is a member of the carrot family Apiaceae.  Parsley is a widely used culinary herb, great both fresh and dried.  Many cultures are reported to wear it for various reasons – the Romans in particular wore it as garlands to ward off intoxication during festivals and were given as a wreath during weddings to ward off and protect against evil spirits.  Grown as a biennial herb in northern climates as it takes two years to complete its life cycle.  There are two types of parsley, flat leaf parsley and curly leaf.  The leaves picked in their first year are best.

Parsley offers more nutritional value than most folks are aware of.  It is extremely high in vitamin A and C and it supplies five times more than your needed daily intake of vitamin K, which is instrumental in bone health and blood clotting.  Parsley is extremely rich in antioxidants.  Antioxidants reduce stress in the body associated with oxidation.  To get the most benefits from parsley start integrating it more as a staple than a garnish.  Using it in larger quantities in your salad, pestos and soups.  Most often parsley is more thought of as a digestive aid, however you can also use parsley as an ally for the urinary tract system as parsley aids in urinary tract infections and kidney stones.  Most folks aren’t familiar with the root of parsley, but used as a strong decoction it has a much stronger diuretic action.

Growing parsley is easy directly in pots or in the garden.  Plant in direct sun, in well-drained soil and water regularly.

Ginger: Zingiber officinale

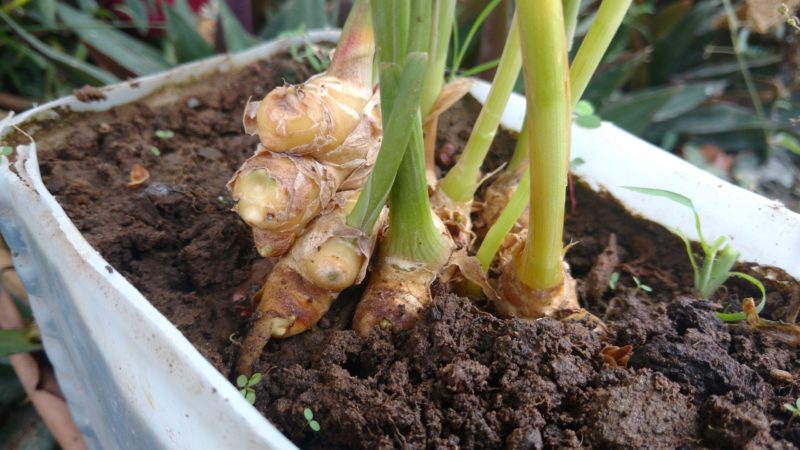
Ginger is historically known as the “great medicine” or “mahaoushadha” among ancient Indians. A native to southeast Asia, ginger has been used for many thousands of years.  Ginger was introduced into the Americas by the Spaniards.  As a tropical perennial it is now widely cultivated all over the world.  It has a subterranean stem, known as a rhizome, that is the edible portion of the plant.  The spicy and sweet flavors of ginger come from the phenolic elements of gingerols, its most abundant constituent.  This pungent herb is very warming and drying. Incredible for aiding in digestion, it works wonders as an anti-inflammatory, antimicrobial, stimulating expectorant  and blood mover.  I often get asked if I could choose only one herb that I could use if I was stranded somewhere, I pretty much always think of ginger.  I use it in the winter months to warm me up, as it improves circulation to my chilly feet.  I drink its fresh squeezed juice to help stimulate my immune system and is a great ally for relieving stomach aches (although be wary of giving the fresh juice to children as it is powerful).

In Chinese medicine the fresh root is called sheng jiang.  In its fresh form its used to promote sweating and as an expectorant for colds and flus.  The dried root is called gan jiang and is used to warm and stimulate the stomach and lungs, a yang tonic and restorative.  Ginger is also used to moderate pain with its anti-inflammatory actions, and is specifically good for cramping associated with digestive issues or menstruation with its anti-spasmodic actions.  For colds and flu ginger aids the body in releasing stuck mucus using a poultice over the chest or by drinking a strong decoction.  Cooking with ginger in soups is a great way to become acquainted with its ability to offer its medicinal benefits by also enjoying its flavor.

It can be grown in a pot in a sunny windowsill, outside during warm/hot months in a pot or interplanted in the garden.  They do very well in the greenhouse.

Sage: Salvia officinalis

There are many different species of sage.  S. officionalis is known as the garden sage – a perennial evergreen shrub also native to the mediteranean region, and also another member of the mint family the Laminacea.  Salvia is the largest genus of this family which includes nearly 900 species.  It is the culinary sage S. officionalis that is familiar to most kitchens.  The word salvia is derived from the Latin word Salveo ‘to save or heal’.  This gives reference to the many healing attributes this plant has.  Traditionally it is associated with longevity and has a reputation similar to rosemary with restoration of failing memory.  In lineage with other plants that are associated with memory, it was a popular herb to plant on top of graves.  Historically it was very popular in trade as well.  While tea was being traded between the British and the Chinese, it is reported that the Chinese valued sage so highly that they would exchange two cases of tea for one case of the English sage.

Sage has a strong and pungent flavor with a slight bitter tang.  This bitter pairs well with fatty food.  The aromatic bitters of sage have traditionally been used in ales.  The leaves can be harvested throughout the growing season and used fresh or dried.  The herbal actions of sage are carminative, antispasmodic, astringent, anti-biotic, reduces blood sugar levels, promotes bile flow, circulatory stimulant, sedative and clears heat.  The leaves can be used in an infusion to create a digestion, liver stimulant, improving digestion.  This sturdy and drought resistant resinous herb grows within a large spectrum of growing zones.

Sage is a very forgiving. It a sunlight lover and prefers well drained soil.  It should be direct sown into pots or the garden.

Using plants in everyday life is essential to health.  The common cooking herbs are rich in benefits and applicable in so many different ways.  Their rich history in the lives of our ancestors has been preserved so much through food and medicine.  Start cultivating your own relationship with the green allies of the plant world into your life by bringing them closer, into your gardens, windows and kitchens.

All information written here is for educational and informational purposes only.  The statements here have not been evaluated by the Food and Drug Administration. Information is not intended to diagnose, cure, treat or prevent any disease.  Readers are advised to do their own research and make decisions in partner with their health care advisor.  If you are pregnant or nursing or have a medical condition please consult your physician.

DIY Activated Carbon

Like everyone else, Living Web Farms is adapting to the changing circumstances of the Covid-19 pandemic.  Expanded farm operations and food donations are now top priority.  We’ve started a new short-form, rough-edit video series for sharing immediately relevant information and a few weeks ago we offered our first of should be many free webcast workshops.  During this workshop I reviewed a number of different low-tech point-of-use water treatment technologies and quickly introduced some exploratory work with production of activated carbon from our wood-waste sourced biochar.  Today, for the blog, I’ll take a closer look at activated carbon and how it’s made and used around the world for removal of chemical contaminants from drinking water.

A screenshot from one our latest webinar-based workshops


Household Water Treatment

In 2015 the World Health Organization estimated that 2.1 billion people do not have safe water at home and of those, 159 million still primarily drink water from untreated surface sources such as streams and lakes.  Surface water is rarely fit to drink unless clarified and treated for the removal of biological and chemical contaminants.

Diarrheal diseases as a result from consuming microbiologically contaminated water are a severe and immediate human health concern.  An often cited WHO publication estimates that 2.2 million people die every year from gastrointestinal infections.  Tragically, young children are especially at risk of life threatening cases of diarrhea and further developmental issues related to malnutrition in non-lethal cases.  The good news is these diseases are largely preventable – and much attention has been paid to providing appropriate microbiological water treatment technologies to those in developing countries, ranging from the no-tech SODIS method, to locally produced biosand and ceramic pot filters, and beyond to the more recently developed higher tech personal use Steripen UV device and Madidrop tablets.  The downside is that, for the most part, these technologies do very little for treating water for chemical contamination.

Chemical contaminants may range from those that are naturally-occurring like arsenic, radon and fluoride, to lead in aging municipal water systems, or to the more complex and insidious herbicides, pharmaceuticals and industrial pollutants.  Interestingly, arsenic can be mitigated with locally-made iron-modified biosand filters and fluoride can be removed by passing water through calcium-rich bone char – However, altogether broad chemical decontamination of point-of-use drinking water is typically done with one of two technologies: removal via reverse osmosis or adsorption with activated carbon.


Biochar and Activated Carbon

If you’ve followed any of our work, then you’ll know we speak often about the physical properties of biochar.  Well-made biochar is resistant to decay, has a well-developed pore structure, and a high internal surface area.  These properties are what makes biochar work so well in building soil fertility – nutrients will ‘stick’ the internal walls of the charred material and diverse microbes can inhabit the open pore spaces.  Well inoculated biochar in the soil helps maintain a thriving soil ecosystem in the midst of external pressures such as tillage, drought or excess fertilizing.  In this way it can be even used as a vehicle for restoring fertility to damaged, lifeless soils.

Visible mesopores in our biochar at 400x magnification

One could think of biochar inoculation as essentially filtering a nutrient rich solution.  For example: If fresh, raw biochar is added to a bucket of tea made from rich worm castings, the nutrients will be drawn in and adhere to the internal walls of the porous char. One could now think of the tea itself as partially filtered.  Extrapolate from here and things get more interesting: biochar can be used in a cascading manner – for example, first as a filter adsorbing excess nutrients from the floor of the chicken coop, then to in the compost to maintain moisture stability and low bulk density, and lastly to its final destination in the soil.  Biochar could be used to filter water contaminants too, although it should be mentioned: careful attention should be paid to what is being filtered and whether or not it is acceptable to accumulate and bury these contaminants.

Before moving on, lets review a few definitions:

  • Biochar is essentially an agricultural or forest waste-based charcoal that is destined for the soil with the intention of building fertility.  This is an important distinction when marketing the material, as biochar is usually processed at higher temperatures than regular charcoal, sieved, and sold in pre-inoculated compost blends.
  • Charcoal that is intended for cooking might be processed at lower temperatures, leaving behind compounds that help it light easier and give its characteristic charcoal flavor.
  • Filter charcoal should be processed at high temperatures, as to remove all possible pore clogging tars and maximize usable surface area.  Typical filter charcoal is a select biomass that has undergone pyrolysis, but has not been Activated.
  • Activated carbon is like filter charcoal, but further processed to increase internal surface area.  Activating charcoal is distinctly different from Incoculating or Charging biochar.

The first documented case of charcoal as a filter substance hails from around 1500 BC when ancient Egyptians used it to absorb odors when dressing wounds.  Around 400 BC, Phoenicians would store potable water in charred barrels on their trading ships to ‘improve taste’. But it wasn’t until the late 18th century that scientists began to understand charcoal’s adsorptive properties.  In 1913 French chemist Michel Bertrand dramatically swallowed a lethal dose of arsenic, followed it with charcoal and survived.  A few decades later, another French scientist would publicly perform a similar demonstration by swallowing strychnine and charcoal in front of the French Academy of Sciences (he was however apparently booed off the stage).  In 1903, inventor and ‘subject of the Emperor of Russia’ Raphael Ostrejko was granted the U.S. patent for a ‘process of obtaining carbon of great decolorizing power’.  What he was describing was carbon with an improved adsorption capacity – produced by applying controlled steam over red hot charcoal – that would eventually be known as activated carbon.


Activated Carbon

Today, activated carbon production is a multi-billion dollar enterprise supplying material to a broad range of industries.  It can be found in numerous consumer products from gas masks to posh cosmetics.  It can be found in hospital emergency rooms, electro-plating facilities, distilleries and water treatment facilities.  Modern activated carbons are produced in a number ways, usually under specific parameters for targeted end-use applications.  All activated carbons are characterized by well developed pore structure and high adsorptive capacities – some may be chemically treated or ionized to target specific pollutants.  Our interest here is in granular activated carbons for water purification. They are generally produced in one of three ways:

  • Physical Activation – Charcoal is produced, sieved to specification,heated to 800-1100C and then steam, carbon dioxide gas, or some other oxidizing agent is carefully applied, creating additional fractures and tiny micropores along its internal mesopores.
  • Chemical Activation – Prior to carbonization, biomass is milled and chemically pretreated – possibly with potassium hydroxide or phosphoric acid, or a salt such as zinc chloride.   Activating agent is chosen based on biomass properties and desired chemical qualities of the end product.  Lower temperatures are required for activation, but chemical activation can be very corrosive to pyrolysis equipment.
  • Physio-Chemical Activation – Charcoal is produced, sieved, and then chemically activated and heated to a high temperature.

SEM photograph of Activated Carbon Source

In water treatment applications, activated carbon is mostly used for the removal of natural and synthetic organic compounds including, but not limited to chlorine and disinfection byproducts, industrial chemical pollutants, and some relatively harmless, naturally occurring compounds that negatively affect odor and taste.  This works mainly through physical adsorption – molecules are drawn in via intermolecular forces and then stuck to the massive internal surface.  One could think of this is a weak magnetic force, or similar to adhesion like dust on tape.  If considering granulated active carbon for a water purification project remember:

  • Contaminants must be in extremely close proximity to the carbon for adsorption to work. Contaminated water should not be allowed to bypass the filter media. For this reason, dense packed filters are better than loose ones.
  • Adsorption improves over time. Slower water flow rates through the filter medium are generally more effective. For this reason, gravity fed systems are generally more effective than pressurized ones.
  • Contaminants will occupy available surface area and build up over time.  Eventually this surface area is no longer available and some contaminants will bypass the filter.
  • Breakthrough is described as the point at which the filter is no longer effective at keeping specific contamination levels under acceptable limits.
  • Well designed carbon filters factor in reasonable breakthrough points for various pollutants and acceptable flow rates.
  • Activated carbon filters can be designed to be more effective at holding some contaminants than others – the breakthrough point of the contaminant with the lowest affinity determines the filter’s ‘expiration date’.

The science of activated carbon is complex, and it’s understood that I shouldn’t expect to be able to make gas-mask or pharmaceutical grade carbon in my backyard over the course of a weekend.  Nonetheless, perhaps out of ignorance, arrogance or genuine curiosity –  or some inspiration by the 19th century French scientists who risked their lives for science – I set out to explore whether it was feasible to make filter-grade activated carbon from our biochar at Living Web Farms.


DIY Activated Carbon

In late winter of this year I set out to explore what it would take to make granular activated carbon (GAC) from our biochar.  My ultimate goal was to have a material suitable for the adsorption of any potential hazardous chemicals in my rainwater collection system.  At my home I have a simple food-grade IBC tote and repurposed barrel collection system that retains water collected from asphalt shingles, aluminum gutters and flexible PVC piping.  400 gallons of storage means I can handle irrigation needs for up to a few weeks, and still have backup domestic water for the times when my aging community well system goes down for maintenance.  Incoming rainwater is almost always cleaner than surface water – although one must consider the roof itself is a surface of its own.  I would need a system that allows for settling of particulate matter, simple filtration, microbial deactivation (I’ll be using chlorine for residual protection) and protection against potential organic compounds and chlorine byproducts.  Now I use the popular Berkey brand carbon block filter system – in the spirit of self-reliance, for future experimentation I’ll be using a refillable canister filter and allowing for the longest possible filter contact time.

My simple rainwater collection system

For our experiments in activated carbon production I took inspiration from the immensely popular Cody’s Lab YouTube channel.  Cody does a great job in his video explaining activated carbon, where he then goes on to produce a small amount of steam-activated material in an electric induction oven and follows it up with an iodine test to compare its adsorption capacity to store bought material.  My plan was to perform a similar experiment, using our hardwood biochar as a feedstock, screened and heated with LP in the standalone refractory chamber our team built when developing our atomizing pyrolysis oil burners.  At the same time I set out to compare the adsorption capacities of several ‘DIY’ chemically activated chars, this time, following the recipes provided by several other popular youtube and survivalist-themed blogs.  Unactivated char produced in my TLUD cookstove was also compared.  Adsorption capacities of the final products were to be compared with two simple tests: (1) via visual indication of methylene blue adsorption and (2) following the R-134a adsorption procedure as described in chapter 8 of the Biochar Revolution.

Samples were prepared:

  • Enough retort-made biochar for several tests was screened to <1/8” and >1/16”, rinsed and dried at 350F for 2 hours.
  • TLUD char was similarly screened, washed and dried.
  • Canning jars were filled with the uniformly dried, granulated material and sealed until activated.

I proceeded to test several DIY chemical activation methods, following guidelines set out by popular DIY and survivalist-themed blogs:

  • A 4 oz. jar of prepared char was covered in 3 oz. of lemon juice and covered overnight.
  • 30mL of calcium chloride was dissolved in 100mL of distilled water.  This mix was poured into a 4 oz. jar of prepared char and stirred to paste consistency.
  • A potassium hydroxide sample was prepared similarly.
  • A wood-ash sourced potassium carbonate sample was prepared similarly.
  • All jars were covered and allowed to sit for 24 hours.  After which they were well rinsed over a stainless steel screen and oven dried for 2 hours at 250F.

Making a paste while attempting DIY activation with calcium chloride

In the meantime, a vessel was built for applying steam to heated char.  Again, taking cues from Cody’s lab, I knew it was important to distribute steam evenly, for a short time across a column of heated granulated material.  The vessel would need to accommodate a volume of sacrificial char in order to prevent any excess oxidation during heating.  Two samples were prepared, a steam activated sample and a heated, non-steam activated sample.  Both samples were slowly brought up to 1800F and held there for 1 hour.  Distilled water was simultaneously heated in a cast iron teapot.  Steam was generated and applied in 2 minute increments for a total of 10 minutes over 20 minutes time.  Samples were allowed to cool and stored in canning jars until testing.

Experimental DIY steam activation. Not as dangerous as it looks!

Activation vessel, showing steam input and sacrificial char.

All samples were stored in canning jars and labeled as follows:

    1. Control – Retort biochar, carbonized at 850F for at least one hour.
    2. TLUD – Char generated in a gasifying cookstoves.
    3. High Heat – Retort biochar, heated to 1800F for one hour.
    4. Steam – Retort Biochar, heated to 1800F and steam applied for a total of 10 minutes.
    5. Commercial – A store bought granulated aquarium filter carbon.
    6. KOH
    7. CaCl2AKA “Pickle Crisp”
    8. K2CO3
    9. Lemon

30 mg samples of each carbon were measured into 35 mL test tubes and covered with 30mL of 1% methylene blue solution.  Samples were gently stirred, covered and allowed to sit for 24 hours.

1% solution after 24 hours.

After 24 hours there was some visible change, but I wanted a more nuanced look.  30 mg samples were similarly prepared with a .25% methylene blue solution.  By this point I had run out of commercial activated carbon.

.25% solution after 24 hours

.25% solution after one week.

In the meantime, samples were compared with the R134a test as outlined in Chapter 8 of the Biochar Revolution.  In this process, a known weight of char is loaded into a small vessel and swept with a heavy refrigerant gas. The adsorption capacity is estimated by the weight gain of the sample.  The end point of the adsorption reaction is determined by a temperature change – the char sample heats up during adsorption, followed by a temperature drop when it reaches capacity.  I had some trouble determining this point – ultimately it took three cans of refrigerant until I was confident it was done.  Nonetheless I proceeded to compare the before-and-after weights of my remaining samples:

R134a adsorption test

Documenting percent weight change after adsorption of R134a.


Conclusion

The steam applied char performed well in the methylene blue test.  There was little difference between control and high heat chars.  All chemical-activated samples performed poorly – in all cases worse than the control char itself.  Simply applying a strong base, acid or salt to the char and rinsing does not work to create activated carbon – in time, I’ll attempt a proper physio-chemical activation by heating these chemically activated samples up to 1800F and compare again.  For now, it’s safe to say that the chemical activation methods repeated on many YouTube and blog posts are not helpful in improving the adsorption capacity of proper charcoal.  It is possible they help to some degree in improving low heat, tar-clogged chars, but it is doubtful the result is anywhere near what may be considered activated carbon.

The TLUD char was the star of the show – It compares surprisingly well, and given enough time, with the naked eye it appears to perform nearly as well as steam or even better than commercial activated carbons.  This confirms the rule that higher filter contact times make for more effective filtration.  These results are especially exciting given that TLUD char production requires no additional energy input and is much less demanding of my labor.  I look forward to testing again with TLUD production methods combined with chemically activated biomass – I’ll start by soaking hardwood chips in a solution of wood-ash sourced ‘lye-water’.

Since performing these experiments I’ve come across the work of Dr. Joshua Kearns and the work of Aqueous Solutions.  This is exciting stuff – their team is researching and developing extremely low-cost, locally-constructed, multi-barrier water treatment systems that include high-temperature biochars for removing chemical contaminants.  Kearns’ peer-reviewed work has been shared with the International Biochar Association and CAWST – Open source plans are available here.  What’s most exciting is that this work confirms high temperature biochars – those made with improved (still simple, still locally made) TLUD style methods – perform nearly as well as the ‘gold-standard’ activated carbons for adsorption of a variety of common surface water pollutants.  Essentially, according to his research, there are no major differences in the feedstocks tested, but rather the difference is in production method – gasification chars, made with high temperature methods perform much better than lower temperature kiln-produced charcoal for control of organic chemical pollutants.  Activated carbons ultimately still perform better for adsorption, but when compared to char that can be locally made with agricultural wastes on low tech production equipment, the cost/benefit analysis doesn’t always check out.

Want updates? Questions answered? Comments and criticisms? Send me an email.

Home-Scale Biogas Production

My enlightenment on the subject of biogas began when I stumbled upon an article in a dog-eared copy of The Mother Earth News entitled “Chicken Manure Can Power Your Car.”  Buried among debatable bootstrap business stories and homespun garden-prep tutorials, the write-up recounted how a one-legged British maintenance man named Harold Bate converted a 1953 Hillman sedan to run on decomposing poultry waste to circumvent what he saw as an unreasonably high tax on gasoline.

At the time I didn’t realize that not too far into the future I’d be building and operating a similar methane digester at the very same publication that ran the story years before. I’d been hired by the magazine and almost immediately thrust into the development of a 624-acre research farm in the mountains of Western North Carolina, where biodynamic gardening, permaculture, alternative energy, and natural building were the rule, not the exception. The experience left me with a newfound appreciation for the convenience of petroleum fuels–but it also opened a vast world of unexplored alternatives.

old TMEN methane digesters

My earliest foray into biogas, setting up a Servel gas refrigerator to run off the biogas generating tanks in foreground

There’s probably no better time than the start of the Spring season to talk about methane digestion—now referred to as “biogas” to more accurately describe its place in the hierarchy of renewable energy. Spring is nature’s time for rebirth and renewal, and the decomposition process of turning waste into a new form, a burnable fuel, is not so far removed.

The Living Web Farm project began in 2018 when we agreed to set up and test the Home Biogas system, a small home and farm scale anaerobic digester manufactured by a startup collaborative in Beit Yanai, Israel.  Unlike more permanent systems, this one uses a reinforced flexible bag as a digestion tank and a second sealed chamber as a gas storage bag. A molded plastic inlet feed sink is attached at one end and liquid fertilizer outlet at the other, with a gas filter and management setup fastened to the gas storage chamber.

setup before filling

The 300 gallon system is compact and occupies a 4 x 8 footprint

This approach makes it fairly easy to set up and operate a gas-generating system as long as you have raw materials available to feed it. This would include animal manures, food wastes, and garden culls such as vegetables, fruits, and even meat and fats. So let’s take a look at how it works.

What is Anaerobic Digestion?

In the short version, it’s a natural process in which organic materials decompose in the absence of atmospheric oxygen. Unlike aerobic digestion, familiar to most of us as simple composting, the anaerobic process involves specialized microorganisms known as methanogens whose metabolism generates methane in low-oxygen conditions. Because they do not have access to surrounding air, their limited oxygen requirements are derived from the organic material itself.

The transition from organic material to gas occurs in four stages. The first is hydrolysis, in which a watered slurry breaks down chemical bonds in complex matter such as carbohydrates and proteins into simple molecules of sugar and amino acids. The second stage is acidogenesis, by which those molecules are converted into ethanol and fatty acids, creating carbon dioxide and hydrogen sulfide coproducts. In the third phase, the ethanol and fatty acids transition to hydrogen and acetic acid in a process called acetogenesis. Finally, in the fourth stage the methanogenic organisms prevail to convert remaining hydrogen and acetic acids into methane and additional carbon dioxide. The composition of biogas is typically 55 to 65% methane and 35 to 45% CO2, with traces of nitrogen, hydrogen, water vapor, and hydrogen sulfide. The last two components are stripped out with a condensation trap and ferrous filter to improve the quality of the gas.

Fortunately for us, this complex series of events occurs without our intervention, save for providing a hospitable environment and a regular ration of feedstock material. Hosting the accommodations essentially means maintaining a consistent temperature above 75 degrees F and monitoring the slurry chamber’s pH levels. A surprising variety of kitchen and garden wastes, and animal manures, can successfully contribute to the generation of methane gas, but too much of certain things will crash the pH balance, dropping the levels into acidic territory and requiring a minor course of stabilization.

Even if the temperature falls below the threshold or pH levels stray from the ideal neutral zone, it does not kill the gas-producing organisms; they will simply go dormant until corrections are made and they can continue on their natural path. Extreme cases of pH imbalance will render populations inactive, in which case they can be easily jump-started with an infusion of fresh manure.

Why Bother?

Before I answer that, I want to answer this: Methane is a greenhouse gas. Why would we want to make more of it? The short answer is that livestock manures (among other things) generate methane whether we intervene or not. Here we are simply making and capturing it in a controlled fashion. Allowing it to degrade in the environment causes direct atmospheric emissions, the second greatest source of GHGE in intensive dairy operations. Coincidentally, volatized ammonia from concentrated livestock manures becomes residual in water and land ecosystems and can subsequently convert to nitrous oxide emissions as well.

But back to the question: we do it because energy provided by biogas can replace its share of fossil fuel, which happens to be the prime contributor to greenhouse gas emissions. Biogas energy is considered carbon neutral, since carbon emitted when burning it comes from the carbon fixed by plants in their biological cycle.

Biogas energy can be a supplementary source of income on a larger scale, but for small-potatoes producers it could reduce or eliminate the need for a propane delivery or a natural gas hookup. It can be a source of cooking, heating, or lighting fuel in any location, on or off-grid, and its residual digested matter can be further composted to provide nutrients to garden soils.

Granted, biogas does not have the energy content of natural gas. Due to a lower methane component, it contains about 25% less energy in Btu’s per unit, but it is has the advantage of being renewable and does not have to be extracted from the ground. Each cubic foot of biogas contains about 600 Btu’s of energy, so the standard measure of one cubic meter (35 cu. ft.) provides 21,000 Btu’s or the equivalent of 6 kW hours of heat energy–enough to keep a cookstove burner going for 4 to 7 hours (depending on its size) or a 100-watt light bulb on for 60 hours.

boiling water in pan

A single cookstove burner can operate for hours on the digester’s daily output

Post-Digestion Particulars

The amount of waste going into the digester is almost equal to the amount coming out. But the quality of that residue is improved with far less odor and a higher quality fertilizer because the nitrogen in the effluent is more readily absorbed by plants than the nitrogen contained in raw manure. Its nutrient value remains nearly as complete. Liquid effluent can be drained off and used as fertilizer; the solid component is removed periodically and is normally composted.

Through the anaerobic digestion process, most disease vectors are destroyed and external odors are eliminated, resulting in an impressive level of insect control. In fact, the only odors present in a healthy system exhibit as a slightly musty scent and are contained in the digestion tank itself, which is sealed from the outside environment.

The Need to Feed

As I mentioned earlier, hosting a biogas digester requires maintenance heat, pH balance, and a third condition familiar to home composters–a favorable Carbon to Nitrogen ratio.

Although reaction temperatures as low as 75 degrees F will keep the system functioning, ideal mesophilic conditions occur closer to 95 degrees. At this level, volume production and efficiency are optimized, and retention time can be as low as 15 days. The digester at Living Web is currently housed in a small greenhouse enclosure where it sees direct solar gain throughout the year. In the winter months, endwall and subfloor extruded polystyrene insulation works to retain some of the heat, but a 300-watt internal tank heater carries things through the night and the coldest days. (The digestion process itself generates some thermal energy.) Over the next month, we will be relocating the system to a large greenhouse at our Grandview location, where it will be far easier to feed and maintain, and where there is room for additional gas storage in a separate auxiliary container.

LWF biogas enclosure

A simple poly-skinned enclosure makes a good all-season environment with addition of extruded polystyrene insulation

pH levels are ideal in a range between 6.5 and 7.5. Digestion problems usually present as a drop in pH, which “sours” the system. The condition is easily corrected with a dose of sodium bicarbonate (baking soda) or sodium carbonate (washing soda). Infrequent alkaline conditions are remedied with an application of common citric or lactic acid.

The C/N ratio directly affects gas potential and undesirable ammonia production. Carbon to Nitrogen ratios between 25:1 and 30:1 have proven to be ideal. Keeping the C/N ratio in check is a matter of calculating, by weight, the values of individual inputs to the substrate used as digester feed, which are available online at sources such as this homesteading site.  Most livestock manures are already in the desirable range (poultry being one exception), so you’ll mostly be paying attention to supplemental garden and kitchen wastes.

The suitability of a substrate or feedstock for digestion depends not only on C/N ratios and pH levels, but also on the amount of total and volatile solids in the material. Livestock manures are usually in a slurry form with a limited dry matter content, but our horse manure required mixing with water to achieve a slurry. Too much dilution reduces the volume of manure input and too much dry matter can cause operating difficulties.

slurry mix

Solid manures are mixed with water to make a slurry for starter activation

To activate the system a starter manure slurry of 8 to 10% total tank volume is introduced into the digestion chamber, where it takes 10 to 21 days to digest and start producing gas. Suitable manures include horse, cow, sheep, swine, rabbit, goat, poultry (with caveats) and others, but manure is not necessary to keep the system going once gas is being produced. Vegetables, fruits, kitchen and dairy products, fats, meat scraps, seeds, and eggshells are all fair game feedstocks at this point, though manures can continue as part of the matrix if it’s available.

This, in fact, was a lesson I learned with the original methane digester years ago. Committing to one substrate limits the collective value of having a digester on the homestead that, in fact, is equipped to consume almost anything. Though it’s convenient to have a consistent feed regimen, you are limiting the digester’s potential if you don’t consider all inputs, including rotten and molded foods. Food waste has a high energy potential because it has not been digested by the stomach of an animal—particularly foods high in calories, starch, and sugars.

As far as volume, our 300-gallon system can accept up to 2 gallons of food and garden waste a day, or 4 gallons of manure slurry, including dog and cat wastes. Any input should be free of soil, straw, and non-digestable materials such as stones and twigs.

Other acceptable substrate materials, to be considered on a limited basis, include citrus (it has anti-bacterial oils), oil and cooking grease, poultry manure (high ammonia levels), fish, and spinach. Materials to avoid would be cardboard, tissue paper, fur and feathers, coffee grounds, sawdust and wood chips.

What to Expect from Biogas Digestion

The 300-gallon capacity turnkey system on our farm is one of many existing designs, and though it’s convenient it is also relatively small because it was intended for use on a home scale. The gas storage bag has a 24 sq. ft. capacity which is the equivalent of about 4.5 kWh of energy, or just about 15,000 Btu.

cross section Home Biogas

An illustrated cross section of the biogas unit. Weighted ballast at top provides gas pressure

Additional storage can be added, but the gas is difficult to compress and the technology impractical at this scale, so reinforced bladders are the storage of choice. With a moderate daily feeding of 2 lbs. of food scraps you can expect about 20 cu. ft. of gas daily under ideal conditions. Larger managed permanent systems perform even better, with some producing 1 cu. ft. of gas per day for every cubic foot of digester capacity.

gas outlet

Gas is extracted through the small black piping and can be delivered up to 50 feet for use

In working with a flammable gas, safety of the system is always important. Though methane content of the gas will fluctuate slightly with digester conditions, biogas is essentially odorless, colorless, and lighter than air so it is difficult to detect. It is also an asphyxiant, like natural gas and propane. Its flame often burns with complete clarity so it may not be visible.

Maintenance is an occasional thing, but nonetheless important. Any leaks in the digester tank or liquid fittings need to be addressed promptly for sanitary reasons as well as performance. Gas leaks are critically essential to avoid, but since the system works at a very low pressure of 4” water column—about 0.15 psi—they are not particularly forceful and easy to detect using a liquid soap-water mix at the joints. We have never experienced a leak.

manometer pressure

The biogas system works a a low pressure of less than 4″ water column or 0.15 psi

At some point the solids collect in the digester tank to the level where they must be removed. In this case, the liquid is siphoned or pumped out and the solids extracted through the port built into the base of the tank.  The chamber is small and manageable enough that this is simply a chore and not a battle.

Granted, most of us probably will not be going to the lengths that Mr. Bate did to get his vehicle running on manure gas, but a regular supply of site-made biogas fuel isn’t beyond the capacity of anyone with a small farm or homestead. And yes, outside of cooking, lighting, and heating water, it is possible to power a stationary generator that would normally run on gasoline or LP with biogas fuel as long as it is cleaned and filtered properly, once fuel system modifications are made. The issue is not technical but more of a supply question, since one gallon of gasoline is the equivalent of 200 cubic feet of biogas.

Waste Not: Wood Ashes

In the fall of last year I led a short workshop covering some homestead applications of common wood stove ashes.  It was the first of what I hope will become one of many “Waste Not:” workshops hosted out of the Living Web Farms’ biochar facility.  Later this year I’ll discuss the myriad applications – of both historical and modern relevance – for human urine.

The Waste Not: series of workshops are about exploring the chemistry of common household wastes – cardboard and junk mail for example, or plastic films and oil rich food wastes.  From here we stand to gain a more rounded understanding of how to apply these ‘wastes’ as materials in a surprising range of beneficial applications. A deeper understanding of our wastes not only guides us in lessening our immediate ecological footprint, it helps us prepare for major supply chain disruptions, offers interesting historical insight and gives us a relatable, multi-disciplinary platform for introducing chemistry to the otherwise uninitiated.

Waste Not: A “plarn” handbag, sourced from the plastic liners of girl scout cookie boxes.

Anyone who has a wood stove knows that ashes pile up quickly during the heating season. Land application of wood ashes has been proven an effective way to return nutrients to some intensively farmed soils, but still an estimated 90% of wood ashes are still regularly landfilled in the southeastern United States.

For the waste-conscious homesteader, a quick search on ‘how to use wood ashes’ reveals the internet is full of contradictory suggestions regarding how to apply ashes in the garden, in food preservation, soap-making, cleaning and so on.  On some sites there are even vague references to extremely dangerous acts such as drinking ash-derived lye water for bowel cleansing, ‘treating’ your hair, or even removing nose hairs! For those wanting clarity, a closer look at the composition of wood ashes may provide some insight.

Wood Ash Composition

Ashes are what is left over after the complete combustion of organic matter.  We are concerned here specifically about firewood ash – the inorganic, mineral component of wood – drawn up from the soil and stored in the cells of heartwood, sapwood and bark.  This mineral complex is what makes up ash after the organic portion of the wood is completely burned away.  Residual charcoal should be sifted out and either thrown back into the wood stove or composted as biochar.  Depending on many factors, the nutrient profile of the remaining fine sifted ash could range between 20-40% calcium, 3-10% potassium, and 1% phosphorous and 1% magnesium.  Expect very little nitrogen. Higher than expected carbon likely indicates lower than ideal combustion temperatures. Nutrient density and composition will vary according to the soil and environmental conditions where the tree was grown.

It is generally advised that if felling trees for firewood, the best time in late winter months to cut is when sap is down and the moisture content of the wood is lower.  On the flip-side, wood felled in the summertime when sap is high and nutrient exchange is active will eventually yield ash with a higher nutrient content. Bark contains more ashes than wood.  Wood ashes are typically, but not always, low in heavy metals. Wood grown on leached, nutrient poor soils will have much lower nutrient density in ash than that grown on more rich soils.

Regional variability of ash and garden soil types are broad and those wishing to apply ash in the garden should rely on advice from local agronomists.  If going it alone, have both ash samples and garden soil tested before application.

Our state of North Carolina provides low cost lab services for farmers looking to make use of wastes as fertilizers. Click for larger photo

Wood Ashes in my Garden

Soil testing from NCDA (seasonally free for residents) and Logan Labs (very reasonable fee) reveal already excessive potassium levels and adequate calcium in my garden soil.  Waste analysis shows my ash contains what is expected: 26.8% calcium, 4.7% potassium, smaller amounts of many other elements and very little heavy metals. Also note the elevated pH in both samples.  Direct application of wood ash clearly would not benefit my vegetable garden.

Many States provide free or low cost simple garden soil analysis.  Click for larger photo

Wood ashes could greatly assist fertility in soils that are lacking in potassium and calcium.  However, it’s clear that addition of wood ashes to my garden soil will contribute to my issues with excessive potassium.  Plants will readily uptake excess potassium, ultimately interfering with phosphorus uptake, resulting in lower quality yields. In his book The Intelligent Gardener, author Steve Solomon writes extensively about the importance of balancing nutrients in the soil.  His advocacy of soil remineralization via imported fertilizers and subsequent critique of reliance on compost for sustaining fertility is one that would seem at odds with the permaculture community. Though his point rings true – continually fertilizing a garden with composted vegetation from an imbalanced soil will only exacerbate the imbalance.  Since I generally compost with food and landscape waste generated on my own property, it stands to reason my compost is already potassium rich.  Addition of wood ashes has little value in my compost too.  Ultimately, he recommends as I do if one doesn’t want to fool anymore with their ash – scatter it back on the forest floor from whence it came.

Discouraged by the lack of value of wood ashes in my garden, I set out to answer the question: Could I remove the potassium prior to applying wood ash as a liming agent?  By taking advantage of the comparably high solubility of potassium salts to other compounds in wood ash, removal of potassium can be accomplished through a process known as leachingWhat remains after leaching is a calcium rich and micronutrient laden material that is still useful in the compost, and if re-dried can be broadcasted as a liming agent, or, with a little extra work, used as a primitive cement and an alternative to clay bricks.

From Ash ‘Lye’ to Potash

Leaching of wood ashes is a historically important process for obtaining potassium carbonate – an important alkali used in the early soap and glass industriesBenjamin Franklin’s father was a ‘soap boiler’ by trade and surely relied on wood ash sourced potassium salts for his soft soaps.  By the late 19th century more economical methods for alkali production shuttered the commercial asheries, though the practice persisted on timber rich frontier homesteads well into the 20th century.

A commonly described method of leaching ashes involves filling a straw lined barrel with sifted ashes and pouring in enough rainwater to cover the ashes completely.  After some time, a plug in the bottom of the barrel is removed and a caustic, brown liquid will slowly drain out. This ‘lye’ is either used directly in its dilute form, boiled down and concentrated, or boiled down completely to Potash.  Interestingly, potassium gets its name from potash – boiled ashes in a pot.

Simple wood ash leaching arrangement with five-gallon buckets

Potash produced in this manner is a rather impure combination of the most soluble salts from wood ash.  Salts are compounds of positively charged cations and negatively charged anions that dissociate in water.  Crude potash contains salts consisting of potassium (K+), sodium (Na+) and calcium (Ca+) cations with predominantly carbonate (CO3-) and chloride (Cl-) anions.   Potassium carbonate is the dominant salt, and through a process of high temperature firing (calcining), and recrystallization, can be refined to purified potash, known commercially as pearl ash.  Refined potash played a very important role in the early soap industry and still has commercial value in the glass industry today.  Pearl ash was used as an early chemical leavener and appears in some of the earliest American cookbooks.

In the early part of last year I set out to explore the processes of leaching ashes and ultimately took a deep dive into the lore of applications of potash on the homestead.  Wood stove operators at Living Web donated their ashes and before long I had acquired over 20 gallons of fresh material to experiment with. I had some experience with soapmaking, so this was a natural place to start.  Baking experiments would come later, starting with experiments in nixtamalization of field corn using fresh unleached wood ashes, and later with refined pearl ash in some traditional German and colonial American recipes. 

It’s hard to say exactly what motivates this time consuming work.  Its certainly not economics.  There is a some merit in building emergency preparedness skills, but for me I think its more its a simple fascination that something of value can be rendered from what others see as waste.  Experiencing chemistry applied in the real world, and feeling the connection with the past is worth more to me than the market value of the final product.

Making Soap from Wood Ash

A simple soap can be made by reacting warm oils or rendered animal fats with a strong alkali.  The process is known as saponification – where long molecules of triglycerides are converted to fatty acid salts with a polar, hydrophilic “head” and a non-polar, hydrophobic “tail”.  Most craft soap makers nowadays rely on sodium hydroxide lye, and typically a combination of fats and oils to produce consistent, solid bars with the right amount of lather, cleansing and conditioning characteristics. Potassium hydroxide is considerably more soluble than its sodium counterpart and is the alkali of choice for the production of liquid soaps.  Though one shouldnt be overwhelmed, it’s my opinion that soapmaking should be a craft reserved to those who pay attention to details – incorrect ratios of lye to fats can produce a soap that will either become rancid (bad smell) or be potentially dangerous due to excess caustic alkali.  Recipes are a nice place to start, but serious craft soapmakers would do well to immerse themselves in the details. Kevin Dunn’s excellent immersion in the chemistry of soapmaking is a great place to start. 

Historically, soap boilers would mix a refined potash solution with rendered animal fats, and boil, sometimes up to days to produce a paste like laundry or kitchen soap.  Eventually it was learned that addition of slaked lime  to the potash solution would precipitate calcium carbonate and produce aqueous potassium hydroxide, which could greatly speed up saponification, thereby reducing the hours of toiling over the soap pot.  Addition of sodium chloride back in at the end of the boil serves to create a harder final product.

A quick search for wood ash soap pulls up many sites which confuse wood ash lye with sodium hydroxide lye sold in stores.  Recall that unrefined wood ash lye will contain a mix of alkali salts, predominantly potassium carbonate, but also some sodium carbonate, along with sodium, potassium and calcium chlorides.  The ratios of these compounds depends greatly on a number of factors – though softer hard bars can be expected from soaping with unrefined potash and harder rendered fats such as beef or lamb tallow. The strength of the wood ash lye also varies according to the original composition of the ashes and amount of water used in leaching. There are clever ways to measure strength directly by dissolving a feather in the lye, or indirectly by comparing its density to a floating eggStoichiometric ratios of fats and lye are a guessing game with potash sourced in this manner.

Last summer I attempted a test batch, starting with 1 ¼ cups ash lye at 1.1 g/mL concentration with 2 cup quantity blend of olive oil and rendered lamb tallow. Throughout what became a six hour boiling process I added ½ cup water and 2 tsp table salt.  Six months later now, this soap smells of lamb and has the characteristic ‘zap’ from touching a sample on your tongue – indicating incomplete saponification. To anyone used to soaping with hydroxides, six hours of hot processing may seem like a long time.  Potassium carbonate is still only a weak base and only readily saponifies free fatty acids, which may explain why earlier batches seemed more successful with rancid olive oil.  This can be overcome by much longer cooking times at elevated temperatures.  For those looking to get started, Mother Earth News has a nice introduction to making hot process soap with wood ash.

Recently cut soap bars from wood ash lye and lamb tallow are laid out to cure for a few months

Recently I completed another much more successful batch of soft soap from refined potash (more on this later) and olive oil.  For those interested, here are the ratios I used:

  • I started with 302.5 g refined potash with 55 g calcined egg shells.
  • I added enough water to solubilize (about 2 cups) let settle, and decant.
  • I added the solution to heated 902g olive oil and 25 g castor oil
  • Cook in a crock pot on high heat and stir often. Day one for 5 hours.  Day two for additional 6 hours.
  • I added 1.5 qts distilled water and stirred vigorously.  By day three some separation had occurred.
  • I changed to the low heat setting for another 8 hours the following day before spooning the gel-like soap into mason jars.
  • I set out to make a suitable bath soap, and although pH is in a safe range at 8.5, it still has a harsh feel and is not something I would want to use in the shower.

Hot process soap in the crock pot.  Made with refined potash and olive oil

Cooking with Wood Ash

Wood ash applications for cooking have a long and rich history among a variety of cultures.  Chinese century eggs are prepared with a combination of clay, wood ash, rice hulls, salt and lime.  Scandinavian Lutefisk was traditionally made with birch ash.  Native Central American cultures treated corn with lime or wood ashes through a process called Nixtamalization.

Nixtamalization is the process of treating dried maize with an alkaline solution prior to grinding. Nixtamal corn tastes better and is easier to grind and form into dough, but it’s also healthier. Problematic aflatoxins are greatly reduced and niacin is made more bioavailable.  Historically, this was especially important for cultures that relied exclusively on maize for the prevention of pellagra.  Following a harvest of bloody butcher red dent corn at Living Web last fall, I began working with both fresh and old ashes to find the right recipe for at home nixtamal.

Nixtamal alkali solution is strong enough when maize kernels change color after a few minutes of soak time.

After a few trials I’ve landed on my best nixtamal routine at home.   Starting with fresh unleached ashes from a hot fire, I use an 8:1 maize to ash ratio.  Hot fires are important here – low heat, smouldering fires will yield ash that produces tarry, smoky flavors.  Measure out by volume, add to a large pot and fill with water. Bring to a boil and maintain a low heat overnight.  The top of the wood stove works nicely for this.

In my experience, fresh ashes tend to be more alkaline.  Assuming my fires are hot enough, this makes sense – hot, oxygen rich fires will create some oxides that when added to water produce hydroxides.  We know from soap making now that hydroxides are a much stronger alkali than carbonates. Older ashes however, will have had their oxides reacted with carbon dioxide in the atmosphere, tying up oxides in the form of carbonates.  I’ve used older ashes at a ratio of 2:1 with successful results. Both methods require persistent rinsing after the soaking period. You’ll know you were successful when the kernels swell and become soft, where the pericarp can be gently removed, and there is no bitter soapy taste after rinsing.

Pearl Ash

On her website and in her short book on the subject, author Leigh Tate writes about her experience baking with ash water.  She tells of the “highly variable” chemical composition of wood ash but nonetheless was able to determine:

“A very satisfactory biscuit with excellent flavor could be made with a solution of two parts water to one part hardwood ash, replacing half the milk called for in the original recipe”

Tate’s book includes 54 vintage recipes for all manner of goods baked with historical leaveners.  I’ve now attempted two of these recipes – American Potash Cakes and Molasses Gingerbread. As an absolute novice baker, I knew that for success in either recipe I would need to eliminate variability in my unrefined potash by taking the extra steps to create my own pearl ash.

I set about making pearl ash in January of this year with fresh ashes collected from the fall heating season.  A total of 54 lbs of sifted ash were divided into three 5 gallon HDPE plastic buckets. The volume reduced significantly as 3 gallons of heated rainwater was poured into each bucket.  After vigorous stirring and overnight soaking,  I drilled a series of 1/16” holes in the side, near the bottom of the leaching buckets.  Alternatively, I could have pre-drilled the holes by driving a small screw in the bottom of the bucket.  Removing the screw would start the dripping process.  Over the course of the following few days, ash water would drip out into HDPE buckets staged below. 

After dripping stopped, each bucket was filled a second time with just enough hot water to cover the ash and the dripping process was repeated.  My trials have found that half of available potash was removed after the first soak.  A second soak will put half of what remains in solution for an estimated 75% total yield of available potash.  After two soaks, I had roughly 6 gallons of very dilute lye.  From there I was able to concentrate the lye by aggressively boiling off excess water using our biochar producing TLUD stoves.

Boiling lye should be done outside in a dedicated stainless steel or cast iron pot.  Aluminum reacts strongly to alkali and will absolutely ruin your batch and your pot.   Now is the time to wear glasses and gloves. Be prepared with access to running water for eye rinse and hand washing.

The idea here is to completely boil off all of the water.  I experienced almost a pleasant vanilla-like smell during most of the boiling process but this can turn quite noxious towards the end if you allow it to burn.  Potash will eventually form a hard cake at the bottom of the pot and will require some effort to remove. After chipping and scraping out the raw potash, I weighed 78 oz of the brownish, soft rock-like material.  Dependent again upon the temperature of the original burn, raw potash will still contain a large amount of organic carbon compounds that should be removed through  calcination.  These organic compounds are what give ash water its characteristic amber brown color.  Water rinsed through calcined ash or the ash from very hot fires will be clear.

Refined potassium carbonate, also known as pearl ash

78 oz of raw potash was heated to 1200F for 2 hours with LP in a furnace we originally built for our atomizing pyrolysis oil burner.  The resulting material changed from tan/brown to a much lighter easily crushable, but still raw potash.  Following this step is a series of dissolving, decanting and boiling, taking advantage of the relative solubilities of the mixed salts, that is again, best described by Kevin Dunn in his chapter on the subject of alkali from what has become one of my favorite books.  After refinement of calcined potash via recrystallization, carbonate yield was 198 grams, or about 1 cup. Purified potassium carbonate yield was 1,348 grams or 2 ½ pints of fine, deliquescent, white crystalline material we can now call pearl ash.

Pearl ash can be used in baking applications as a replacement for baking soda.  1 teaspoon of pearl ash will replace 1/2 teaspoon of baking soda.  As a leavening agent in baking applications pearl ash must be heat activated to release carbon dioxide gas.  Some recipes call for addition of an acid ingredient, not for the aid of releasing gas, but for neutralizing any bitter aftertaste.  Pearl Ash should be dissolved in liquid prior to addition to the dough. 

Upon cooking the potash cakes and gingerbread from recipes found in Tate’s book I found I had no issues with bitter flavors and the dough rose slightly, but not in a way one would expect with modern leavening agents.  Size of cakes and temperature of the oven are areas for future experimentation.

American Potash Cakes

Conclusion

There is a long and rich history of using wood ashes across a massive range of applications – many not even mentioned here.  Ashes can be alkaline, powdery and dry, and may contain a wide variety of nutrients, they will likely only be rich in calcium and potassium. Curious experimenters should attempt to explain a mode of action as to why wood ashes work for their application. For example, I would expect the dusty alkaline nature of wood ash pairs well in poultry housing for dusting feathers and managing mites.  For this same reason, I would not recommend wood ashes in a thriving worm bin or active compost system.

For those who read this and are overwhelmed with the work involved – there is nothing wrong with storing ash until it is completely cooled off and scattering back on the forest floor.   Be absolutely sure there are no hot coals, scatter thin and keep out waterways and drainage areas.  For those wanting to build on my experience, here are some quick references to get you started:

  • As a liming agent: My ash was about 90% CCE of agricultural Lime.
  • For paste soap:  Start with 1 ¼ cups ash lye at 1.1 g/mL concentration with 2 cups of rendered fat.
  • For nixtamal field corn: Start with 8:1 by volume corn to fresh ash.  Use more ash if older.
  • For baking applications: Substitute 2 teaspoons of refined potassium carbonate for every 1 teaspoon baking soda.

Please reach out and share your experience if you find yourself inspired to work with wood ash!

A Deep Dive into Subsurface Irrigation

Text and Images by John Henry Nelson

Civilization, at least on the scale that we know it, would not exist without irrigation. The rise of all culture is intimately linked with good farming practices, and irrigation has always been the most important dynamic in increasing food production.  On average, irrigated crop yields are 2.3 times higher than those from rain-fed soil and proactive intervention will be increasingly needed to feed the growing populations of the world

We are rapidly heading into a world in which water scarcity is a new normal and where agriculture consumes an astounding 70% of all fresh water on the planet. This means that as farmers and gardeners we have a responsibility to use water wisely and develop irrigation methods that reduce our environmental impact on the water sources we use.  Since the 1960’s, global population has doubled but water use for farming has tripled. This is creating an immense burden on aquifers, wetlands, and rivers around the globe. Legal battles have been fought and it is expected in the near future wars will be waged over water – our most valuable resource.

Farmers are becoming more dependent on irrigation water extracted from aquifers that are getting depleted more quickly than they are able to recharge naturally with rainwater. At this point, farmers are having to dig deeper wells and install stronger pumps that require more energy to get the needed water to the surface.

Relying on and depleting precious water from our aquifers is not sustainable, and it is critical that we develop irrigation methods that use water wisely and at the same time harmonize with natural ecosystems. Rainwater harvesting is the most underutilized water resource we have and good practices in that field will be key for irrigation in the future.  Rainwater harvest for irrigation has been proven to work even in arid climates with as little as 6 inches of annual rainfall. In Mills River, North Carolina where Living Web Farms is located, the farms receive an average of 48 inches of rainfall a year and we can easily harvest enough water for all our irrigation needs.

The Virtues of Digging In

There are four types of irrigation: flood, drip, overhead, and subsurface. Though each has its advantages and disadvantages, we’ll only be exploring subsurface, or, sub-irrigation in this post.

Sub-irrigation is an irrigation system deliberately and purposefully buried below the surface. One advantage it has over other types of irrigation is that it keeps the infrastructure out of the way of all gardening activities such as cultivating, seeding, mowing, and harvesting.  A second benefit is that it serves as a permanent irrigation improvement and does not need to be replaced or repaired every season like plastic drip tape irrigation does.

Essentially, when you sub-irrigate you are creating raised garden beds in which you lay 4-inch pipe in the pathways between the beds, and cover it with wood chips. When you turn on the irrigation water, it fills the pipe under the path and the water soaks into the soil of the garden bed. The 4-inch perforated high-density polyethylene black pipe we chose is available at hardware and home improvement stores and is widely used for gutter and foundation drains.

This type of irrigation allows water to soak deep into the soil and stimulates more soil life by hydrating the entire soil profile – not just a small circle of water directly under the plants as is the case with drip irrigation.  In farming we are essentially working with soil and soil biology, and it is the soil’s bacteria and fungal life that feed the plants.

Additionally, with deeper soaking of the soil there is less surface water evaporation. Evaporation concentrates salts at the surface, which is a common predicament in areas that do not experience sufficient flushing of these salts from natural rainfall. This often happens to soils in arid climates, and is also a common problem for greenhouses because they are covered and do not see atmospheric precipitation. Sub-irrigation does not concentrate the salts like surface applications do, and can actually be used to flush the salts out of the soil.

Though subsurface irrigation can be applied to all types of growing situations, its up-front labor cost and higher material costs compared to drip tape make it most feasible to use in a permanent high-production growing area. We choose the greenhouse at our Grandview Farm because of its abundant harvested water supply, and its permanent high-production crop growing setup.

Planning for the Future

If you are considering subsurface irrigation, the first thing to do is to establish your water source. You’ll need to have an ample water supply to make sub-irrigation saturate the soil deeply in a short amount of time- usually 30 minutes or less. At our Grandview Farm I designed and built a permaculture water-harvesting system to catch storm water runoff on the farm with swales and berms and rooftop catchment. The water is stored in ponds that gravity-feed the greenhouse with irrigation water.

No pond to supply water? It doesn’t take much to simply collect and store rainwater directly from the greenhouse roof. With a gutter and downspout system,rainwater can be collected in a cistern placed above or below ground, depending on your strategies for antifreeze protection in the winter months. The problem with cisterns are their relatively small size and high cost-per-gallon as compared to pond storage. Another option would be to directly pipe rainwater into the greenhouse and into a distribution box that flows into the 4-inch pipes. This could be a good way of utilizing rainfall and store water directly into the soil.

A concrete distribution box fills with harvested rainwater and distributes it to the 4-inch perforated lines

The Grandview greenhouse sits on a slight slope and the beds are level on contour, but each bed steps down a few inches similar to a level terrace but barely noticeable. With the greenhouse sitting on a slope the water has to be distributed evenly.

To do this I used a small concrete septic tank distribution box also known as a D-box to even out the flow of water to all the 4-inch drain pipes used for the irrigation. These pre-cast boxes are available at your local concrete yard for about $50. You could also buy a plastic D-box at a plumbing store but it will likely cost about $20 more. I like the concrete version as it provides a solid piece of hardware to connect to and is a little less expensive to boot.

Best practice is to locate the D-box at one end of your raised beds. It will need to be slightly higher than the irrigation pipes in the bottom of the paths so the water will flow from the box to the 4-inch pipes. After locating the D-box you are ready to plumb in the water source. Our source is a 2-inch line that is gravity fed from a pond on the highest spot on the farm.

You can use a transit to establish a level bed for the trenches, or work with a simple water level

The next step is to dig out the path trenches, making sure the bottom of the trenches are at least 7 to 8 inches below the top of the raised beds, and as mentioned before, slightly lower than the outlets on the distribution box so gravity can do its work. I used a laser transit to level the bottom of the trenches for the 4-inch pipes to lay in. There are alternative tools for making sure this bed is level, including a homemade water level, but the end result needs to be a flat and level bed any way you accomplish it.

The pipes are covered with wood chips to a point 2 inches below the tops of the bed mounds

After digging the trenches simply lay the pipe out in the bottom of each one and connect the ends to the D-box. Then cover the pipes with wood chips. I keep the wood chips approximately 2 inches lower than the top of the garden beds to prevent the chips from getting in the beds. This creates a nice firm and level walk path.

You can get woodchips from your local arborist for free most of the time, since chips are a waste material from their tree removal or cleanup. The branches are run through an industrial chipper that makes small 1’’x1’’ pieces, which are the perfect size and also happen to be a great source of carbon and food for soil life. Woodchips and fiber act like a sponge and can help drought- proof a garden as they soak up and hold water.

Chips work best either on the surface of the garden bed or in the paths, but should not be mixed in directly with the garden soil because in their slow decay they tie up elements such as nitrogen in the soil.

The chips provide a firm and level
pathway and do not contaminate
the soil beds.

Now you’re ready to irrigate the beds. Limit deep-soak irrigation to 30 minutes or less if possible. Be careful not to over-irrigate, because this will cause the soil to waterlog, a condition that favors anaerobic bacteria which make it nearly impossible to grow healthy food crops.

With a subsurface system like this, you can irrigate once or twice a week, as opposed to every other day like you would with drip or overhead irrigation. Sub-irrigation does use more water than drip irrigation, but you end up irrigating less often. And if you are using rainwater for irrigating, you can afford to use more water and still end up with a more sustainable and resilient operation that is better for the environment and does not deplete the aquifer.

WNC Repair Cafe and the fight against Planned Obsolescence

It’s been over a year since our last blog post, but the Biochar Facility at Living Web Farms is still a busy place.  In addition to keeping our batch biochar retort system in production we’re constantly exploring the nexus of all things sustainable technology and regenerative agriculture.   Our 2020 workshops are covering a boggling range of material, but there is one often unmentioned common thread among all of Living Web Farms’ work:  building community resilience. Our decision to organize a Repair Cafe program was born out of this mission.

A Repair Cafe is an event where you’ll find volunteers with tools and supplies, available to fix broken household objects at no cost, while offering instruction in the form of hands-on help.  We started hosting WNC Repair Cafe in 2018, and since then I’ve seen many reasons why people bring us their broken stuff.  It’s a free service, so saving money is certainly on many people’s minds. Many may come with a sense of environmental stewardship or old-fashioned thriftiness and intuitively sense something wrong with throwing something in a landfill that may still have some use.   Some have heirloom objects and don’t know where else to go. Repair Cafes work on deeper levels too: if you visit one you’ll see it’s about sharing the skills and building confidence to take on repairs of your own. In the context of consumer-debt driven economy, riddled with planned obsolescence and a throw-away culture, Repair Cafes are all about building community resilience.

Volunteer repair coaches help guide visitors through the repair process.

Repair or Replace?

So as someone who thinks this hard about repairing something like ordinary household appliances, you can imagine the mental tug-of-war I experience when it comes to deciding whether to purchase new or repair an existing car.

For most of us, purchasing a new car is a big decision that is often rationalized in a (perfectly legitimate) financial context.  Depreciation alone dictates it never makes sense to buy new.  In nearly all cases, when weighing repair costs against a new monthly payment, keeping an old car on the road is going to save money. Especially, if one is willing to go after some repairs on their own.

Maybe you’re willing to take on simple home repairs but spooked about the idea of working on cars?  Did you know that auto parts stores will often scan your check engine light and loan specialty tools at no cost? Model-specific online communities are increasingly helpful for diagnosing problems and, of course, YouTube has been amazing for walkthrough DIY repair tutorials. Using all three of these resources, replacing the knock sensor on my 1999 Forester was brazenly simple and helped me through another annual North Carolina vehicle safety inspection for what eventually was its final year on the road.

Transmission problems were too much for my 1999 Forester.  This photo was taken days before Working Wheels salvaged it for parts.

So how to compare the environmental costs of driving old low-mileage cars versus newer, more efficient cars?  From a carbon footprint standpoint we know the manufacturing of new cars is a carbon-intensive process. However, it turns out this kind of carbon accounting is a lot more complicated than replacing a knock sensor.  The process of assessing the environmental impact of materials processing, manufacture, distribution, use, and disposal of a product is done with a Life Cycle Analysis.  And though accounting for the amount of detail that goes into a ‘perfect’ LCA is ultimately impossible, even an imperfect LCA can be useful as a guideline for making decisions as an environmentally driven consumer.  Distribution and disposal factors are largely dependent on an end user’s geographic location.  Environmental impact from use can be incredibly variable. So by focusing exclusively on just the energy required for materials processing and manufacture – or, embodied energy – we can begin to understand how our new purchases can affect our carbon footprint.

For example, let’s take a closer look at the embodied energy of a typical American-style refrigerator with an estimated embodied energy of 1639 kWh.  Let’s assume that a typical 10 year old 22 cu.ft. refrigerator consumes 600 kWh/year.  Trading the refrigerator in for a new 20% more efficient refrigerator could save 120kWh/year in personal electrical costs, but when factoring in embodied energy, these savings could take over 13 years to completely recoup its manufacturing footprint!  Not a huge gain, considering that typical refrigerators have an average expected lifespan of 14 years.

Additionally, though many major appliances have been steadily becoming more energy efficient, the increased number of these appliances in the home has outpaced any efficiency gains.  New purchases for the sake of saving energy at home should be weighed against the total global environmental costs from the manufacturing process.

So with this in mind, let’s revisit my question of whether to repair or replace my car. Embodied Energy data on specific appliances or automobiles isn’t readily available information, but we can estimate these figures too.  Quoting from the Translational Ecology blog:

“Across a range of size, the energy it takes to manufacture a new car is equivalent to about one year of the energy used to power it.”

“If you plan to keep a new car 5 years, it should get 20% better gas mileage than your old car if you want to approach environmental neutrality in your decision to buy.  If you will keep a new car 10 years, then you only need to get 10% better mileage.”

In the spring of 2019 I was observing an average 20 highway MPG in my 20 year old Subaru Forester.  The Forester had been remarkably reliable since a head gasket replacement in 2012, though I had become increasingly aware that I could do better for my 29-mile, mostly highway commute.  Planning to keep a new car for 10 years I would only have to aim at 22 MPG to break even on accounting for embodied energy.  Given the sheer amount of energy consumed in my use of driving a personal car for 15K miles per year, breaking even on fuel standards of a 20 year old car was easy.  Repeatedly replacing a new car after five years would be a much different scenario.

Our family’s decision to drive a 2015 Ford C Max Plug-In Hybrid with a 20 mile electric range was, in part, motivated by a decision to do better than break even on gas mileage.  My gas mileage on gasoline alone is wildly improved, the ride is more comfortable, and for now I’ve got a 21st-Century stereo. It’s a major upgrade, and I’m very thankful to have it.  But one can’t forget the ethical issues surrounding mining practices for the raw material in the lithium batteries it uses.   Electric car drivers that boast of zero emissions have also been criticized for offsetting their pollution from the tailpipe to the power plant.  Ideally I would be set up for solar charging at home, but Asheville’s switch to natural gas gives me some relief that I’m not driving a coal powered vehicle for the 60% of my commute that is powered off the battery.

As someone who is used to fixing my own stuff, perhaps most concerning for me is the growing disparity among newer cars between what can be repaired at home and what requires dealership intervention.  What needs to work, and what are gimmicky ‘bells and whistles’ may be too closely linked, and the resulting exorbitant repair costs may guide consumers to prematurely reach the decision that ‘it’s not worth fixing’. As a result, insurance costs are rising and people are working harder for things they don’t need.  This is a concerning and familiar trend. It is one of the many faces of planned obsolescence.

In a blog post of their own Carfax casually tells us:

“Because your vehicle has common features such as a rearview camera and LED taillights, and those are damaged, you’re facing $3,000 worth of repair costs.”

Bells and Whistles

Planned obsolescence

It is widely known that Henry Ford developed the moving assembly line, significantly reducing costs and for the first time making the prospect of automobile ownership widely available to ordinary Americans.  Not so widely known is that only a few years later, General Motors, under the direction of Alfred P. Sloan, (yes, the same Alfred P. Sloan as in the NPR sponsorships) introduced the concept of the “model year”, in which annual, and often petty, stylistic changes to last year’s model masquerade as meaningful technological improvements.  This practice in itself is a form of planned obsolescence, albeit using social and psychological means to achieve the same end: encouraging the replacement of a product before the full extent of its useful life is realized.  This combination of mass automobile ownership at the dawn of a competitive, throwaway culture has had a massive impact on the way we approach our material world.

If you’re like me, then you’ve always assumed the term “planned obsolescence” refers specifically to the practice of intentionally inferior engineering for the purpose of driving sales.

An often cited tale is that of the Phoebus Cartel.  This is the true story of a consortium of light bulb manufacturing executives from all around the world who met in Geneva in 1924 to discuss mutually agreed upon limits to hours of operation and production quotas for the world’s light bulbs.  When contrasted against reports of the centennial bulb of Livermore, California where a hand-blown light bulb has been in operation for 117 years, this lightbulb conspiracy serves as a textbook example of the sort of planned obsolescence we have come to expect: the act of subversively engineering a shortened lifespan into common consumer products.  This narrative is easy to believe. During these early years of mass consumerism, planned obsolescence was even openly discussed as a plan for recovering unemployment gains during the Great Depression.  And even in recent times, programs like ‘Cash for Clunkers’ have been simultaneously touted as a means for building markets for more efficient cars, and alternatively criticized as another example of government sanctioned obsolescence.

Subversive planned obsolescence does still exist. Though in truth, a closer look reveals that clear-cut examples of this kind of intentional engineering of inferior products for the sole purpose of driving sales are very hard to find.  For example, the often repeated tale of DuPont nylon stockings that were engineered to “ladder” prematurely may be entirely rooted in rumor. Giles Slade writes in Made to Break about how, while appealing to anti-Japanese-silk patriotism, DuPont’s team had first generated unforeseen demand in the new artificial product, and then later responded to changing fashions by offering sheer (and thus more fragile) alternatives to the original seemingly indestructible heavy styles of the pre-war era.  In later years, by appealing to – and in part, manipulating – fashion trends, the company had effectively rendered a lifetime product into one that warrants new purchases based on satisfying people’s demand for changing styles.

No longer fashionable

To single out one company or focus only on a particular industry is to miss the point.

The consumer-driven economy of today very well may be built less on products that are designed to intentionally fail and more on those that will go out of style.  By appealing to psychological forms of obsolescence, marketing trumps engineering, and product designers are encouraged to build cheap-to-replace products. In turn, these products are not built to last forever, but rather just long enough for a fashion cycle.

Breaking the Cycle

Volunteers and Living Web Farms Staff at WNC Repair Cafe

The first Repair Cafe was held in October 2009 in Amsterdam, and was so successful that founder Martine Postma continued organizing several Repair Cafe meetings at different locations throughout Amsterdam.  By 2010 she had founded the Repair Cafe Foundation.  Now there are over 2000 Repair Cafes operating on six continents.

In the media, Repair Cafes are often touted as a means of preventing one’s household goods from going to the landfill.  When a daunting 569 million tons of demolition and construction waste alone were generated in the USA in 2017 – an estimated 40% of landfill volumes – keeping a few appliances out of the landfill may seem insignificant.  However, on a personal level, the impact of saving money while gaining the confidence to take on repairs of their own can be very significant. Volunteers with technical skills that are not always seen as valuable have an opportunity to give back, by passing on their knowledge to those that can appreciate it.  The community shift away from throwaway culture emboldens professional repair shops, and helps create markets for spare parts. Ultimately, consumers may demand products that are built to last and marketing departments will respond.

It’s on a community scale where Repair Cafes are most effective at organizing grassroots resistance to the throwaway culture.  They are places where questions are asked – “should I repair or replace?” – and where nuanced conversations about sustainability and resilience are the result.

LWF’s Benjamin Pelton on the Life Changing Wim Hof Method, 2019 On-Farm Fitness Classes, and Climbing Mt. Snezka in a Bathing Suit.

LWF’s Benjamin Pelton teaches health & fitness at the farm.

Hello! My name is Benjamin Pelton, I am currently living in Vero Beach Florida and work with Living Web Farms to bring together the newest practices for wellness and longevity. Growing up in Florida provided me with many opportunities to participate in athletics and learn more about human physiology. There was just one thing missing– something that is turning out to have a huge impact on our bodies: COLD! For my entire lifetime, Florida hasn’t sustained temperatures around freezing for more than a couple of days at a time, if at all. So here in Florida, we are missing the opportunity to stimulate our human physiology with the effects from the freezing environment. If this sounds totally crazy to you, let me introduce you to Wim Hof, the Ice Man. Three years ago, I had no idea who Wim was either, especially coming from a place to which vacationers travel simply to escape frigid temperatures.

I first heard Wim Hof speak on a Tim Ferris podcast, and I was completely blown away. I couldn’t believe what I was hearing. There’s really a man that climbed beyond the death zone of Mt. Everest in only swim trunks? A man who was able to stand in an ice bath for one hour and fifty-eight minutes for another Guinness World Record? Who is this guy? How is this possible? Wim Hof, The Iceman, holds 26 World Records, and is now being recognized for changing how science views the human body. Wim Hof is causing science to rewrite the textbooks with new evidence, showing that we have the ability to control our autonomic nervous system. The energy pouring through my speakers from Wim’s voice sparked a fire of inspiration that day. I began to believe I had the same potential, and wanted to experience the enthusiasm that Wim embodied.

As someone who has dedicated years to training the body, learning that there was more performance and wellness to unlock was captivating. I knew that I wanted to meet Wim, and so as soon as I saw he was opening a US based Academy I immediately signed up to become an Instructor of the Wim Hof Method. Each level in the Academy was transformative and enlightening. I was challenged with obstacles I had never faced before. The cold was something I never thought to utilize as a training modality. When you practice exercise, you create specific stresses that create targeted responses for positive adaptation to facilitate strength and health. The same applies for utilizing stress from cold exposure. The Wim Hof Method teaches us how to manage pain and stress better. Above the enlightenment of this new treatment, my experience has taught me to feel more empathy for those suffering from pain and stress.

My first impression after being immersed in the Wim Hof Method (WHM) was how life changing

LWF’s Benjamin Pelton, right, and Wim Hof “The Iceman”. Ben is a Certified Wim Hof Method Instructor.

the method is. The reprogramming of my mind toward a new understanding of the benefits of cold exposure training was incredible. There is more evidence now than ever supporting the benefits of cold exposure for health, and without a doubt, learning about this information is life changing. With a positive outlook towards cold exposure, participating in the Method is much easier. The WHM is great for increasing energy, improving sleep, heightening focus, increasing sports performance, reducing stress levels, enabling faster recovery, enhancing creativity, and developing a stronger immune system. The top three benefits I experienced immediately after practicing WHM were better sleep, more consistent relaxation throughout the day, and less instances of cold or flu. I would say my favorite benefit is stress management. By practicing the Wim Hof Method, one is able to de-escalate his own stress, and handle it in a more natural way. This is one of the most powerful benefits of the method.

The Wim Hof Method and its community are also amazing because the three major principles of the WHM are Happiness, Strength, and Health. When you are implementing tools and practices that bring you more happiness, bring you more strength, and bring you more health then you are seeking a life you will love. While instructing the Wim Hof Method I have been inspired by the empowerment this method provides. It was very powerful to watch two women, a mother and her daughter, conquer their fears of the cold. Their mindsets changed, and they knew they were becoming stronger by enduring the cold. Seeing this shift from being frightened to feeling accomplishment for conquering the fear was amazing and I hope to share this experience with many more. It has been very inspiring to hear how this method has helped so many with health issues, and I feel very blessed to be able to share this healing method with people who are in need.

The Wim Hof Method is designed to be a simple and effective tool, and in addition to increasing happiness, strength, and health, the method also works well for checking your ego. Wim describes the cold as a mirror. When you are inside the cold water you have the opportunity to reflect on how you react under stress. If you allow your ego to get in the way, you will learn the hard way from nature. In the cold, nature is unforgiving and merciless. Being mindful of cold’s temperament is crucial for training in the cold safely. It is important to understand boundaries and learn from experienced instructors. Working with an experienced instructor will give you an opportunity to challenge yourself and see how much potential you really have.

As an instructor, I continue to challenge myself through the WHM. Recently, when I finished sprinting down a mountain in winter with a group of Wim Hof Instructors, I asked them if they thought the summit we had completed was a challenge. I immediately received some interesting faces, all of which carried the same expression. The other instructors were not impressed with the sunny 35-degree Fahrenheit temperature and the light snow. I responded that I, too, was expecting the environment to be more of a challenge. A few of the Instructors standing in the circle had traveled to Poland to complete the famous Mt. Snezka summit with Wim Hof.

“Do you want to experience a challenge?” they said. “Go climb Mt. Snezka, that will test you!” I felt a strong feeling in my stomach that I needed to experience the beast for myself. I went on the Wim Hof Method website and searched for the next event taking place in Poland. Kasper van der Meulen, the lead Instructor for the WHM Academy was hosting a winter travel to Mt. Snezka, so I immediately committed to the trip. This was my first time traveling to Europe, and for an entire week we discussed human physiology, neurology, and the Wim Hof Method. We trained each day with the cold to prepare the body for the final summit, Mt. Snezka.

The day of the Summit, the temperatures were the coldest I’ve personally trained in at the time. The thermometer was reading -5 degrees Fahrenheit! This was something I had never experienced before. This was the tundra I was searching for, and there was snow everywhere. The hairs on my arms froze over and my goatee had icicles hanging from it. For 3 hours we hiked in nothing but a bathing suit and boots. As we began the climb of the final leg, the skies cleared above us and the sun shone brightly, unveiling a spectacular view of Mt. Snezka. At the top we celebrated as a group the amazing accomplishment of climbing Mt. Snezka with wind chills as cold as -15 degrees Fahrenheit, all in our bathing suits.

The experience of climbing Mt. Snezka taught me many lessons about strength and perseverance. By practicing the Wim Hof Method, I was able to control my mind and body to complete the summit and withstand the frozen tundra.

LWF’s Benjamin Pelton recently climbed Mt. Snezka in Poland wearing only a bathing suit!

Why did I put myself through this experience? Because I wanted to experience it first-hand. I wanted to feel the adrenaline of a -15 degrees Fahrenheit wind chill. I knew I could complete the summit and accomplishing it felt very self-empowering. I believe that the feelings of accomplishment from the summit have carry-over into fueling drive to accomplish other goals in life. Completing Mt. Snezka taught me that I can accomplish challenging tasks, and with some determination I can accomplish even more.

This winter I will be teaching the Wim Hof Method Fundamentals at Living Web Farms in Mills River, NC and will share some of the valuable lessons I have learned from the cold. Please join me, February 2nd 2019 at Living Web Farms Mills River Educational Farm for a WHM Fundamental Workshop. In this event, you will be guided in the three pillars of WHM, practice breath work, and have the opportunity to do an ice plunge. I’m so looking forward to sharing this inspirational and life-changing work!

Note: Ben will also teach “Body Movement Rehabilitation” at the farm in July 2019, exploring myofascial awareness and other cutting edge health information. Stay tuned for information about this offering, when we release our full 2019 schedule…very soon!

Return to Atomizing Oil Burners

Part One available here

The nexus of appropriate technology, circular economy and agriculture is a buffet of challenging, interesting projects.  In 2017 and 2018, our continued work in biochar and gasification, and among other esoteric projects, our work with small-scale plastic recycling, – not to mention organizing the WNC Repair Cafe project – have kept us pulled in many directions.  With so many new frontiers, when we’ve got a minute, its nice to get back to something we’re becoming quite comfortable with: our Babington style pyrolysis oil burner.

#babington #waste oil #modified beckett burner

We’ve modified our previous pyrolysis oil atomizer to fit in a smaller package. Note the manual override controls for servicing, and the smaller sump is required to interface with our biochar equipment.

Pyrolysis oil

Think of what we call pyrolysis oil as somewhat interchangeable with what is sometimes called ‘bio-crude’ or simply tar and ‘creosote’.  Though the common definition of creosote (at least in the southeast USA) tends to encompass all wood liquids, it’s usually brought up when talking about build-up in a wood fired chimney.  This gooey/sometimes crusty mess lining your chimney is basically condensed smoke from a smouldering fire – the product of cold and partial combustion.  Pyrolysis oil is a little different: its produced by condensing the gases released during pyrolysis – something that all happens prior to the introduction of oxygen.  Its also important to note here that wood creosote is different than the inherently more toxic coal tar creosote that throughout the 20th century was commonly used as a wood preservative. So as to avoid confusion, instead of calling it creosote, we’ll stick to calling it tar and pyrolysis oil.

Plant based tars and oils have a well documented long history of use in pre-industrial shipbuilding – tars worked well to seal the joints and prevent rot on wooden hulls.   Some historians have claimed that for a period during the 18th and 19th centuries that North Carolina (go Tarheels!) led the world in production of pine tar and turpentine.  Lesser known is its role in early road construction (see: tarmac), roofing, and and interestingly, in varying degrees of legitimate and quack medicines like tar water. (If you’re curious, the story of philosopher and UC Berkeley namesake George Berkeley’s obsession with tar water is certainly a bizarre one.)

These days, with pyrolysis emerging as a viable waste management tool for tires and plastics, along with farm and forest wastes, its possible that these wide ranging pyrolysis liquids may re-emerge as a major contributor to the peak-cheap-oil chemical industry.  Plastics to fuel technology is getting a lot of attention, and biomass tars in bio-asphalt appear to be performing well as a suitable alternative to conventional petroleum binders.


#bio asphalt

The crew at LWF Biochar made this block of asphalt using a conventional aggregate ratio while replacing petroleum based binders with wood tar. Though it doesn’t see normal wear conditions, it has been left in the sun, rain and snow for a few years now.

Pyrolysis condensates vary greatly with differing feedstocks and processes.  Ours is derived from mostly high-lignin Appalachian hardwood mill waste, resulting in a molasses thick, oxygen and water rich, very sticky and highly acidic complex oil/tar blend.  I’ve wrote before about we use pyrolysis oils as a consistent and meterable, stable liquid fuel.  These advantages of liquid fuels over other renewable alternatives are definitely attractive, and though clean combustion of pyrolysis oils is challenging, we believe we’ve found a suitable solution with the babington ball nozzle design.


Babington Style Burner, Revisited

A  year ago when I wrote about our first-generation babington style burner, I left off with remarks about what kind of improvements we’d like to make.  Our first unit was large, with a clunky preheat system, awkward controls and unreliable (and honestly, a bit dangerous) ignition system.  We’re by no means done with our work, but we’ve come a long way since then. Our new unit is mostly squeezed into a conventional gun style burner housing.  It sits low enough to the ground now that it interfaces with our biochar production equipment. We can preheat in ⅓ of the time and auto-fill the sump from a 20 gallon vessel for (theoretically) up to 20 hours continuous burn time.  Start-up is much more reliable, and perhaps most importantly, atomization is adequate for continuous +900C combustion. There’s still plenty of work to be done with (to name a few) improved float controls, emissions testing, weatherproofing and cold weather operation.  Despite the issues, I’m confident we’re not far from this machine serving as our primary startup heat source for biochar production – where we may be able to eliminate our wood chip gasifiers entirely – trading one source of (debatedly) carbon neutral heat for one that, when considering sequestered biochar, could actually be called carbon negative.

If you’re like most people investigating oil burners , you’ve already got a source of waste motor or vegetable oils.  For these fuels, there are plenty of commercial waste motor oil burners available.  If you want to see one in action, there’s a good chance you can see one at any of the common drive through oil change shops.  Most of these burners can swap between motor and vegetable oils, so long as attention is paid to proper filtration and a means to adjust heat is available.  Remember, compared to conventional oil burner nozzles, siphon nozzles have slightly larger passageways and allow for some leeway in fuel quality.  Though if you’re like us, and your fuel demands a low degree of filtration, nothing beats the Babington ball nozzle design – where fuel is spread over the nozzle, not through the nozzle as in other designs.  Another important detail: conventional waste oil burners require robust air compressor systems to achieve atomization and drive the siphon fuel delivery system.  Babington style burners still require compressed air, but the volume is much less due to the very tiny hole on the nozzle. Our unit has a (comparatively large) .0137” hole and has proven to work (where others have not) on the volume of air available from typical junkyard sourced refrigerator compressors.  Admittedly, this isn’t the safest, and certainly isn’t suitable for long term operation, but it is a decent tool for demonstrating the relatively small amount of compressed air actually required.

[tribulant_slideshow gallery_id=7]

Just like last time, I’ll leave with a few notes on improvements. Improved float controls and overflow alarms are the first to come – there is a delicate balance with this small sump and overflows are messy and dangerous.  If not for buildup in the long burn tube our run time would likely be limited only to the volume of fuel in our preheat tank.   Modifying the burn chamber inlet tube will possibly fix this; for improved atomization smaller nozzle holes and a true ball design can’t hurt.  A dedicated shroud with engineered cooling air will keep electronics cool, contain catastrophic fires and allow us to operate in rainy weather.  There’s still work to be done.

Before we finish: A reminder about safety.  Though we love to read and hear stories and share our experience experimenting with alternative fuels, it should be noted the system we’ve designed and shared here is experimental and optimized for our specific blend of hardwood tars and oils.  We never encourage modifying a furnace for waste oil operation, and we don’t endorse leaving DIY machines to operate indoors without constant supervision.  Be safe – saving a few dollars is nice, but its never worth the risk to people and property.

As always, feel free to reach out to us for questions,

Steven Druker, Author, visits Asheville to discuss GMOs

by Patryk Battle

Steven M Drucker has authored an incredibly important book. Jane Goodall says it’s “one of the most important books of the last 50 years” and is deserving of a Nobel Prize. Another reviewer compares its capacity to drive change in public policy to the impact of Ralph Nader’s book Unsafe at Any Speed and Rachel Carlson’s Silent Spring. In Altered Genes Twisted Truth Mr. Druker thoroughly documents (with over 80 pages of highly detailed footnotes) that there has never been consensus within the scientific community as to the safety GE foods. He also shows how the promoters of GE foods have systematically suppressed evidence and distorted the truth to promote them, and that the entire GE foods venture’s viability depends on this deception. Indeed, the FDA suppressed extensive warnings from its own scientists, lied about the facts and is in violation of food safety law with regards to GMOs. All of that is in the first of fourteen chapters! Other chapters document the lethal effect of the first ingestable GE product: tryptophan, how scientists who exposed the dangers GMOs have had their careers damaged and their research fallaciously discredited, and so much more. Fortunately, we also learn that a 4-year massive study involving the UN the World Bank and 400 experts from 80 countries determined that it is going to take fundamentally redirecting agricultural modes of production to be more environmentally sustainable and socially just in order to “feed the world”– not GMOs.

Yet Steven’s remarkable exposé has yet to have the impact That Rachel Carson’s and Ralph Nader’s books had. Perhaps this is because although our government’s regulatory agencies failed to regulate the industries responsible for the problems exposed by their books, the government was not actively promoting unsafe cars and toxic pesticides. Early in its first term, The Ronald Reagan administration decided that GMOs and other high-tech industries were the solution to repairing the American economy. To that end it directed government scientists to not act on their serious concerns– making it clear that careers would suffer if they did. Our government also paid scientists to write forwards and afterwards to the proceedings of the early scientific gatherings which addressed what the potential issues of genetic modification might be. These forwards and afterwards claimed results from the proceedings that were the opposite of what actually came out of these proceedings. Invariably much caution and serious scientific investigation of potential side effects and consequences were the recommendations of these early proceedings.

This deliberate suppression and distortion of much of the scientific community’s early expression of serious concerns about GMOs and misrepresentation of their calls to proceed with great caution with regards to the introduction GMOs into our environment and our food supply was greatly aided by leading geneticists, molecular biologists and biochemists. Many of these scientists already had a financial stake in venture capital supported corporate applications of genetic engineering technology. Also, most of them shared a disdain for environmental science and its necessitated consideration of the complexity and interdependence of all life. The final piece in this perfect storm of what became mythology of benign GMO technology was the failure of the American press. Literally, European reporters would read American reports on the early conferences and incredulously ask their American colleagues if they had read the middle of the reports along with the forwards and afterwards! At the same time, the minority of responsible reporters had their reports suppressed or distorted by their editors or publishers. All of the broadcast networks, including PBS and NPR, submitted briefs in support of Fox News when it was defending itself in a lawsuit brought by whistleblowers Jane Acer and Steve Wilson. Fox News’ defense in this case was that there was no law that said that they had to tell the truth in their news reports. Fox lost before a jury but their deep pockets wore Jane and Steve out on appeal. Of course the rest of the broadcast media join Fox News and the preponderance of newspapers and magazines and lumping GMO critics with 911 truthers and “anti-vaxxers”.

Meanwhile, insect populations are crashing, people are becoming increasingly allergic to common foods, ever-increasing amounts of herbicides are being used, including older more toxic ones, as farmers struggle with super weeds that have become resistant to herbicides. Most of these outcomes cannot be definitively tied to GMOs, as far as reductionist science is concerned. This is because it would take the kind of science that was employed to finally document the carcinogenicity of cigarette smoking. But of course our government refuses to even begin to look at these issues let alone fund comprehensive studies.

So, it is up to us. We need to listen to Steven and read his book and begin to take seriously the defense of our food supply and our environment.

Each GMO introduced into our environment is permanently there. There is no taking them back. And none of them have been seriously evaluated with regards to environmental impacts.

The good news is that the UN, the World Bank and 80 nations are right. And we are proving it every day. We can replace herbicide dependent farming with the use of highly productive multi species cover crops that are terminated and planted into by means of no till technology. The resultant residues from these cover can have similar effect as far as weeds suppression goes. Serendipitously, as these residues decompose they we will obviate the need for most supplemental fertilizing. BT crops such as corn and cotton can be protected with the biological diversity engendered by farmscaping. The never realized myth of Golden Rice need alarm no one with its abject failure. David Kennedy, in his amazing book 21st-Century Greens provides many answers to the issue of adequate vitamin A. Indeed an impressive number of these solutions are the leaves of other crops, weeds and perennial edge shrubs and trees. The fancy term for some of these solutions is Permaculture! Hopefully you will come hear Steven speak, Tuesday October 9th at UNCA (Robinson Building Room 125) buy and read his book and actively join the resistance to the government/corporate juggernaut that is hell-bent on breaking nature.

Back to Backyard Biochar

Save for our WNC Repair Cafe project, and a handful of appropriate technology workshops, we’ve been pretty quiet over here at the biochar facility for a little while now. Lately, most of our work has centered on upgrading the liquid components of our method of biochar production: we’re going deeper with our research in wood vinegar and biochar applications and improving processes with clean combustion of pyrolysis oil, and all the while developing some innovative small scale waste management tools.  As a result, our work has led us down some deep rabbit holes, but so is the work of understanding the circular economy: processes are often dependent on the resources of other processes. For example, what started as a standalone project in carbonizing wild grown, (surprisingly robust) black walnut shells for a friend at the Nutty Buddy Collective, became the catalyst for experimentation as biochar for grow media in aquaponics systems. After neutralizing pH by soaking the charred shells in a wood vinegar solution, we were able to start a biofilter with the addition of pond microbes and common store-bought ammonia. In the fall, we’ll move our 55 gallon drum system into our climate controlled black soldier fly composting chamber, where high protein fish feed is grown just a few feet away on tubs of restaurant food waste. Admittedly, we’ve still got a lot to learn.

Carbonized wild-grown walnut shells are not easily broken down into smaller pieces: it’s for this reason, along with biochar’s characteristic high porosity and natural resistance to decay, that we expect make it an outstanding grow media in aquaponics systems. Currently there are just 6 fingerling tilapia and 10” of walnut shell char under 2” of river pebbles in our not yet mature aquaponics system.


Checking in on the Production Facility

If you’ve been following our work in biochar production, then you know that for five years the biochar crew at Living Web Farms has been operating a batch retort system with condensate and process heat recovery.  After starting our work in 2013 we have produced at least 800 yards of high quality crushed carbon-negative biochar. Since then, system developer Bob Wells has gone on to continue his work with New England Biochar, while Jon Nilsson has nurtured Chargrow LLC: a western NC developer of value-added biochar products. Nowadays, all of the biochar produced at Living Web Farms is reserved for use on our farms, either rehabilitating soils or as a component of a very wide range of new trials.

We get a fair amount of questions from all over the world regarding small scale production, with a high percentage of those questions about the tin man method described by Bob Wells in the How to Make Biochar video from 2013. In her last post, Meredith introduced the Q+A format to the blog. I like this idea, and thought sharing some details about the tin man method might help clear the air (metaphorically, and literally). For the remainder of this post, I’ll show some details on tin-man construction, a little bit about operation and troubleshooting, and then I’ll go on to introduce a few other do-it-yourself methods that each have their own advantages.

Tin Man Q+A

The “tin-man” or “55/30” retort consists of two fairly common 55 and 30 gallon steel drums nested in each other. Holes are drilled or punched at distinct locations in each of the drums. The inner drum is packed tightly (but not too tightly!) with wood chunks or sticks, up to 1” in diameter. The outer drum is packed with similar material, lit on top and then closed up with a vented lid. When all assembled the flue pipe stands up proud off the drum lid, step back, and with a stretch of the imagination it resembles the Tin Man from Oz. If you’ve watched the video and have remaining questions on Tin-man construction, then please, scroll through the following slideshow.

[tribulant_slideshow gallery_id=”5″]


Operating the Tin-Man

When woody biomass is heated in the absence of oxygen, two simultaneous processes are set into motion: pyrolysis and carbonization. Volatile gases are driven out (pyrolysis) while what organic material remains is carbonized into biochar. These volatile gases are burned when allowed to mix with a proper ratio of ‘secondary’ air. Gas escapes from holes in the inner drum, while air makes it way into the system via two sets of holes on the outside drum. These holes in the drums each serve a specific function in this process.

  1. The holes along the bottom of the inside drum allow pyrolysis gasses to escape, but limit the amount of the oxygen that can go in. These holes are very important! Do not apply heat to a completely sealed drum!
  2. The holes along the bottom of the outside drum are for “primary” air: that which provides oxygen for sustaining the burn in the space between the drums. Think of this as the ‘fuel’ when determining your fuel/gas ratio. In general, more air is necessary here in the beginning of the batch process, but may become a problem later if things become excessively smoky.
  3. The holes along the top of the outside drum are for “secondary” air: providing oxygen to the fuel rich gas coming from below. After the process gets going, the space between the top of the two drums becomes a mixing zone, facilitating maximum combustion before exiting through the flue pipe.

In my experience: I have not yet been able to run a Tin-Man without adjusting air inlet at some point during the process. Fuel rich dark smoke indicates inadequate combustion – this common problem is almost always helped by adding more secondary air to the mix by carefully cracking the lid of the outer drum. White colored wispy smoke may indicate the temperature is too low – possibly due to too much secondary air, or inadequate primary air, or the wood isn’t dry enough. Moisture is a huge factor in all biomass systems – it takes a lot of energy to vaporize water – energy that is otherwise available to raise the combustion temperature. It’s also important to pack the space between the two drums with enough combustible material to sustain throughout the entire process.

How big do I make my holes?

Unfortunately, there’s no good answer for this. You can use our hole spacing (outlined in the slideshow above) as a starting point. But herein lies the catch: (for the most part) the tin-man is a batch system. What I mean here is the whole batch of woody biomass in the inner drum is (mostly) heated evenly. As wood heats up, its constituent parts: cellulose, hemicellulose, and lignin undergo pyrolysis at different temperatures. At first all three of these main constituents require heat to begin pyrolysis. Then later in the process, some are releasing gas (exothermic), while another may still yet be requiring heat (endothermic). Problems occur when gases are released at once, overwhelming the careful mix of gas and secondary combustion air. In general we find that between 450 and 600F there are steep climbs in gas production, requiring additional secondary air to maintain a clean burn. We call these “bursts” that generally coincide with the pyrolysis of cellulose. Different species of woods can have differing ratios of cellulose to lignin, therefore, bursts become especially apparent when carbonizing an entire batch of the same species. The strategy to managing the tin-man system lies in anticipating bursts by limiting the speed of the process and adjusting air controls accordingly.  Simply put, there are too many variables to provide a solid recommendation for number and size of holes.  Consider a mechanism that allows for air adjustments; Mixing species for feedstock, and packing a nice full (but not too tight!) inner drum will also help buffer bursts.

This may sound confusing, but it’s important to recognize the tin man has some advantages: Of the three systems I’ll describe here, the tin man allows for carbonizing wood up to 1 ½” in diameter. To some extent, it allows for some time to step away. It’s a nice way to make good biochar from common yard wastes with the least amount of ash. It’s also allows for a cool down period after finishing – other systems require dousing with water at the end of the process. Of course, we love the simple design and use of junkyard materials.

Some disadvantages: When things go wrong, they can go very wrong. Don’t ever attempt run a DIY tin-man without holes in the inner drum. By now you should understand that heated wood creates char and volatile gases that could explode if not allowed to vent properly. Managing bursts is tricky, and can turn into a messy plume of concentrated wood gases (much stronger than regular smoke) that can be very harmful to your health. Sure, the tin-man can carbonize random chunks of biomass and sticks, but as I said above, it’s best to pack it in tight. This requires a decent amount of feed stock prep time.
That said, we’re happy to share success stories with the tin man. If you’ve found a matrix for hole sizing and/or an appropriate feed stock pairing, then please share. Continue on for a review of the TLUD system and the Kon-tiki open flame method.

The TLUD

We’ve talked a lot about the TLUD before, so I’ll keep it short, and focus on how it compares to the tin man.
It’s another steel cylinder inside a cylinder – but the air and gas flows are much different.
It’s another batch system – fill up the inner cylinder and light on top, but unlike the tin man, the biomass is gasified in a continuous, even ‘pyrolysis front’. No bursting with this one.
Utilizing the heat is built into the design – TLUDs are commonly used as small cook stoves, but can also be scaled up for other heating processes: canning, sterilizing, or even laundry. We used ours last week for boiling down lye crystals from wood ashes.
It requires a consistent size and shape biomass feedstock – it works very well with easily sourced wood chips, nut shells, etc. It won’t work with large chunks of wood or sawdust. Let’s be realistic: unless you have a chipper, it would be a challenge to use this with yard waste.
You have to be present to extinguish the char. Knowing when to extinguish the char takes some practice – too soon and you may end up with not yet fully carbonized (torrefied) wood on the bottom of the column, too late and the char becomes ash.
Plans are widely available – stay close to the dimensions of the Champion TLUD, use dry feedstock and you’re almost guaranteed clean burn with very high quality biochar.


Kon-Tiki Cone Kiln

The Kon-Tiki (or it’s cousin, the ‘Oregon Kiln‘) are unique among small, ‘backyard’ biochar systems: the truncated cone (or pyramid) design with open top is an oxygen limited container that allows for relatively clean biochar production, while still maintaining the primal feeling of working an open fire. The secret is in the upward and outward sloping walls of the kiln, that force secondary air to build up pressure as it rises toward the top edge. Upon cresting the lip of the kiln’s top edge, the low pressure zone on the fire side pulls in preheated air in a (sometimes dramatic) swirl pattern, thoroughly mixing air and fuel rich pyrolysis gases.
Start a small fire in the bottom of the inside of the cone. After the fire is well established, add sticks and brush on top of the open flame. The idea is to keep top barely burning in this oxygen limited environment, where gases are fully combusted at the top edge where secondary air mixes in. As the top layer of wood burns down to coals, add more wood on top, paying close attention to cover all exposed charcoal with sticks. Expose the charcoal to air for too long and you’ll get more ash. This is easier than it sounds; and indeed, the creators of the Kon-Tiki kiln at the Ithaka Institute can explain it much better than me. Our experience shows operating a cone kiln requires a bit of nuanced experience in judging feed rate. In our very small 32″ diameter cone kiln we’ve been able to cleanly carbonize dry sticks up to (and possibly larger than) 2″ in diameter.
We fabricated our small cone kiln from a single (scrapyard sourced) 3’x5′ sheet of 22 gauge stainless steel. Though this system requires a bit more oversight, we enjoy the feeling of standing around a carbon sequestrating campfire.

We had a huge pile of pallets that are beyond repair; a cone kiln is a nice way to manage this kind of waste while making good biochar.


Comparison

From pit methods to continuously operated automated systems, there are so many ways to make biochar, each with its own appeal. For me, advocating for small scale biochar production is about identifying the technology that takes the least effort with the cleanest burn. For instance, a TLUD boasts a very clean burn, high quality char and adaptive cooking design, but can be very intensive on feedstock preparation without equipment. Feedstock preparation is a perennial problem with biomass energy systems: the systems with labor and energy intensive feedstock preparation (predictable size, shape, moisture and density) are the simplest to manage. The Kon-Tiki offers a means to char sticks and limbs with very little preparation, but requires oversight throughout the process. The tin-man style designs can work, but not without careful feedstock preparation and some control over the process.

If you’ve made it this far, thanks for your work. You know by now that biochar produciton can be a powerful way to capture carbon and improve soils, but it shouldn’t be done at the expense of your (and your neighbor’s) health and well-being. Careful consideration in selecting the right system will go a long way in sustaining your biochar operation. As always, send us an email if you want to share your experience.