Online Q&A: How to Grow Your Own Kombucha or Vinegar SCOBY

Our workshops and YouTube videos can spark some questions that take a little extra time to address. The blog is a great way to answer and to share with a wider audience. Send your questions via email and they might just end up here (with your permission, of course.)

QUESTION: How do you grow your own Kombucha or Vinegar SCOBY?
(this question was sparked from watching “Introduction to Vegetable Fermentation” with Meredith Leigh)

Meredith,

Hi from Cape Town South Africa. Just a quick question. Could you please do a video showing us how to start a Kombucha mother from scratch, as in real scratch, without using Kombucha tea as a starter.

The reason for this is that the health industry here has become fully “hipstered” and they charge stupid amounts of money for scoby “starter kits.”

Also, Kombucha tea have been made expensive to the point where it is not even something you would want to support by buying it (I’m talking the price of a decent, high quality organic burger for a 200ml bottle of KT.)

Also, they try to not sell the raw, unflavored tea, because they know people can starts scobys from that.
I, for one, think this information should be “opensource” and not ruined by hipster-ized commercialism (it is a big problem here – everything that is seen as “good” or “natural” or “alternative” is soon taken over by people with beards and wooden glasses and tweed and priced to the point where normal people can’t afford it.)

Would really appreciate your expert knowledge on how to safely start a proper Kombucha Scoby from scratch.

Regards and best wishes

Jacques.

ANSWER:

Hello Jacques,

Great question!

The easiest way to develop your own kombucha is to have pieces of a SCOBY (symbiotic community of bacteria and yeasts) either from another bottle of kombucha, or from a friend. I understand your concerns about cost and dependency, for sure. Usually, community is the solution, as people who are brewing kombucha already have more SCOBY than they know what to do with. Is there a forum on social media, or even a meetup in your area where you can ask other like-minded fermenters if anyone has a piece of SCOBY for you?

If the answer to all that is definitely no, then you are looking at developing a SCOBY all by yourself. That requires a phased process. Start with some fruit, cut up (not citrus). OK to leave the peels on if it is organic fruit. Apples, plums, pears, etc. Place the fruit in a bowl with sugar to coat and stir well. Transfer to a jar, and add enough non-chlorinated water to cover the fruit, and then add a generous splash of vinegar (best if it is unfiltered). Cover with a towel, label with date and contents, and remove to a cool, dark-ish place (pantry, cabinet) to ferment. Stir it every once and a while. What you will likely find is that over time it will develop a very alcoholic smell. This is normal. Continue to ferment and eventually you should develop a SCOBY. This process will be VERY slow, so be patient. I did this for the first time as an experiment to see if I could develop my own apple cider vinegar SCOBY, and luckily, I kind of forgot about the jar. When I came back to it I said to my friend “I think I made apple alcohol by accident.” Rather than clean it up, I left it there. Then, again, by accident, I came back to find it had eventually developed a SCOBY.

An even faster way to do this is to take whole organic fruit (not citrus) and vacuum seal it completely, and then place it in a warm place (up to 80F). As fermentation begins, the fruit will release ethanol and begin to inflate the vacuum bag. It can take 3+ weeks. Let it inflate as much as you can over time, until it looks like it may burst. Then, carefully open it at one corner, and let out the CO2 that has inflated the bag (it will smell sour, don’t worry). Then, transfer the entire contents of the bag (fruit and juices) to a jar, cover with a thin cloth, and refrigerate. Slowly, a SCOBY should begin to develop. Give it time, and taste the liquid to see how tangy it is. You can use the fruit vinegar that you’ve created, and then you can remove the SCOBY to a jar of sweetened tea to work up continuous batches of Kombucha.

The reason the second approach works faster is that you are intentionally providing two very distinct environments: 1st, a fully anaerobic environment that produces alcohol, and then the aerobic environment that encourages acetobacteria and yeasts to produce the SCOBY.

If you’re growing a SCOBY for kombucha, I have found it works great to use apples or pears. I have put many other fruits through this process, but have usually not used the resulting SCOBYs for kombucha in those projects, but have instead used them to perpetuate distinct fruit vinegars. So, I cannot speak to a persimmon or plum SCOBY in a black tea kombucha. Feel free to experiment! Keep in touch!

Thanks for your question,
-Meredith

Low Voltage Controls: Part 2

Last time I wrote about controls, things got a little dense real fast.  If all of the talk of switches and relays seemed to lack any relevance, then stay put, because this month I’ll skip ahead and show some real concrete examples of ways we use low voltage controls around on our farm.  Review the earlier post if you need a refresher on switches and relays.  This time, in some real specific examples,  I’ll review some of my favorite low cost and versatile control devices we use around Living Web Farms.

But first, remember when working with electricity to take it slow and pay attention to detail.  Be redundant with your testing equipment, and know your limits.  Depending on your jurisdiction, it may not even be legal for you to work on your own electrical systems (In most cases low voltage controls and appliance repair don’t require licensing) and even though we agree it’s important for owners of their equipment to understand its operation and have the ability to diagnose and repair, we don’t endorse unlicensed or unqualified high voltage electrical work, especially when it puts people and property at risk.


‘Ready-made’ Controllers: Sensor and Switch

Remember a simple control circuit needs three things: a power supply, switch and a load.  The switch is either actuated manually – think lightswitch, or your car’s ignition – or automatically, like in your water heater, or refrigerator.  Automatic switching devices employ a sensor and some means of reading the sensor, and switch a load accordingly, either directly or through a relay.   Sensors and relays are everywhere – as they are the foundation of anything that’s automatically controlled.

Mirroring what I said in last month’s post about switches and relays: refer to a spec sheet when selecting a controller.  Look for input voltage requirements, along with amperage switching capabilities.  Some controllers are capable of switching relatively high amperage loads directly, others may require an intermediate relay for load switching.  Pay attention to environmental ratings – can the controller be used outside, under rain or irrigation? Can it be installed in humid environments?    What about memory storage?  If it’s an electronic controller, you’ll want to consider whether it can store presets if the power goes out.  The list goes on.  Again, check the spec sheets and product brochures for these details.  Here’s an example before I move on: early on when building out the kiln ventilation system at the biochar facility, we selected a typical household humidity controller for its low cost.  We were later disappointed to find we didn’t have the option for remote sensing, or for controlling the humidity outside of the range typical of dwellings – two things we’d have noticed if we paid closer attention to the spec sheets.  Four years later now, we’ve learned a bit, but we haven’t lost our spirit for experimentation and finding low cost control options.  Following are a few of my low-cost favorites we use around the Living Web Farms Biochar Facility.


TF115 Line Voltage Thermostat

The simple and rugged, affordable PECO TF115 Thermostat comes in a NEMA 4x housing. NEMA ratings correspond to the environment where the unit can be safely operated – 4X is just one of many electrical enclosure ratings. For example, NEMA 1 enclosures are the common interior type that don’t offer much beyond protection from live electrical components, while the NEMA 4 rating states this thermostat has a watertight enclosure: ideal for outdoor locations, greenhouses, or anywhere else it’s likely to get wet.

The greenhouses at the Grandview Facility employ TF115 line voltage thermostats to monitor air temperatures and control baffle inflation fans accordingly.

These thermostats use a bimetallic sensor: requiring no outside power source to make or a break a connection between common, and Normally open (N/O) or Normally closed (N/C), based on a user determined dial-set temperature.  SPDT operation means it can be used either for heating (where N/O lead has continuity with common, when the actual temp is lower than the set temp) or cooling (where N/O has continuity with common when the temp is higher than the set temp).

The best parts about the TF115 are its rugged housing and simple 120 Vac switching up to 16 amps.  Use this when simplicity is preferred over other options like extended remote sensing, or programmable differential.  We use these thermostats in our greenhouses to de-energize sidewall and gable baffle inflation blowers when things get too hot.


Ranco ETC

When talking about thermostats, differential refers to the temperature range in between on (switch closed) and off (switch open).  Many thermostats use a preset, non-programmable differential somewhere near three degrees, and, for the most part, when heating your homes this is fine.  However, in other applications there are a few reasons you might want a more narrow or wider differential.  High mass heating loads (think concrete slabs and huge water tanks that require a lot of energy to change temperature) are good at storing and slowly releasing their heat.  Radiant floor heating systems are a kind of high mass heating system, where a very low differential is appropriate.  On the contrary, low mass heating systems, (or leaky buildings) may require a wider differential to overcome short cycling: where a heating system turns on and off too frequently to maintain a constant temperature.

For these kind of applications I’d look first to the Ranco ETC.  This very low cost, easily programmed controller comes in a range of operating voltages, with single and double relay versions available, in a Nema 1 or Nema 4 housing.  The simplest version of these controllers has a single relay action, where a circuit is opened when a user determined temperature is realized, and doesn’t close again until the measured temperature is outside of the range of the differential.  These controllers have a heating or cooling mode (expressed in the industry as ‘Open on Rise’ or ‘Close on Rise’)  that dictates the action of the switch upon rising temperature.  Although Ranco controllers don’t offer programmable schedule options like most residential heating thermostats do, and these controllers are limited to one sensor, they’re still one of the most versatile controllers out there.  However, r they’re rarely used for human comfort heat; they’re more commonly found in light industrial heating or cooling applications – think temperature control for brewers, walk in coolers, or, in our case for hot water heating control in our curing chamber.

Programmable setpoint and differential. Source: Ranco ETC installation manual


Peltec 102 – Repeat Cycle Timer

The Peltec 102 is an extremely versatile timer relay that absolutely stands out as on my favorites – so much that we’ve installed a few permanently in applications ranging from our chip gasifier agitator control, or for pulsing our biochar retort overheat alarm buzzer.  I even keep one around that’s pre-wired for 120V loads.  We used it for our irrigation spray bar we used for germination trials last fall.  I’m using it now for dialing in the on/off schedule for the pump on our trial aquaponics system.

Our overheat and overflow alarm system includes a stoplight and 24V buzzer. When the system gets too hot or condensates aren’t flowing freely, a 24Vac relay energizes the red light and triggers a repeat cycle timer for the buzzer. The yellow light indicates we’re within 100 degrees of overheat.

Just like relays, when you start looking you’ll find that timers are everywhere, and there are so many different types it could make your head spin.  We’ve all familiar with countdown timers like the switch on your crock-pot, or the plug-in christmas light timer that operates on a 24-hour cycle.  When you see flashing lights at regular intervals, it’s likely a Repeat Cycle Timer that’s responsible.  Looking specifically at the Peltec 102 datasheet we find it’s capable of switching up to 16 amps at input voltages from AC/DC 12-240V.  What I like most about this one is the separate programmable ON and OFF intervals.  For example, I’m not bound to flashing lights for 1 second on/1 second off, now I can use it for controlling our alarm buzzer, where I want 15 seconds off between 1 second on pulses.  Or, in the case of our irrigation spray bar, on for 5 minutes with 8 hours in between.  I find it especially helpful in experimental applications.  Say for some wild reason you wanted something to operate for .1 second every 100 days, then you could do that with this timer.

Voltage is applied ‘to the coil’ just like any other relay, and the switching between Common and Normally Open begins at user-programmed intervals. Source: Peltec 102 Spec Sheet


TM-619 Digital Programmable Weekly Timer

Similar in a lot of ways to a Christmas light timer, with a 24 hour cycle, the TM-619 expands on this, allowing for up to 8 different programmable ON/OFF functions over the course of a week.  This very low cost unit saves its program when the power flickers, and switches up to 20 amps directly, or can be used to further activate another relay or contactor for large loads.  We use one now in our kiln ventilation fan circuit.  Process heat from the biochar system keeps the solar wood kiln at a baseline temperature.  The solar starts kicking in around 10:00 AM on sunny days and begins boosting temperature, further driving out moisture in the wood.  As long as it’s below a set humidity level outside, ventilation fans kick draw in fresh air and exhaust moist air at set intervals throughout the day.  This program allows for heat and humidity levels to rise with the sun’s applied heat, then vent, then rise again, and vent again, finally venting again at the end of the solar day.

A Ranco, differential controller, humidistat and TM619 timer: working together to help dry sawmill waste before becoming biochar.


PID Resistance Heating

PID stands for proportional-integral-derivative controller, and as you might expect, these things gets incredibly complicated, fast. When applied to resistive heating applications, PID controllers work to maintain a constant temperature by sensing the temperature at the heated device and then anticipating fluctuations by recording rates of change.  The PID uses this information to pulse the heater device on and off accordingly.  PID technology is used across a wide range of industrial control applications, perhaps most famously as the cruise control function in your car.

We’re using the Inkbird ITC kits with PID, Solid State Relay (you’ll need this kind of relay to allow for rapid switching) and a thermocouple for temperature sensing.  These days you can find imported kits like this (albeit with questionable quality)but at very low prices.  Lately we’ve been using these on any of our devices that need tight, constant temperature, and are small enough that electrical resistance heating can reasonably do the job.  For example, our modified oil burner uses a PID controlled heater at the nozzle for heating waste oils for easier atomization.  We use them too, on our extrusion machine from Precious Plastics where we can extrude melted plastic wastes, or even pelleted animal feed.

PID controllers and resistance heaters on our extrusion machine.


…and More

The list goes on.  We’re using differential temperature controllers normally reserved for solar hot water heating to operate our kiln heater fans.  We’ve kept the R8184 ignition control units from our junkyard sourced burners  intact for oil burner safety shutoff.  Float switches from restaurant equipment have been re-purposed for our condensate collection overflow alarm circuit.  A windshield wiper motor (low speed, high torque) powers our small tracking solar array.  I’ve even used a pressure switch from a landfill destined dry-cleaning machine for an air cannon that I can shoot off on the Fourth of July or at my kids’ birthday parties.  Point is, hopefully now with a little background in what’s out there, you can start to think creatively about what’s possible in low voltage control and automation.


Experimental Farm Network’s Nate Kleinman Visits Living Web

Climate change– its causes and effects, its crusaders and its naysayers– is one of the top issues of our time. For Nate Kleinman, who used to work in disaster relief, it’s the work of his life. On February 24th, Living Web Farms will host Kleinman for a full day workshop on addressing climate change on the farm and in the garden, through the fostering of native plants, resilient plants, radical grassroots plant breeding, citizen research, and seed saving.

As a political organizer and activist working on hurricane relief in New Jersey after Sandy, Nate Kleinman made a connection that would change the course of his life. “It clicked for me that climate change and its effects are a social justice issue. And social justice is something I had always been passionate about. Disaster relief work was a bandaid, but I needed work that got at the root of the problem.” Enter the Experimental Farm Network, Kleinman’s online network, citizen research and plant exploration project that seeks to do just that.

“With all the ways agriculture impacts climate change, I want to address how individual farmers and gardeners can facilitate the creation of a sustainable food system,” Kleinman says. On February 24th, 2018 he will deliver a full day intensive workshop at Living Web Farms focusing on agroecology techniques, plant breeding, seed saving, native plants, and germplasm resources, to name a few of his favorite topics.

“Plant breeding is something that people have been doing for thousands of years,” Kleinman continues. “You don’t need a PhD to do it.” And so he is teaching people how. From seeds he got from the USDA, to plants he’s collected from the wild, Kleinman is assimilating a network of volunteers to work on proliferating resilient plant varieties, breed plants for nutrition and plant health, and research and harness the opportunity of useful wild plants.

In addition to hands-on techniques demonstrated by Kleinman, participants in the workshop will learn about resources for plant seeds and plant germplasm, and hear about highlighted projects of the Experimental Farm Network, including an effort to develop perennial sorghum, and to produce may apple for its powerful medicinal qualities.

Kleinman hopes to demonstrate that even if you are living in a row house and gardening a postage stamp, you can access free seeds, find rare plants, and practice breeding. Kleinman remembers the impetus for his projects being the total failure of perennial wheat, “which totally exists!” he adds, to ever become a marketable commodity. This drove him to champion what he calls “a citizen-science model for developing staple crops.”

The idea for the classes he teaches is to put the techniques for seed saving, plant breeding and variety development into the hands of laypeople. “Anyone can do it,” he says, “and regular people ought to be doing it. We can’t just leave it to the ivory tower and the corporation.”

To register for Farming to Fight Climate Change, click here.

Low Voltage Controls: Part 1


Last weekend I had the privilege of leading Living Web’s first workshop for 2018.  Tech workshops tend to work best in the winter, before the growing season kicks in. Cold weather and a stiff wind kept us in the classroom and bundled up tight for a brief tour of some of the low voltage control systems around the Grandview Biochar Facility.

Leading a six hour workshop means you can take your time and cover the fundamentals before honing in on the specifics.  Still, understanding how to use low voltage controls to help run your small farm more efficiently is no small task.  I thought the blog format would be useful as a way to cover some of the highlights from last Saturday while providing links for further study.  I’ll start out today on a brief soapbox before coming down to introduce some basic control circuit vocabulary.  Next month I’ll pick it back up and finish by mapping out some control circuits that include some readymade controllers to do some simple, but necessary work.

Appropriate, and Inappropriate Technology

Last weekend’s controls workshop was about introducing the vocabulary of some of the behind the scenes processes that keep us comfortable, safe and efficient.  First off, we’re not in a position to advise building these systems from scratch.  It’s important to know your limits, and recognize when you put you people and property at risk.  That said, I’m a firm believer that, as owners of these appliances and machines that play such an integral role in our lives, it’s at least in some part our responsibility to understand, and have the ability to troubleshoot and perform basic repairs when the need arises.

When we talk about controls, it’s important to recognize the difference between those that remove the human element – rendering us lazy and unaware – and those that we can work alongside, gathering useful data and substituting human effort for only the most mundane and inefficient tasks.  Take for example the case of irrigation controllers: today’s newer models have ‘improved’ upon older ones by including wi-fi connectivity to access weather forecasts and control irrigation solenoids accordingly.  Contrast this to the RainBird SMRT-Y soil moisture sensor kit that saves water by interrupting an irrigation schedule when the soil is already moist, and works alongside any 24 volt irrigation timer, whether the internet is down or not.  Ask yourself, do you really need to control your sprinkler with a cell phone?  We’re all familiar with the narrative of our tendency to overplay high tech systems that can leave us exposed when these systems fail.  Of course I understood the useful applications of these systems, but there’s a time and a place:  when user-repairable components are replaced with non-repairable parts in the name of technical progress, something is lost.

The Farmbot Genesis Open-Source CNC Raised Bed. Clocking in at $2495 this machine is essentially a watering system that allows you to plant your garden as a videogame, pushes weeds underground (no mulch?) and sends text message alerts when your crops are ready for harvest.

I’m only part Luddite: no doubt, the Farmbot is an amazing work of open source tech that will serve well as an educational tool, and to some become a gateway to sensible agriculture.  And there are inherent advantages with IOT when applied to small agriculture, as long as we maintain a means for human intervention.  The SwitchBox control is a complete kit for controlling standard 120V outlets with your cell phone.  And, for those more initiated, there are many online tutorials for DIY versions of SMS controlled outlets at a much lower cost.  I’m sure there are many of us that would like one of these to open the chicken coop door, or start the block heater on the tractor on a frosty morning.  Earlier this summer in our greenhouses, we used a combination of two Android apps that make use of older, otherwise irrelevant phones: Tasker for automatically controlling a phone camera for overnight data collection in some germination trials, and Alfred which allows you to use your phone as a remotely monitored security camera.  With a motion activated alert feature, certainly someone could use this to catch a chicken thief in the act.

Low Voltage Controls

High tech aside, let’s get back to basics. A simple electrical control system really only involves three things: a power source, a switch and a load.  A common light switch will allow power from the utility to energize a lightbulb.  Low voltage controls, however, are inherently safer, more cost efficient, in some ways more capable and easier to install. First, we’ll take a look at some basic components of a low voltage control system: transformers, switches and relays, and see a few simple control circuits we built for the greenhouse and our tracking solar array.

A small doorbell transformer like this takes 120Vac down to 24Vac and typically provides enough power for relays, thermostats and more in our control circuits.

Transformers are devices that either raise or lower an incoming primary AC voltage to a usable secondary voltage.  Depending on the application, transformers can ‘step up’ the incoming voltage (microwaves, arc welders) or ‘step-down’ transformers such as those on the telephone pole in your neighborhood.  We’re most interested in the 24V control transformer.  You can find these everywhere, chances are you’ve already got at least one for your doorbell or inside your furnace.  For most applications around the Grandview Facility we’re using pri:120V, sec:24V transformers rated at least for 40VA. VA is very similar to Watts: a measure of the amount of power a transformer will provide.

Switches come in an immense variety of styles and functions.  Since there’s no way I could even come close to covering it all, I’ll mention a few interesting ones we’re using in our control circuits.  But first, we need to understand a few basic terms.

[tribulant_slideshow gallery_id=”2″]

Admittedly this is a little dry, so let me try to inspire showing a popular example of a way we can use switches to make our lives easier: the three-way lighting switch.  Chances are you have this circuit in your home, where you can toggle an overhead light on or off from either of two switches located on opposite ends of the room.  If you were to pull off the switch cover plate and observe it’s likely any novice would be overwhelmed by a indiscernible mess of wires.  However, when expressed on a line diagram it’s easy to see that a three-way lighting circuit is nothing more than two SPDT switches wired in series.

The light is energized when both SPDT switches are in the up or down position. Move either switch and the circuit is broken.

So far we’ve only covered small, manually operated switches.  A crucial step towards understanding low voltage control systems involves knowing how relays work. Think of Relays as electrically powered switches, that are often employed by control circuits to energize larger loads, or otherwise isolate circuits.  Just like switches, relays can look quite a bit different from one another – each with its own application.  The starter motor solenoid in your car is a type of relay.  Turn the key, and control power from your car’s ignition switch energizes a coil, that closes a circuit from your battery to the starter motor.  If your car didn’t have this relay, your ignition switch would have to be rated for the full load current of the starter motor: as much as 250Amps or more!  What we’re going to focus on are 24V electromagnetic ‘ice cube’ relays that close a switch between common and ‘normally open’ when 24 volts is applied to ‘the coil’.  Scroll through the photos below to learn a bit more about relays.

[tribulant_slideshow gallery_id=”3″]

When you begin to imagine the applications for relays, first you’ll realize that relays are everywhere, and then you may see that relays can make a lot things possible that you might not have otherwise thought of.  For example, our greenhouses are the constant inflation type: requiring a small blower to maintain air between two layers of plastic film. They’re great for insulating air pocket it creates and can keep a tight greenhouse much warmer in the winter than single layer poly versions.   However when the grid goes down, we’d otherwise lose inflation and our greenhouse walls would be a floppy mess if we didn’t have a relay activated, battery powered DC backup blower.  This circuit is simple:  A 120Vac relay stays energized as long as the grid is present.  The DC blower is connected to the battery by way of the N/C contact the relay.  So, as long as the grid is present, the relay is energized and makes common to N/O, and the DC fan won’t turn on.  It’s not until we lose power that the relay reverts back and makes common to N/C, completing the DC blower circuit.

DC backup with a 120Vac ‘grid sensing’ relay

Next time I’ll cover some of the ‘ready made’ controllers we use, along with relays and switches, to do fun things around here, like energizing a stoplight and buzzer when our biochar retorts get too hot, or, for optimizing our solar kiln operation.  I’ll wrap up today with one more example of how we use relays: the motor reversing circuit on our our 400W tracking solar trailer.  In this case, we’re using an Arduino microcontroller to advance our simple tracker westward 15 degrees every hour.  The arduino board sends out a 5v signal to a relay that’s only rated for switching 5 amps max.  We had to then step up to another relay capable of handling the full load of the tracker motor.   At the end of the day, the tracker motor reverses by switching polarity and reverting back to it’s original, pointing eastward, morning position.  We programmed the arduino board to do this automatically, but we’re not pros, so we used relays to make sure that the motor couldn’t receive a command to move forward and reverse at the same time.  If the arduino fails to recognize the end of day, repurposed N/C lawnmower safety switches are wired in series and used as limit switches, so the tracker won’t tear itself apart.  See the circuit diagram and you’ll see how a couple of relays both protect the motor and switch motor polarity upon receiving the signal.


Biomass for the Masses

by Richard Freudenberger, Living Web Farms Resource and Alternative Energy Coordinator

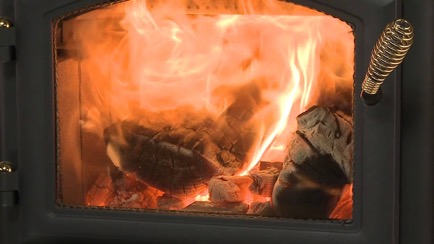
Call it firewood, biomass or solid fuel, it’s still one of the most reliable ways to heat your home—but only if you do it right. Even long-time wood-burners can disagree on what is “right,” so we’re going to do our best to clear the air about best practices in wood burning and selecting appropriate wood-burning stoves.

Getting the most out of firewood is nothing new. Ben Franklin’s heat-radiating stove, Count Rumford’s clean-burning fireplace, and Scandinavia’s wood- frugal tile masonry stoves were all an 18th -Century response to inefficient burning or regional shortages of wood fuel. Enclosed metal and cast-iron stoves followed in the years after, and wood cook stove innovations came close behind, all direct developments of efforts to control temperatures and fuel consumption.

Most of that development went away with the advent of natural gas and electricity, but petroleum shortages and the back-to-the-land movement of the 1970s sparked a renaissance in wood burning which has largely continued to this day.

The Good and Bad of Wood

Wood is a renewable resource that is carbon-neutral when used properly in a certified stove or fireplace insert. Contemporary stoves, with efficiencies of 80 percent or more, make better use of their fuel than most fossil-fuel furnaces and electric resistance heat in any form.

And because wood is a local commodity, there’s no worry about infrastructure, grid stability, scarcity or any of the other risks that come with processed fuels. If you’re fortunate enough to have even small acreage, you can glean your supply on site, from deadfall or proactive management. If not, you can always order a load, split or uncut, and store it pretty much indefinitely if you have it under cover.

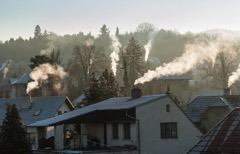
But there is a downside. Smoke from residential woodstoves contains an especially damaging pollution called fine particulate matter or PM2.5.– airborne respirable particulates with a diameter of less than 2.5 microns. These super-fine particles in smoke comprise about 93 percent of the smoke’s particulates and can get deep into the lungs, damaging the pulmonary system, blood vessels, and heart.

Other pollutants in smoke include carbon monoxide, volatile organic compounds (VOCs), and benzene. Unregulated residential wood smoke can increase particle pollution to levels that pose serious health concerns, and in some rural areas constitutes a significant portion of the fine particle pollution. More about the health effects of PM2.5 here.

A Brief History of Wood Burning

How we got here from there is an ongoing saga that started with the shift to airtight wood stoves that came with the OPEC fuel crises of the mid-1970’s. Woodstoves now easily account for 75 percent of the cordwood burned in residences, the remainder being fireplaces which are used much less frequently. There are over 11 million homes in the United States that use wood for either primary or secondary heating.

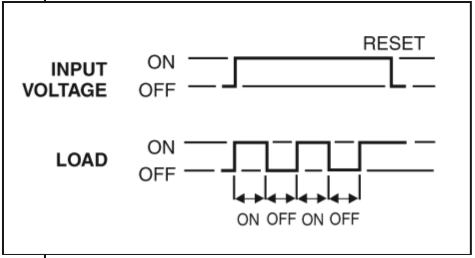
Because the only controls in early airtight stoves were an air inlet and a flue damper, users quickly learned that in order to conserve wood they could throttle down the air inlet and slow the burn once the fire was fully engaged. The result was a smoldering and very dirty fire that would release 40 to 60 grams of particulate matter into the air every hour.

By the 1980’s state agencies and the federal EPA began testing airborne particulates, and in some jurisdictions set wood burning bans on especially bad days. This prompted manufacturers to research and develop clean-air models, which is when the first catalytic and “high-tech” stoves (called non-catalytics) came onto the market.

In 1988 the EPA initiated what would become a three-phase regulation program that required woodstove manufacturers meet a certified emissions standard of 8.5 grams/hr. (5.5 for catalytic models), followed by a 7.5/4.1 gram/hr. standard a few years later. In 2015 that dropped to 4.5 grams/hr. for all certified woodstoves and included previously unregulated outdoor wood boilers, wood furnaces, and pellet stoves. A Phase IV performance standard for 2020 sets the limit at 2.5 grams/hr. for all cordwood burners. Follow this link for information about wood heaters that are in compliance with the 2015 New Source Performance Standard (NSPS) for New Residential Wood Heaters.

So now we’re at an emissions level that’s less than 8 percent of what it was thirty years ago. But just as important we’ve seen efficiencies rise dramatically, so far less fuel is being burned in today’s certified stoves to provide the same amount of heat available from those high-emissions stoves of decades past.

How Wood Burns

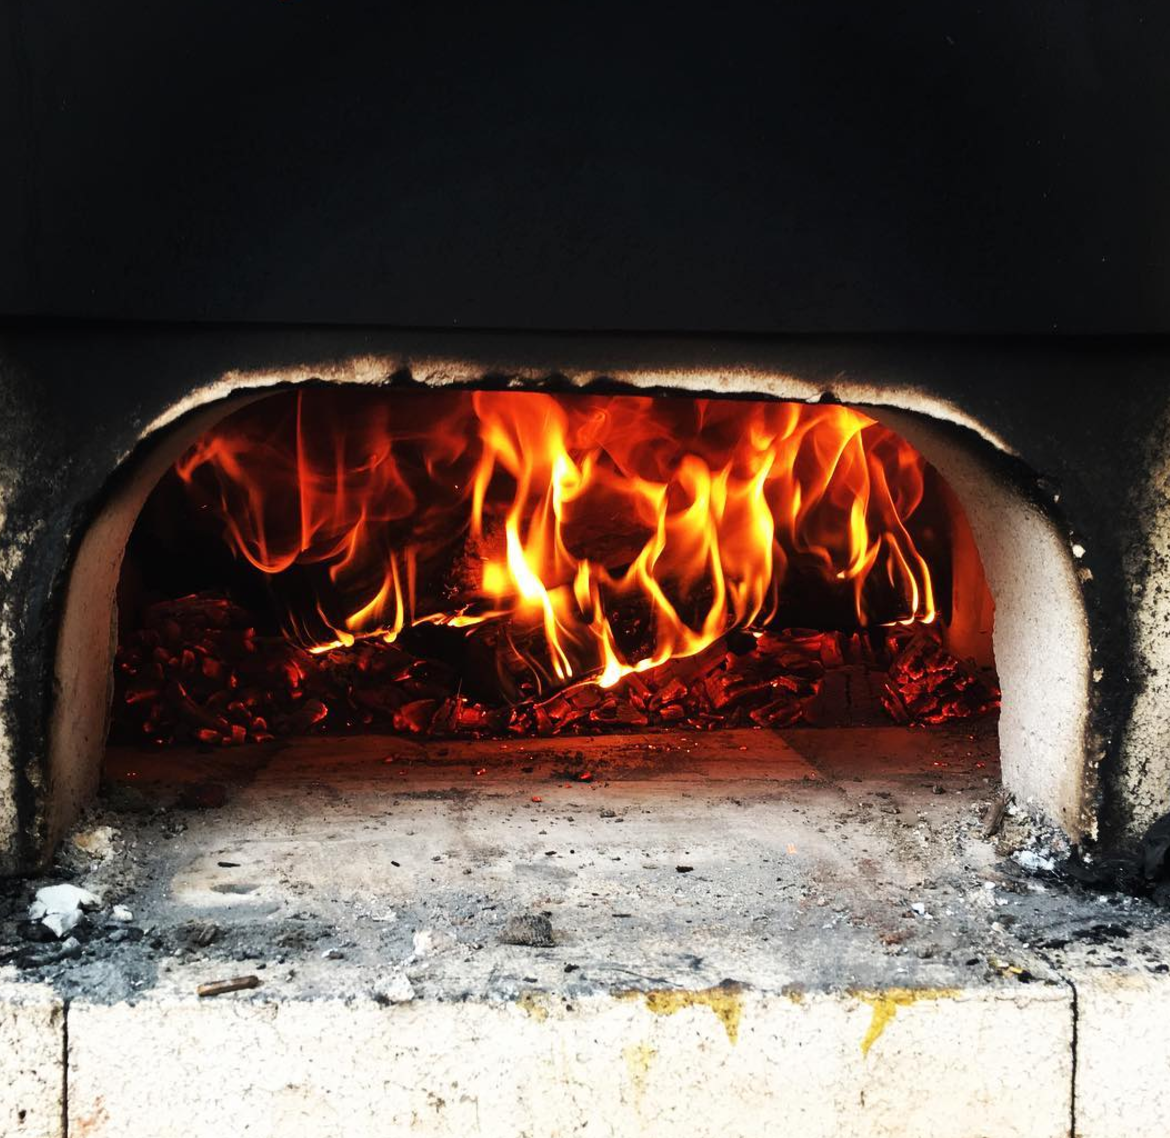
The magic happened when designers began looking at the stages of combustion inside the stove. Wood itself doesn’t actually burn. The initial heat source–a match, a coal, burning tinder—decomposes cellulose in the wood starting at about 300 degrees F by breaking chemical bonds between compounds, a thermal decomposition process called pyrolysis. Offgassing of water vapor and volatiles (smoke comprised of oxygen, hydrogen, and carbon) occur at that point, and as temperatures rise to around 540 degrees F, most of the water vapor is driven off, and a large quantity of volatiles are released in a process of primary combustion, which generally occurs below 900 degrees F.

These volatiles, known as secondary gases, contain combustibles such as methane and methanol, along with carbon dioxides and oxides of nitrogen. In order for the secondary gases to burn, temperatures must reach the 1100 degree F range with sufficient oxygen present. These conditions don’t exist in close proximity to the wood because primary combustion is taking up the necessary oxygen.

Secondary combustion is critical to a clean burn and high efficiency and depends on just the right supply of air at high enough temperatures. Too little air cannot support combustion and too much cools temperatures below the needed threshold because its nitrogen absorbs heat.

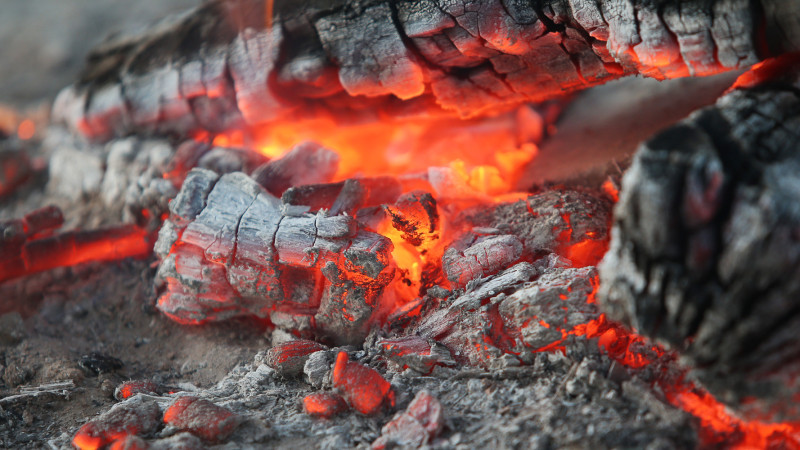
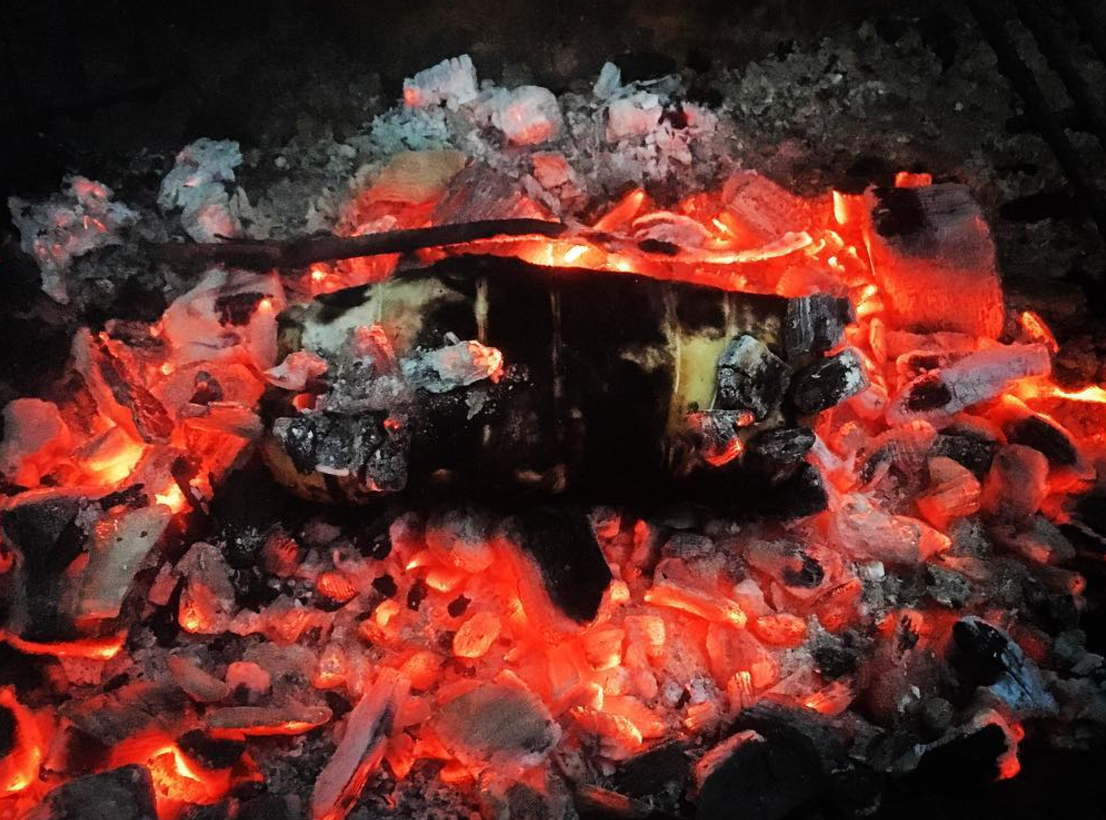
Left behind is ash and carbon char, which combusts slowly because of the lack of oxygen. With the gases gone from the wood, the carbon chains of cellulose and lignin molecules remain behind as charcoal, which burns for an extended period with a low heat output. This third phase of combustion is still significant because in addition to releasing additional energy which adds to fuel efficiency, the charcoal extends the burn through the night so the fire can easily be reignited with fresh fuel in the morning.

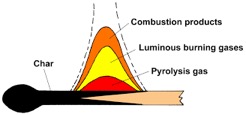
The combustion of wood occurs in varying zones at different temperatures

Two Good Alternatives to a Dirty Burn

Legacy woodstoves, the airtight stoves sold before July 1988, are still in use, either because they are original installations still going strong, or they’ve been sold on the used market as economical buys. As a matter of fact, they are a very poor investment due to their high rate of wood consumption, not to mention a burden on local air quality.

Current certified woodstoves have evolved to include design features that encourage all-important secondary combustion so critical to a complete burn. Popular technologies include the use of catalytic combustors, extended circulation of gases in the stove, controlled secondary air manifolds, baffles, and thermal-mass stove construction to hold heat. More recent entries are smart stoves that use sensors and computer controls to adjust airflow or recycle heated exhaust air.

For most people, clean stoves will fall into two categories—catalytic and non-catalytic. The catalytic types direct exhaust smoke through a ceramic honeycomb catalyst that, when heated to a temperature of around 550 degrees F, burns off volatile gases and strips out particulate matter. Catalytics tend to have a slightly higher efficiency and longer burn times than non-cats, but they can also be a bit more expensive and require more user input. They will not tolerate wet wood, colored or waxed kindling paper, or trash burns of construction waste with nails or wire, as these will inactivate the catalyst unit over time. Even under ideal conditions, the life of a catalyst is limited to ten years or so before it must be replaced.

Catalytic woodstoves rely on a coated ceramic honeycomb operating at high temperatures to keep emissions within limits

Non-catalytic stoves depend on internal airflow and delivery to keep secondary burn temperatures in the working range. Internal baffles keep gases in the combustion zone longer to assure a more complete burn and pre-heated air delivery enhances the secondary burn process. The firebox in a non-cat may tend to be smaller because of additional insulation, and its heat output curve may not be as consistent as that of a catalyst type, but the stove requires less user input, and because of the airflow pattern will provide a very visual fire.

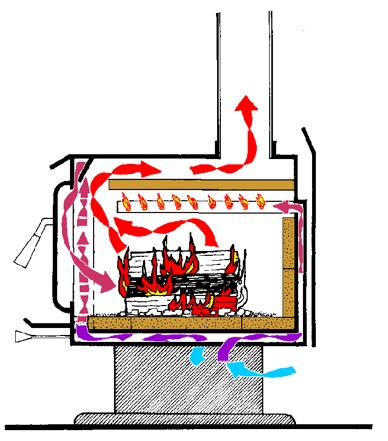
Non-catalytic stoves use flow baffles and a carefully engineered secondary burn manifold to meet emissions standards

At the lowest end of the price scale you may still find non-airtight, ungasketed stoves that are not EPA certified. These were banned from retail sale at the end of 2015, and were only exempt from regulations because they are so leaky that they fall under an 11 lbs./hr. fireplace exemption. Generally they are not UL approved, and are not clean burning by any measure. Their only attraction is their price, and they should be avoided. You can access here The List of EPA Certified wood heaters.

The secret to a good burn in any woodstove is to use only dry, seasoned wood, preferably a hardwood species. Moisture has a significant effect on heat value in the fuel, as uncured wood can have 40 percent lower heat value than wood seasoned to a 19 percent moisture content. It takes, on average, about six months of air-drying in most climates to achieve this level of dryness.

Atomizing Waste Oil Burners

Update: 10/26/18.  Part 2 available here

Summer HVAC season is coming to a close and lately our local scrap-yard has been teeming with old oil burning furnaces. While Asheville residents are replacing oil burners with updated heat pump systems as fast as they can, conscious builders and tradesmen are recycling the used equipment, and although many of these machines are fully functioning, no doubt many of them still end up at the landfill.  What can be done to keep this robust, sometimes outdated, technology out of the waste stream and put to good use?  The biochar crew at Living Web has been working over the past year to develop oil burning technology for clean combustion of pyrolysis oil – a corrosive, sticky, and heavy liquid coproduct of biochar production.

Conventional Oil Burners

Conventional oil burners are commonly found in older homes and in areas where heating systems were installed prior to the widespread availability of natural gas.  They’re the appliance commonly found in basements, that pulls oil from a large tank, and burns it in a chamber housed directly underneath a furnace or boiler.  These home heating oil (HHO) burners are set up for a specific grade of oil, commonly referred to as #2 fuel oil (Imagine the viscosity of diesel fuel).  In fact, any oil furnace designed for #2 fuel oil can accept up to 20% biodiesel with no modifications.  WNC locals may be familiar with bioheat from Blue Ridge Biofuels – a blend of up to 20% biodiesel and fuel oil.  For those of you outside of the area with oil furnaces and boilers in your home, use this map to find biodiesel distributors in your area.  Also, see the Dept of energy site for suggestions of some simple procedures, such as nozzle resizing, that can cut up to 10% off fuel usage.

These “gun style” burners were pulled out of old furnaces instead of getting crushed at the the junkyard. Conventional oil burners can be modified to accept a wider range of fuels to provide intense heat for many processes.

How do they work?

Conventional oil burners are a tightly packaged system of components: oil pump, blower, nozzle, ignition system, controls and safety mechanisms. These ‘gun-style’ burners work by forcing refined oil through a specialized nozzle at high pressure, creating a mist that ignites in the presence of a high voltage spark.  This extremely fine, or atomized, spray facilitates clean combustion by reducing the particle size of fuel relative to combustion air.  Think about kindling when starting a campfire – given adequate combustion air, small pieces of wood burn quick, clean and hot – It’s the same with an atomized spray.   The right amount of oxygen is introduced, add spark, and the resulting flame is then managed in a burn chamber, where the intense heat is directed across a heat exchanger, warming the air or water in a residential heating system.

Apart from improvements in flame retention and combustion air handling, very little has changed with the gun style burner in decades.  Of course, environmental and resiliency issues arise when considering the extraction and distribution of our remaining cheap petroleum, especially when it’s diverted to home heating use, where there are so many better options.  However, operation of these burners is surprisingly clean, they have to be, or soot clogs the small passageways in a typical furnace heat exchanger.

There are a few more things that make these working with these conventional oil burning technologies so interesting:

  • Liquid fuels inherently have certain advantages: they’re easily stored and metered for predictable power output.  This is essential in certain of kinds of equipment, and merely a convenience in others.
  • Clean combustion requires high temperatures – an advantage when applied correctly.  High temperature heating fuels are not always necessary in a home heating system, but are critical when applied in certain applications, such as backyard foundry or ceramic kiln.
  • Unless otherwise indicated, gun style burners are designed to only burn #2 fuel oil (and up to 20% biodiesel).  Higher concentrations of alternative fuel oils require equipment modifications.  Fortunately, these modifications are well documented: waste motor and vegetable oils are accessible fuel alternatives.

Retrofitting a gun style burner for alternative fuel use requires a few distinct changes to the original design.  Specialized siphon nozzles use compressed air to deliver fuel spray while preventing clogging issues and eliminated the need for the oil pump.  Waste motor oil has a higher flash point than #2 HHO and requires additional fuel preheating. We use a small (surprisingly affordable) PID controlled heating element at the nozzle for reliable startup and consistent operation.  The details go on, and these are not easily understood modifications without a little background and tenacity. Lucky for us, CKburners provides kits and detailed instructions for those starting out.  For our first unit, we bought the block heater and siphon nozzle kit.  For those inclined to sourcing salvaged materials, one could be able to modify an existing oil burner with this kit for as little as $400.

A modified gun-style burner, developed for use with waste motor oils.

Pyrolysis oil

At Living Web Farms, our end goal was a machine not limited to the use of waste motor oils, or even used vegetable oils.  We needed a system that could reliably burn pyrolysis oil – a coproduct of our slow pyrolysis method of biochar production.  In slow pyrolysis, gases are released from dry biomass as it’s heated in the absence of oxygen.  These gasses pass through a condensing unit on their way to a controlled burn chamber.  At the condensing unit, gasses that can be condensed drop out as liquids, where they drain into large holding containers.  Over the course of a few months, heavy oils and tar settle out in the bottom of these containers.  The lightest of these oils are what we call pyrolysis oil, which is separated and stored for use as fuel.  The remaining liquid products, tars and wood vinegar (or, pyroligneous acid) are also separated at this time, where it’s stored and used later for all sorts of interesting things.

Pyrolysis oil has some very different qualities that set it apart from conventional fuel oils.  It requires fine atomization into a hot burn chamber.  It’s highly corrosive, and its viscosity changes dramatically with changes in temperature.  From our experiments, we’ve learned if it’s heated beyond a certain threshold, it won’t return to a liquid form. Since then, we’ve learned this may be due to increased oxygen exposure, and this makes sense too, as if it’s allowed to dry in the sun long enough it can create a hard plastic like shell. These characteristics become distinct challenges when tasked with designing an appropriate burner.   Because of these issues, especially corrosivity and clogging problems, we knew it wouldn’t be reasonable to ‘push’ pyrolysis oil through the tiny passageways in the nozzle of a modified gun style burner.  Our research in DIY metal casting brought us to the babington style burner.

Pyrolysis oil: A valuable coproduct of farm scale biochar production

The Babington style burner

Babington burners were developed in the 1970’s by the inventor, Robert Babington, as a means of achieving very fine atomization spray at low firing rates.  Babington Airtronic burners saw an early market in the 1980s as home heating units in mostly European households.  Today, the technology has been picked up by the US military in remote cooking applications.  Babington burners have a unique ball-shaped nozzle design that not only provides a fuel efficient burn, but also allows for a much wider range of fuels, requiring much less filtration than modified conventional burners.

The heart of the babington burner system is the ball shaped nozzle.  Instead of forcing oil through a nozzle with a pump, now, oil is pumped over the ball, where it forms a thin film as it stretches out over the surface of the ball.  At the equator of the ball, where the film of oil is at it’s thinnest point, it intersects a stream of pressurized air forced through a very small hole.  Atomization is achieved here, where the fine spray of oil passes near an ignition point, more air is introduced, and clean combustion is realized.  Excess oil flows over the ball and back into a vessel (sometimes called a sump) where it is continuously pumped back over the ball.  The original babington burners were designed for high efficiency, low firing outputs.  DIY builders have experimented with ways to adjust heat output (and thus, fuel consumption) by adjusting the size and number of holes in the ball, flow rate of oil, and pressure of air through the nozzle.

Water poured over a ball shaped nozzle as air passes through a very small hole produces a very fine spray

At normal temperatures, our pyrolysis oil is too thick for filtration through standard oil filters.  For us, the real advantage of the babington style nozzle lies in the reduced need for this level of fine filtration.  Since our oil won’t be forced through a conventional nozzle, the fuel only needs to be filtered to the extent that it can be pumped.  Our system uses a 12V gear pump to deliver oil from a salvaged LP tank sump onto a stainless 2” ball with a .03” hole.  Preheat is applied to the entire reservoir through a copper coil heat exchanger, where heat is drawn in from either a very small DIY electric water heater, or off the excess heat generated from the system.  Conventional electrodes and ignition control are sourced from another scrap yard burner.  With this setup, we’ve achieved very clean combustion of pyrolysis oil, at temperatures up to 2000°F in our burn chamber, on very little fuel consumption (½ Gal/hr).

Our burn chamber was built with a modular design in mind.  Either the babington style burner or our modified gun-style burner mount on a flange on the inlet tube.  The burn chamber functions as a crude kiln or foundry with a modest amount of temperature control. The lid removes easily to reveal a universal flange for mounting a water heater, or for accommodating future appliances like a tumble dryer or forced air furnace.  Things get interesting here, where we can maximize efficiency by stacking appliances.  For example, simultaneously we can melt aluminum in the chamber, while heating water, and then sterilizing growing media or drying wood chips, before exhausting through the flue.

Our babington style pyrolysis oil burner: this thing is tank! Built with experimentation in mind, we’ve demonstrated pyrolysis oil can burn clean and hot.

We built our first babington style burner with experimentation in mind.  Honestly, It’s an oversized unit that leaves much to be improved upon.  The preheat system is clunky and requires too long for the system to start from cold.  Our conventional ignition system isn’t reliable with oils it wasn’t designed for.  Overall, there are too many ways this system can fail.  Even with our automated safety controls, this isn’t a machine you would want to walk away from for long, much less leave overnight for greenhouse heating.

For me, it’s not until you pick something apart and start rebuilding that you gain an appreciation for the original.  This winter we’re looking forward to redesigning our babington style burner.  We’ll try to fit it all into a conventional gun style burner package.  Our new system will start reliably (and save energy) by preheating the oil only at the point before flows over the ball, and we’ll include an LP source for cold starts, and possibly lose the conventional ignition source all together.  We’ll be developing more low cost applications for the heat: greenhouse heating, plastics recycling, feed processing and more.

Stay tuned, we’ll be updating our progress on the blog.  As always, send me an email if you’d like to know more.

Update: 10/26/18.  Part 2 available here

Conducting a Do-it-Yourself Home Energy Audit

by Richard Freudenberger, Living Web Farms Resource & Alternative Energy Coordinator

There are two benefits to saving energy in the home. One is the financial gain of allocating less of your household budget to keeping the household humming, and the other is the less noticeable advantage of managing consumption for the sake of our planet’s resources. The energy used to generate electricity—whether it comes from coal, petroleum, natural gas, or enriched uranium—requires extraction of a natural resource and all the processing and logistics that come with it. In addition to that, using these resources creates emissions and a waste stream that has to be controlled and dealt with in a responsible way.

The September Equinox is a good marker for those of us north of the equator to make a plan to reduce electrical usage. The weather is turning cooler, demand for heat, light, and cooking is greater, and most of us will be spending more time indoors.

Let’s start the conversation by talking about the typical electric bill. Most of us probably just look at the bottom-line dollar amount and pay the charges, but there’s a lot more information in that bill than you may realize.

A typical residential power bill will show consumption in kilowatt-hours (kWh) and make a comparison with the prior year

The use of electrical energy is measured in kilowatt-hours (kWh), or the amount of power, in 1,000-watt units, consumed in one hour. So, a 100-watt bulb on for ten hours uses 1 kWh of energy. Likewise, a 1,500-watt space heater on for one hour uses 1.5 kWh of energy, or 50 percent more.

In the course of a day, all the lights, appliances, accessory chargers, fans, and so forth in the home draw power in different increments and for varying lengths of time, but at the end of the day, consumption can be measured in a common unit, the kilowatt-hour. Utilities generally work on a 30-day cycle, so it’s a simple matter of dividing the total kWh used in a month by 30 (or whatever number of days the cycle happens to be) to get the average kilowatt-hour usage per day. The bill is then tabulated along with fees and taxes at your utility’s residential rate per kWh, which ranges by state from 9.4 cents to over 28 cents.

It sounds fairly simple, but the problem is that not all appliances use power consistently. Some, like your refrigerator, well pump, or forced-air furnace, may cycle on and off several times an hour, making it difficult to gauge how much power is actually being consumed.

So if you were trying to get a clear picture of how your energy budget was spread out you’d have to be able to measure the consumption of not just the steady draws such as lighting but also the inconsistent uses. Fortunately there is an inexpensive device that allows you to do just that.

The Kill A Watt electricity monitor (manufactured by P3 International) is probably the most well-known, but there are many other choices available online and in home improvement stores at prices ranging from around $13 to $30. Once the purview of professional energy auditors, these devices have dropped to a price point where anyone can take advantage of them.

An electricity usage monitor can be used on any 120 volt outlet and costs less than $30

The monitor plugs into a wall socket and has a built-in outlet that accepts the power cord from the appliance you want to test. Controls on its face allow you to select the mode (it displays watts, amperage, voltage, and frequency in addition to kWh) and can it be set to monitor by the day, week, month or year. Once you’ve entered the cost of electricity from your utility, it will count the cumulative consumption of whatever is plugged into it and convert the data to dollars.

With this information you can make educated decisions about how long to run your air conditioner, whether your refrigerator is devouring more than its share of your energy budget, or if items that use standby power like TVs and printers are worth putting on a power strip that you can shut off after use.

If you are shopping for a new appliance, the yellow Energy Guide label displayed on major appliances is a good measure of how much energy the unit will consume annually in kilowatt-hours. It also provides a yearly estimate of how much it will cost to run based on the average cost of energy. The ratings are categorized by appliance size or capacity, and a further indicator is provided by the Energy Star logo, which indicates high-efficiency models. The Energy Star choices are typically more expensive, but not necessarily by a great deal.

The Energy Guide is a good comparison tool for assessing new purchases and comparing your old appliance’s electricity consumption to a new model

That, in fact, makes them a better buy in the long run, because efficiency is a smarter path to energy savings than simple conservation. Keeping an old refrigerator in service to save the cost of buying a new one simply means that you are spending more each year to operate it, especially if it’s close to ten years old. A new Energy Star purchase will lower operating costs, reduce the need for service costs, and give you the features you want, while paying back the original cost of purchase.

What effective steps you can take to turn an audit of your household power usage into savings? Start with simple things like lighting. Incandescent bulbs are a thing of the past, and compact fluorescents are gradually fading from the scene as well. LED bulbs last ten times longer than icandescents and use 10 percent of the energy while delivering the same amount of lumens, or light output. Replacing every bulb in a moderate-size household will cost as little as $250. You can also take advantage of daylighting for free by opening shades and curtains in the winter which will let in light and some incidental solar energy.

A pre-programmable, or a smart WiFi learning thermostat would also be a good investment, ranging in cost from $100 to around $250, plus installation. These allow you to specifically set your home’s climate control to the times you typically occupy the house, shutting the system down to maintenance levels at other times, resulting in substantial savings. The learning thermostat has a memory that adjusts to changes in your schedule.

Pre-programmable thermostats can be adjusted to suit your schedule and save money by coordinating the climate control system with the hours you spend at home

Water heating accounts for 15 to 17 percent of electricity usage in a typical household, the third largest consumer of household energy behind heating and cooling. For a large family, an investment in an electric heat pump water heater can offer a reasonable payback period, but it’s not really necessary to go to a high-tech fix if you can install a water heater timer (about $55) to control the time cycles that the appliance gets power and a closed-cell foam or fiberglass jacket wrap (about $29) to increase the insulation R-value of the tank. Even setting the internal heater thermostats down to 120 degrees F will result in some savings if the factory presets were set higher.

Phantom load management of the standby electronic devices mentioned earlier are a small but significant part of your household electricity picture. Nationally, standby power accounts for a whopping $11 billion in energy costs, but every little bit of savings helps within the household. The small cubes and black boxes attached to your devices’ power cords are the giveaway that power is being consumed by internal transformers, even when the device is switched off. Plug these into a gang power strip and use the strip’s switch to make sure that no energy is getting to the devices. Problem solved.

The power cube in the wall outlet is about to find a new home on the power strip. Devices like TVs and entertainment equipment usually have built-in standby circuits that consume energy as well

Other than refrigerators, clothes washers are a significant consumer of electricity and water. An electricity monitor will determine if your current washer is power-hungry due to age or just cycle operation, and if you go online to https://www.energystar.gov/products you can research replacement machines that are more efficient. At the Energy Star Tier II level, there are a good selection of products that offer at least a 10 percent energy savings and up to 40 percent water use savings, with costs in the $600-plus range. Horizontal-axis machines are especially efficient and many are domestically manufactured.

Finally, consider having a professional inspect your ductwork and air handling system for leaks and damage. After an HVAC tune-up, a duct inspection can be the most effective path to efficiency, with minimal materials cost. Sub-standard installation and deterioration over time can take a quiet toll through the years, wasting both warm and cool air by not delivering what you’ve paid for to the intended location in the home.


DIY – Make a TLUD Gasifier

By Dan Hettinger, Biochar Facility Manager

Last month I wrote a little about the carbon impact of biochar production, and concluded with the assumption that going ‘carbon-negative’ is likely very possible with simple scale ‘backyard’ biochar technologies.  Bob Wells’ immensely popular presentation on the Tin-Man shows an effective DIY method with a single 55 and 30 gallon steel drum.  Lately, here at Living Web Farms, we’ve been taken by the TLUD (Top-Lit/Up-Draft) Gasifier as an alternate means of DIY biochar production.  In fact, If you’ve followed us closely then you know that we’ve talked a little about TLUD gasifiers before.

I’ll be the first to admit this can be a hard thing for a lot of people to get excited about.  That is, until you look closer at what’s possible with this technology.

What’s a Gasifier?

Chances are you’ve heard about coal gasification as one of the ‘clean coal’ technologies that’s been getting a lot of attention lately.  The merits of this practice are debatable, and not within the scope of our work at all.  Although the principles of the technology are very similar, when we talk about gasifiers, we’re generally talking about much smaller devices that convert biomass into gasses through the application of heat with a controlled amount of oxygen.  Our gasifiers are low tech devices: think of them as vessels filled with biomass and lit with a torch, where just enough oxygen is applied to keep it lit. Pyrolysis ensues, biomass is reduced to carbon, and a myriad of gasses are released. The resulting mixture of Carbon Monoxide, Hydrogen and Carbon Dioxide is (often called Producer Gas, or Syngas) a fuel gas that can then mix with oxygen and burn at higher temperatures than ordinary smoke. Higher temperatures lend to a more complete burn that, when ultimately compared to an open burn, is a cleaner, more efficient process.

In the early part of the 20th century ‘town gas’ was produced as a coproduct of the coking process and distributed throughout nearby communities as a cooking fuel and illuminant.  However, the discovery of cheap fossil fuels made this and the early chemical industry it supported irrelevant. Gasification of biomass saw renewed attention during the world wars where petroleum became so scarce that many European economies were forced to switch up to one million petroleum fueled motor vehicles to operate on syngas.

In 1989 FEMA published a manual on building simple down-draft gasifiers for powering motor vehicles during a petroleum shortages.  Since then, wood gas gurus like Wayne Keith (driveonwood.com) have expanded on these plans to build reliable biomass trucks that are capable of continental travel on a surprisingly low amount of fuel.  Today, there are many outlets for DIY and commercially offered wood gas electrical generators.

The LWF biochar crew built this passive charcoal gasifier to run a lawnmower we found on the side of the road!  Charcoal as a fuel for gasification is a clean choice, as much of the tars have already been driven out, but it burns hot and can lead to different problems.  Look closely and you’ll see how the engine exhaust doubles as the air intake to help make this run a little cooler.

Almost simultaneously in another part of the world, humanitarian engineers were developing small gasifying cookstoves for improved fuel efficiency and cleaner combustion. The World Health Organization has reported that ⅓ to ½ of the world’s population are still cooking their meals on an open fire, and, that annually, up to 4 million people prematurely die every year from indoor pollutants as a result of cooking indoors. There is a huge potential for positive global impact through the development of cleaner biomass combustion technology.

Top-Lit Up-Draft Gasifiers

Born out of years of development was the TLUD gasifying stove.  These devices use chunky biomass (typically wood chips or pellets) as the fuel to produce both a clean flame for cooking or heat, and charcoal, to be used as biochar or sold as a value added commodity.  Along with cooks in the developing world, conscious gardeners and homesteaders have made use of TLUD technology to make biochar from landscape wastes while providing heat for greenhouses, domestic water, canning, or even processing chickens.


Using a TLUD, on chicken processing day at Living Web Farms, the biochar crew maintained 8 gallons of dunking water at optimal temp for easy feather plucking.

The TLUD works on a natural draft of primary air through a column of smoldering biomass.  The process starts when a small fire is started on top of the column.  Primary air is then drawn in through holes underneath – enough to keep it hot, but not enough to create and open burn.  Dense smoke(syngas) is generated, and, once a strong draft is established, secondary air is pulled in through holes towards the top of vessel.  This secondary air mixes with the syngas in the combustion zone where it burns much cleaner than an ordinary campfire.  Limited oxygen just below the flame facilitates preservation of charcoal.  This line between the flame and charcoal is sometimes referred to as the pyrolysis front.

There are many ways to build a gasifier, with varying degrees of sophistication for different applications, and I encourage you to research further on your own.  For the serious DIY small producer, I’d recommend starting with the champion style TLUD.  With it’s preheated secondary air, it’s a little more involved that what I’ve demonstrated below, but worth the effort in achieving a cleaner, neighbor-friendly burn.

The LWF biochar crew built a few champion style TLUDs last fall (see below, end of slideshow for photos).  Of note is the larger of the two, where we expanded on the champion design and offset the flue, so we could use this large flat plate as a heating surface for heating up large pots of water for canning.   What we really wanted a robust stove with longer run times, that would also help move the canning chores (and all that heat and humidity) outside in the summertime. This device will heat 3 gallons of water from the well to boiling in about 45 minutes, it runs at full strength for about 2 hours and yields 2-3 gallons of crushed biochar.

It’s challenging to build a robust gasifier without some welding, though we realize welding can be intimidating (it’s easier than you think) and isn’t accessible to everyone. Below is a slideshow we put together to demonstrate a very simple and robust, large TLUD build from a salvaged 100 gallon propane tank and 2 sections of 6” flue pipe.  You won’t need a welder to build this, but you will need to acquire an angle grinder with a few extra cut off wheels, some good eye and ear protection, gloves, a drill and a couple of self tapping screws.  Locals can try the Asheville Tool Library if you don’t want to buy an angle grinder for just this one project.

[tribulant_slideshow gallery_id=”1″]


You’ll know that a batch is done when the temperature drops, it smokes a little, and you smell that familiar charcoal scent.  Be prepared,  you’ll need to be nearby to quench the char in time.  If you miss it, your precious biochar will be consumed in the presence of air.  Quenching provides an opportunity to create microscopic fractures in the char that further enhance it’s value as a microbial substrate.  Some biochar gurus will even add mineral amendments, such as SEA-90 or Azomite to the quenching water to help encourage microbes to move in.  pH testing at our facility indicates that biochar made in a TLUD may be more alkaline than biochar made in the retort method.  This is likely due the open-atmosphere nature of the technology that facilitates an increased ash content, especially if you don’t quench it in time.  Use caution when applying TLUD char raw, it’s best to allow pH to neutralize by blending it with rich compost and allowing it to set for a few weeks prior to application in the garden.

Winter is a great time to make biochar at your homestead.  This year, instead of making a burn pile in the yard, save your little stuff that doesn’t go in the wood stove.  “Waste” wood like downed limbs and orchard trimmings that don’t compost easily are perfect feedstock for a manageable one person biochar operation.  With its multitude of applications, ease of construction and availability of materials, these small gasifying and biochar producing devices are deserving of a place alongside the solar cell and bicycle as one of the bedrock appropriate technologies.

Send us an email if you’d like, we’re happy to help to get you started!


Remembering Chuck Marsh

by Patryk Battle and Meredith Leigh

(Patryk:) Chuck was the person I was most looking forward to getting together with at this year’s Permaculture Gathering. I wanted to share with him my delight at having rooted in accidentally broken off branch of Yuzu ( a hardy-ish Japanese citrus that I of course got from Chuck). But the vicissitudes of life and the fact that he left the gathering early meant that we missed each other. Upon learning why Chuck left early, I reached out to him offering Living Web Farms grown Reishi mushroom, produce and of course, any other support we at Living Web might be able to provide but our mutual friend Gred Gross who brought me up to date on Chuck’s situation reported that that a key message from Chuck was “no #$%&! sympathy!”.

Chuck and I had a lot in common. One very unimportant but always personally gratifying thing we shared is a penchant for peppering our speech (when our executive editors found it prudent!) with expletives. Would that I could be as effective or evocative with expletives as Chuck was! He could encapsulate much of what Meredith so eloquently describes below with one or two well-placed expletives.

There are no expletives in Chuck’s response to my offer of support but it is classic Chuck, and I believe more effectively illustrates the depth and breadth of Chuck’s spirit than anything I ever write could. So please allow me to share a lightly edited version of his recent letter to me:

Thanks my bro Patryk,

Sorry to have missed you as well.  Yep it’s true, my death is before me.  Kind of exciting actually, though I’m not pretending it won’t be a bit of a rough ride.  After all, what has my spiritual warrior training been for if not to greet my liberation straight on.  I don’t call the news bad, but rather sad and soulful.  Let us cultivate souls together, my bro!

Thanks so much for your offer of veggies and mushrooms.  I would really like to take you up on the Ganoderma lucidum (oak Reishi).  Any other good cancer fighting mushrooms would be welcome.  We’re cooking up some blends for me.  .  Deep appreciations my bro!  I think I’ll pass on veggies for now, as I’m not eating any serious volume of food, but as fall comes on some greens might be delightful.  I know your food is filled with chi and want some, but am still settling into the complexities newly put before me.

Pretty exciting about the yuzu.  life wants to live, as I intimately learn as I am slowly gobbled alive.

My love to you and Diane,

the chuckster

Though I only saw Chuck a few times a year, every encounter resulted same pleasure and celebration of each other as Mere describes below. Fortunately my always perceptive partner Diane recognized the importance of capturing such camaraderie one of the last times we met up with Chuck and insisted on getting a picture of us. It, as they say, says it all.


(Meredith): Anytime there was a gathering of minds around food, plants, farming, or gardening, Chuck Marsh was there. (Patryk says: Mere is being literal here! A quick survey at the last Carolina Farm Stewardship Association’s Sustainable Agriculture Conference awards dinner revealed that only Chuck had attended all 31 of CFSA’s Sustainable AG Conferences.) When I  graduated from Warren Wilson College in 2005 and started working for the Organic Growers School, his name was on an unwritten but understood “list of names”- people who never expired as resources, teachers, idea-makers, movers and shakers in the grower movement. As I went about my work farming and non-profiteering, I committed those names to memory and was honored to call people like Chuck not only mentors, but also friends. When Patryk Battle (once another name on that same list and now a close colleague) and I sat down to write a tribute to Chuck, it occurred to us that the greatest impact Rascal Chuck ever had on us was less an effect of information, and more one of attitude.

Let me explain. People who knew Chuck probably won’t be surprised by this. Those who did not have the privilege of knowing him might misunderstand. Chuck Marsh was a wealth of knowledge about plants, the interactions between plants and people, plants and other beings, community dynamics, and much more. As a comrade of his who happen to also be obsessed with plants, I felt lucky to be able to email Chuck about a specific way to propagate muscadine grapes if I couldn’t quite remember, or recruit him to teach people about making willow tunnels. I’ll miss him for this, probably more than I yet realize. But the part of me that misses Chuck already and the most, is the subversive, over-activist, empath part. The part that connected with his attitude and his ethic and his hope. Indeed, sitting down to create a schedule for 2018 workshops at Living Web Farms, we brainstormed an epic series of Permaculture classes, taught by a cooperative of names and faces we have come to trust and love. Chuck was at the top of the list, and the topic Patryk proposed for him wasn’t water or soil or plant, but “Values and Ethics.” (Patryk adds: He was fiercely egalitarian, can do, and insistent that everyone and everything mattered.)

We are activists. So many of us who knew Chuck. We are subversive, probing, change-oriented people. Anarchists, herbalists, mothers with their boobs out, punk rock homesteaders, tax evaders, hippies, and outlaws. We are those society-as-we-know-it-is-a-rigged-spectacle type of people, with the tendency toward imagination and unfortunately, toward cynicism. Some of us have become angry. For me, (Meredith), the first time Chuck and I truly connected was when we were standing around talking to Joel Salatin at some event or another, and I quoted Machiavelli, and Joel faded away and Chuck and I sat at a round table in a mostly empty conference room and talked about how to maintain a revolution for a couple of hours. This is our type of person- the person who skips small talk about the weather and jumps to the cause and ripple effects of the weather pattern on the state of the top 4 layers of soil. Or something. But that’s not the point, that Chuck was our kind of person in that way. We all know this. The point is that he made being that way fun, even when being that way is sometimes hard, and annoying, and discouraging, and frightening.

He was always laughing, wasn’t he? So many people have said that since he passed, and it is true. That loud, hyperbolic guffaw-laugh. Why don’t we have a voice recording of it right now? Just for the people who didn’t know it well. That’s the point. In our line of work, and especially if your name is on the list of names that everyone calls to talk about muscadines or talk about revolution, it can be really hard to keep laughing like that. To remain hopeful, to not give in to despair, or anger, or sorrow. Especially now. When the world is on fire, and we need Chuck-like people the most, and there Chuck goes. Chuck who was always there. But Chuck Marsh left us better equipped than that. He laughed his famous laugh at the cynical jokes, but then he just kept attacking problems of epic proportions from a multitude of angles, from several different countries, with a dizzying web of people of all sizes, shapes, and colors. And he just kept on believing in that, connecting to it, happily, passionately. We could count on that. I could count on seeing him in the hallway at the next event and he’d be like “HEEEEEYY SISTER!” and give me a big hug and ask about my latest projects and boom around his thoughts, and then I’d wonder why in hell I wasn’t as convinced as Chuck was that I was doing important work. That I am doing the right thing. And suddenly I’d walk away and something would be renewed in the fight or the quest or whatever it is that moves us all to keep working. To keep hoping for change.

Another time I connected with Chuck was when he was immersed in a deep loss. We both were, and we sat together and asked “why?” and even in whirls of wisdom and knowing, there was a small sliver of time to support Chuck. Which felt rare and special. I went home and opened a letter a friend had sent me, and in it there laid a quotation. It said, “Be patient with all that is unsolved in your heart. Try to love the questions themselves.” I sent it to Chuck. It served me then, and it serves us now.

Thanks Chuck, for keeping it light. Thanks for believing. Thanks for being the kind of guy who could sit at a round table and sift through the ugly truth, but then just be happy and encouraged and overjoyed to make the world a better place. Missing that, wanting that back, well, that is a given. What we at Living Web would love to remember, is just to try to embody that. To do the work with joy. To laugh louder, even though you have considered all the facts. To believe that what we’re doing today is important. Because it is. To forget that would be to forget something that Chuck gave us. But to remember that. Well. That, dear friends, is how you maintain a revolution.

Elements of Cooking Series Next Class is about FIRE

“Heat is the element of transformation,” writes chef Samin Nosrat, who has worked with Alice Waters at Chez Panisse. Nosrat argues that heat, more than anything else, is what ultimately renders our food from one thing to another. “Heat is flavorless and intangible,” she writes, “but its effects are quantifiable.”

Long before Nosrat finished her recent book, Salt, Fat , Acid, Heat, (which I highly recommend), the culinary minds at Living Web Farms have been set on providing foundational cooking classes– free, accessible fundamental culinary knowledge to our local community and YouTube audience. This is why we have launched the Elements of Cooking workshop series.

The next class in the Elements series is all about heat. And more specifically, cooking with FIRE. It will be an exploration of the importance of mastering heat in cooking, but through the lens of understanding fire as the most primordial form of heat, and as a defining cornerstone in culinary culture. So, participants will be able to apply what they learn about heat to cooking using electricity or gas, but they will also walk away with a better understanding of fire cooking methodology, and a look into fire science from a cook’s perspective.


Elements of Cooking workshops explore the science and practical application of some of the most basic and axiological knowledge to mastering good cuisine. Our first event in the series centered completely on SALT, and in it we explored the origins of different types of salt, principals for using it, and practical but creative tips for salt’s role in your kitchen based on its chemical effect on foods. (Access the video here.)

For the fire class, I’ll be teaching along with Patryk Battle, as we explore the properties of wood, smoke, and fire and their affect the appearance, aroma, and flavor of food. We will learn how to tweak the culinary outcome of projects based on fire temperature, wood choice, and oxygen flow, along with timing and method of exposure. The class will be taught at our Kimzey Road farm, where we have a wood fired oven, and participants will learn to start and manage a fire for various projects. We will also use a homemade grill for demos, and plan to share several other more primitive fire-cooking methods, such as spit cooking, steam pit cooking, and cooking on a plank. Patryk Battle will share tips for wood fired baking as well.

The emphasis will be on simple, whole foods cooking, and we encourage people to come regardless of whether they feel 100% comfortable with fire. As a female in the culinary industry, it has been particularly meaningful to me to empower women and young people in grilling, smoking, and managing fires for cooking, and to introduce people who have never even started a fire to the excitement of this living cooking method. We will also cover the health considerations of fire-cooked foods, so anyone with concerns about health effects is encouraged to attend.

It is estimated that at least 3 billion people worldwide still cook over an open fire as their main source of heat. Whether you’re just dabbling in flavor mechanics, want to master fire cooking, or just want to have a few tricks up your sleeve when the power goes out, this Elements class will have a little something for everyone.

Future classes in the Elements of Cooking series include a focus on FAT, both plant- and animal based, and ACID, one of the most important components of well-composed cooking that many people overlook.

To sign up, visit http://livingwebfarms.org/workshops/elements-of-cooking-fire/