In the fall of last year I led a short workshop covering some homestead applications of common wood stove ashes. It was the first of what I hope will become one of many “Waste Not:” workshops hosted out of the Living Web Farms’ biochar facility. Later this year I’ll discuss the myriad applications – of both historical and modern relevance – for human urine.
The Waste Not: series of workshops are about exploring the chemistry of common household wastes – cardboard and junk mail for example, or plastic films and oil rich food wastes. From here we stand to gain a more rounded understanding of how to apply these ‘wastes’ as materials in a surprising range of beneficial applications. A deeper understanding of our wastes not only guides us in lessening our immediate ecological footprint, it helps us prepare for major supply chain disruptions, offers interesting historical insight and gives us a relatable, multi-disciplinary platform for introducing chemistry to the otherwise uninitiated.
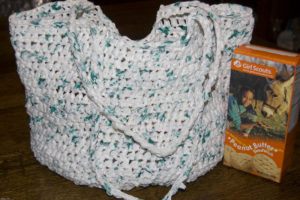
Waste Not: A “plarn” handbag, sourced from the plastic liners of girl scout cookie boxes.
Anyone who has a wood stove knows that ashes pile up quickly during the heating season. Land application of wood ashes has been proven an effective way to return nutrients to some intensively farmed soils, but still an estimated 90% of wood ashes are still regularly landfilled in the southeastern United States.
For the waste-conscious homesteader, a quick search on ‘how to use wood ashes’ reveals the internet is full of contradictory suggestions regarding how to apply ashes in the garden, in food preservation, soap-making, cleaning and so on. On some sites there are even vague references to extremely dangerous acts such as drinking ash-derived lye water for bowel cleansing, ‘treating’ your hair, or even removing nose hairs! For those wanting clarity, a closer look at the composition of wood ashes may provide some insight.
Wood Ash Composition
Ashes are what is left over after the complete combustion of organic matter. We are concerned here specifically about firewood ash – the inorganic, mineral component of wood – drawn up from the soil and stored in the cells of heartwood, sapwood and bark. This mineral complex is what makes up ash after the organic portion of the wood is completely burned away. Residual charcoal should be sifted out and either thrown back into the wood stove or composted as biochar. Depending on many factors, the nutrient profile of the remaining fine sifted ash could range between 20-40% calcium, 3-10% potassium, and 1% phosphorous and 1% magnesium. Expect very little nitrogen. Higher than expected carbon likely indicates lower than ideal combustion temperatures. Nutrient density and composition will vary according to the soil and environmental conditions where the tree was grown.
It is generally advised that if felling trees for firewood, the best time in late winter months to cut is when sap is down and the moisture content of the wood is lower. On the flip-side, wood felled in the summertime when sap is high and nutrient exchange is active will eventually yield ash with a higher nutrient content. Bark contains more ashes than wood. Wood ashes are typically, but not always, low in heavy metals. Wood grown on leached, nutrient poor soils will have much lower nutrient density in ash than that grown on more rich soils.
Regional variability of ash and garden soil types are broad and those wishing to apply ash in the garden should rely on advice from local agronomists. If going it alone, have both ash samples and garden soil tested before application.
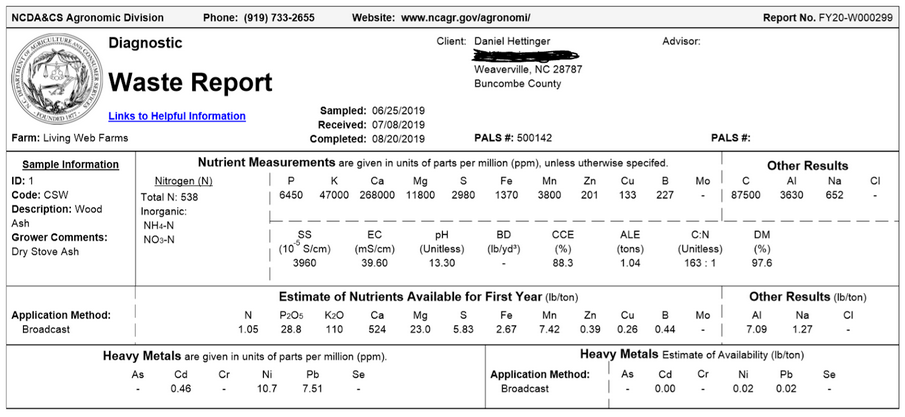
Our state of North Carolina provides low cost lab services for farmers looking to make use of wastes as fertilizers. Click for larger photo
Wood Ashes in my Garden
Soil testing from NCDA (seasonally free for residents) and Logan Labs (very reasonable fee) reveal already excessive potassium levels and adequate calcium in my garden soil. Waste analysis shows my ash contains what is expected: 26.8% calcium, 4.7% potassium, smaller amounts of many other elements and very little heavy metals. Also note the elevated pH in both samples. Direct application of wood ash clearly would not benefit my vegetable garden.

Many States provide free or low cost simple garden soil analysis. Click for larger photo
Wood ashes could greatly assist fertility in soils that are lacking in potassium and calcium. However, it’s clear that addition of wood ashes to my garden soil will contribute to my issues with excessive potassium. Plants will readily uptake excess potassium, ultimately interfering with phosphorus uptake, resulting in lower quality yields. In his book The Intelligent Gardener, author Steve Solomon writes extensively about the importance of balancing nutrients in the soil. His advocacy of soil remineralization via imported fertilizers and subsequent critique of reliance on compost for sustaining fertility is one that would seem at odds with the permaculture community. Though his point rings true – continually fertilizing a garden with composted vegetation from an imbalanced soil will only exacerbate the imbalance. Since I generally compost with food and landscape waste generated on my own property, it stands to reason my compost is already potassium rich. Addition of wood ashes has little value in my compost too. Ultimately, he recommends as I do if one doesn’t want to fool anymore with their ash – scatter it back on the forest floor from whence it came.
Discouraged by the lack of value of wood ashes in my garden, I set out to answer the question: Could I remove the potassium prior to applying wood ash as a liming agent? By taking advantage of the comparably high solubility of potassium salts to other compounds in wood ash, removal of potassium can be accomplished through a process known as leaching. What remains after leaching is a calcium rich and micronutrient laden material that is still useful in the compost, and if re-dried can be broadcasted as a liming agent, or, with a little extra work, used as a primitive cement and an alternative to clay bricks.
From Ash ‘Lye’ to Potash
Leaching of wood ashes is a historically important process for obtaining potassium carbonate – an important alkali used in the early soap and glass industries. Benjamin Franklin’s father was a ‘soap boiler’ by trade and surely relied on wood ash sourced potassium salts for his soft soaps. By the late 19th century more economical methods for alkali production shuttered the commercial asheries, though the practice persisted on timber rich frontier homesteads well into the 20th century.
A commonly described method of leaching ashes involves filling a straw lined barrel with sifted ashes and pouring in enough rainwater to cover the ashes completely. After some time, a plug in the bottom of the barrel is removed and a caustic, brown liquid will slowly drain out. This ‘lye’ is either used directly in its dilute form, boiled down and concentrated, or boiled down completely to Potash. Interestingly, potassium gets its name from potash – boiled ashes in a pot.

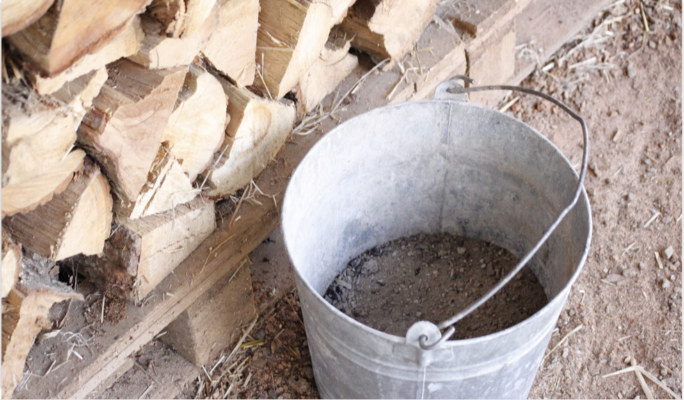
Simple wood ash leaching arrangement with five-gallon buckets
Potash produced in this manner is a rather impure combination of the most soluble salts from wood ash. Salts are compounds of positively charged cations and negatively charged anions that dissociate in water. Crude potash contains salts consisting of potassium (K+), sodium (Na+) and calcium (Ca+) cations with predominantly carbonate (CO3-) and chloride (Cl-) anions. Potassium carbonate is the dominant salt, and through a process of high temperature firing (calcining), and recrystallization, can be refined to purified potash, known commercially as pearl ash. Refined potash played a very important role in the early soap industry and still has commercial value in the glass industry today. Pearl ash was used as an early chemical leavener and appears in some of the earliest American cookbooks.
In the early part of last year I set out to explore the processes of leaching ashes and ultimately took a deep dive into the lore of applications of potash on the homestead. Wood stove operators at Living Web donated their ashes and before long I had acquired over 20 gallons of fresh material to experiment with. I had some experience with soapmaking, so this was a natural place to start. Baking experiments would come later, starting with experiments in nixtamalization of field corn using fresh unleached wood ashes, and later with refined pearl ash in some traditional German and colonial American recipes.
It’s hard to say exactly what motivates this time consuming work. Its certainly not economics. There is a some merit in building emergency preparedness skills, but for me I think its more its a simple fascination that something of value can be rendered from what others see as waste. Experiencing chemistry applied in the real world, and feeling the connection with the past is worth more to me than the market value of the final product.
Making Soap from Wood Ash
A simple soap can be made by reacting warm oils or rendered animal fats with a strong alkali. The process is known as saponification – where long molecules of triglycerides are converted to fatty acid salts with a polar, hydrophilic “head” and a non-polar, hydrophobic “tail”. Most craft soap makers nowadays rely on sodium hydroxide lye, and typically a combination of fats and oils to produce consistent, solid bars with the right amount of lather, cleansing and conditioning characteristics. Potassium hydroxide is considerably more soluble than its sodium counterpart and is the alkali of choice for the production of liquid soaps. Though one shouldnt be overwhelmed, it’s my opinion that soapmaking should be a craft reserved to those who pay attention to details – incorrect ratios of lye to fats can produce a soap that will either become rancid (bad smell) or be potentially dangerous due to excess caustic alkali. Recipes are a nice place to start, but serious craft soapmakers would do well to immerse themselves in the details. Kevin Dunn’s excellent immersion in the chemistry of soapmaking is a great place to start.
Historically, soap boilers would mix a refined potash solution with rendered animal fats, and boil, sometimes up to days to produce a paste like laundry or kitchen soap. Eventually it was learned that addition of slaked lime to the potash solution would precipitate calcium carbonate and produce aqueous potassium hydroxide, which could greatly speed up saponification, thereby reducing the hours of toiling over the soap pot. Addition of sodium chloride back in at the end of the boil serves to create a harder final product.
A quick search for wood ash soap pulls up many sites which confuse wood ash lye with sodium hydroxide lye sold in stores. Recall that unrefined wood ash lye will contain a mix of alkali salts, predominantly potassium carbonate, but also some sodium carbonate, along with sodium, potassium and calcium chlorides. The ratios of these compounds depends greatly on a number of factors – though softer hard bars can be expected from soaping with unrefined potash and harder rendered fats such as beef or lamb tallow. The strength of the wood ash lye also varies according to the original composition of the ashes and amount of water used in leaching. There are clever ways to measure strength directly by dissolving a feather in the lye, or indirectly by comparing its density to a floating egg. Stoichiometric ratios of fats and lye are a guessing game with potash sourced in this manner.
Last summer I attempted a test batch, starting with 1 ¼ cups ash lye at 1.1 g/mL concentration with 2 cup quantity blend of olive oil and rendered lamb tallow. Throughout what became a six hour boiling process I added ½ cup water and 2 tsp table salt. Six months later now, this soap smells of lamb and has the characteristic ‘zap’ from touching a sample on your tongue – indicating incomplete saponification. To anyone used to soaping with hydroxides, six hours of hot processing may seem like a long time. Potassium carbonate is still only a weak base and only readily saponifies free fatty acids, which may explain why earlier batches seemed more successful with rancid olive oil. This can be overcome by much longer cooking times at elevated temperatures. For those looking to get started, Mother Earth News has a nice introduction to making hot process soap with wood ash.
Recently cut soap bars from wood ash lye and lamb tallow are laid out to cure for a few months
Recently I completed another much more successful batch of soft soap from refined potash (more on this later) and olive oil. For those interested, here are the ratios I used:
- I started with 302.5 g refined potash with 55 g calcined egg shells.
- I added enough water to solubilize (about 2 cups) let settle, and decant.
- I added the solution to heated 902g olive oil and 25 g castor oil
- Cook in a crock pot on high heat and stir often. Day one for 5 hours. Day two for additional 6 hours.
- I added 1.5 qts distilled water and stirred vigorously. By day three some separation had occurred.
- I changed to the low heat setting for another 8 hours the following day before spooning the gel-like soap into mason jars.
- I set out to make a suitable bath soap, and although pH is in a safe range at 8.5, it still has a harsh feel and is not something I would want to use in the shower.
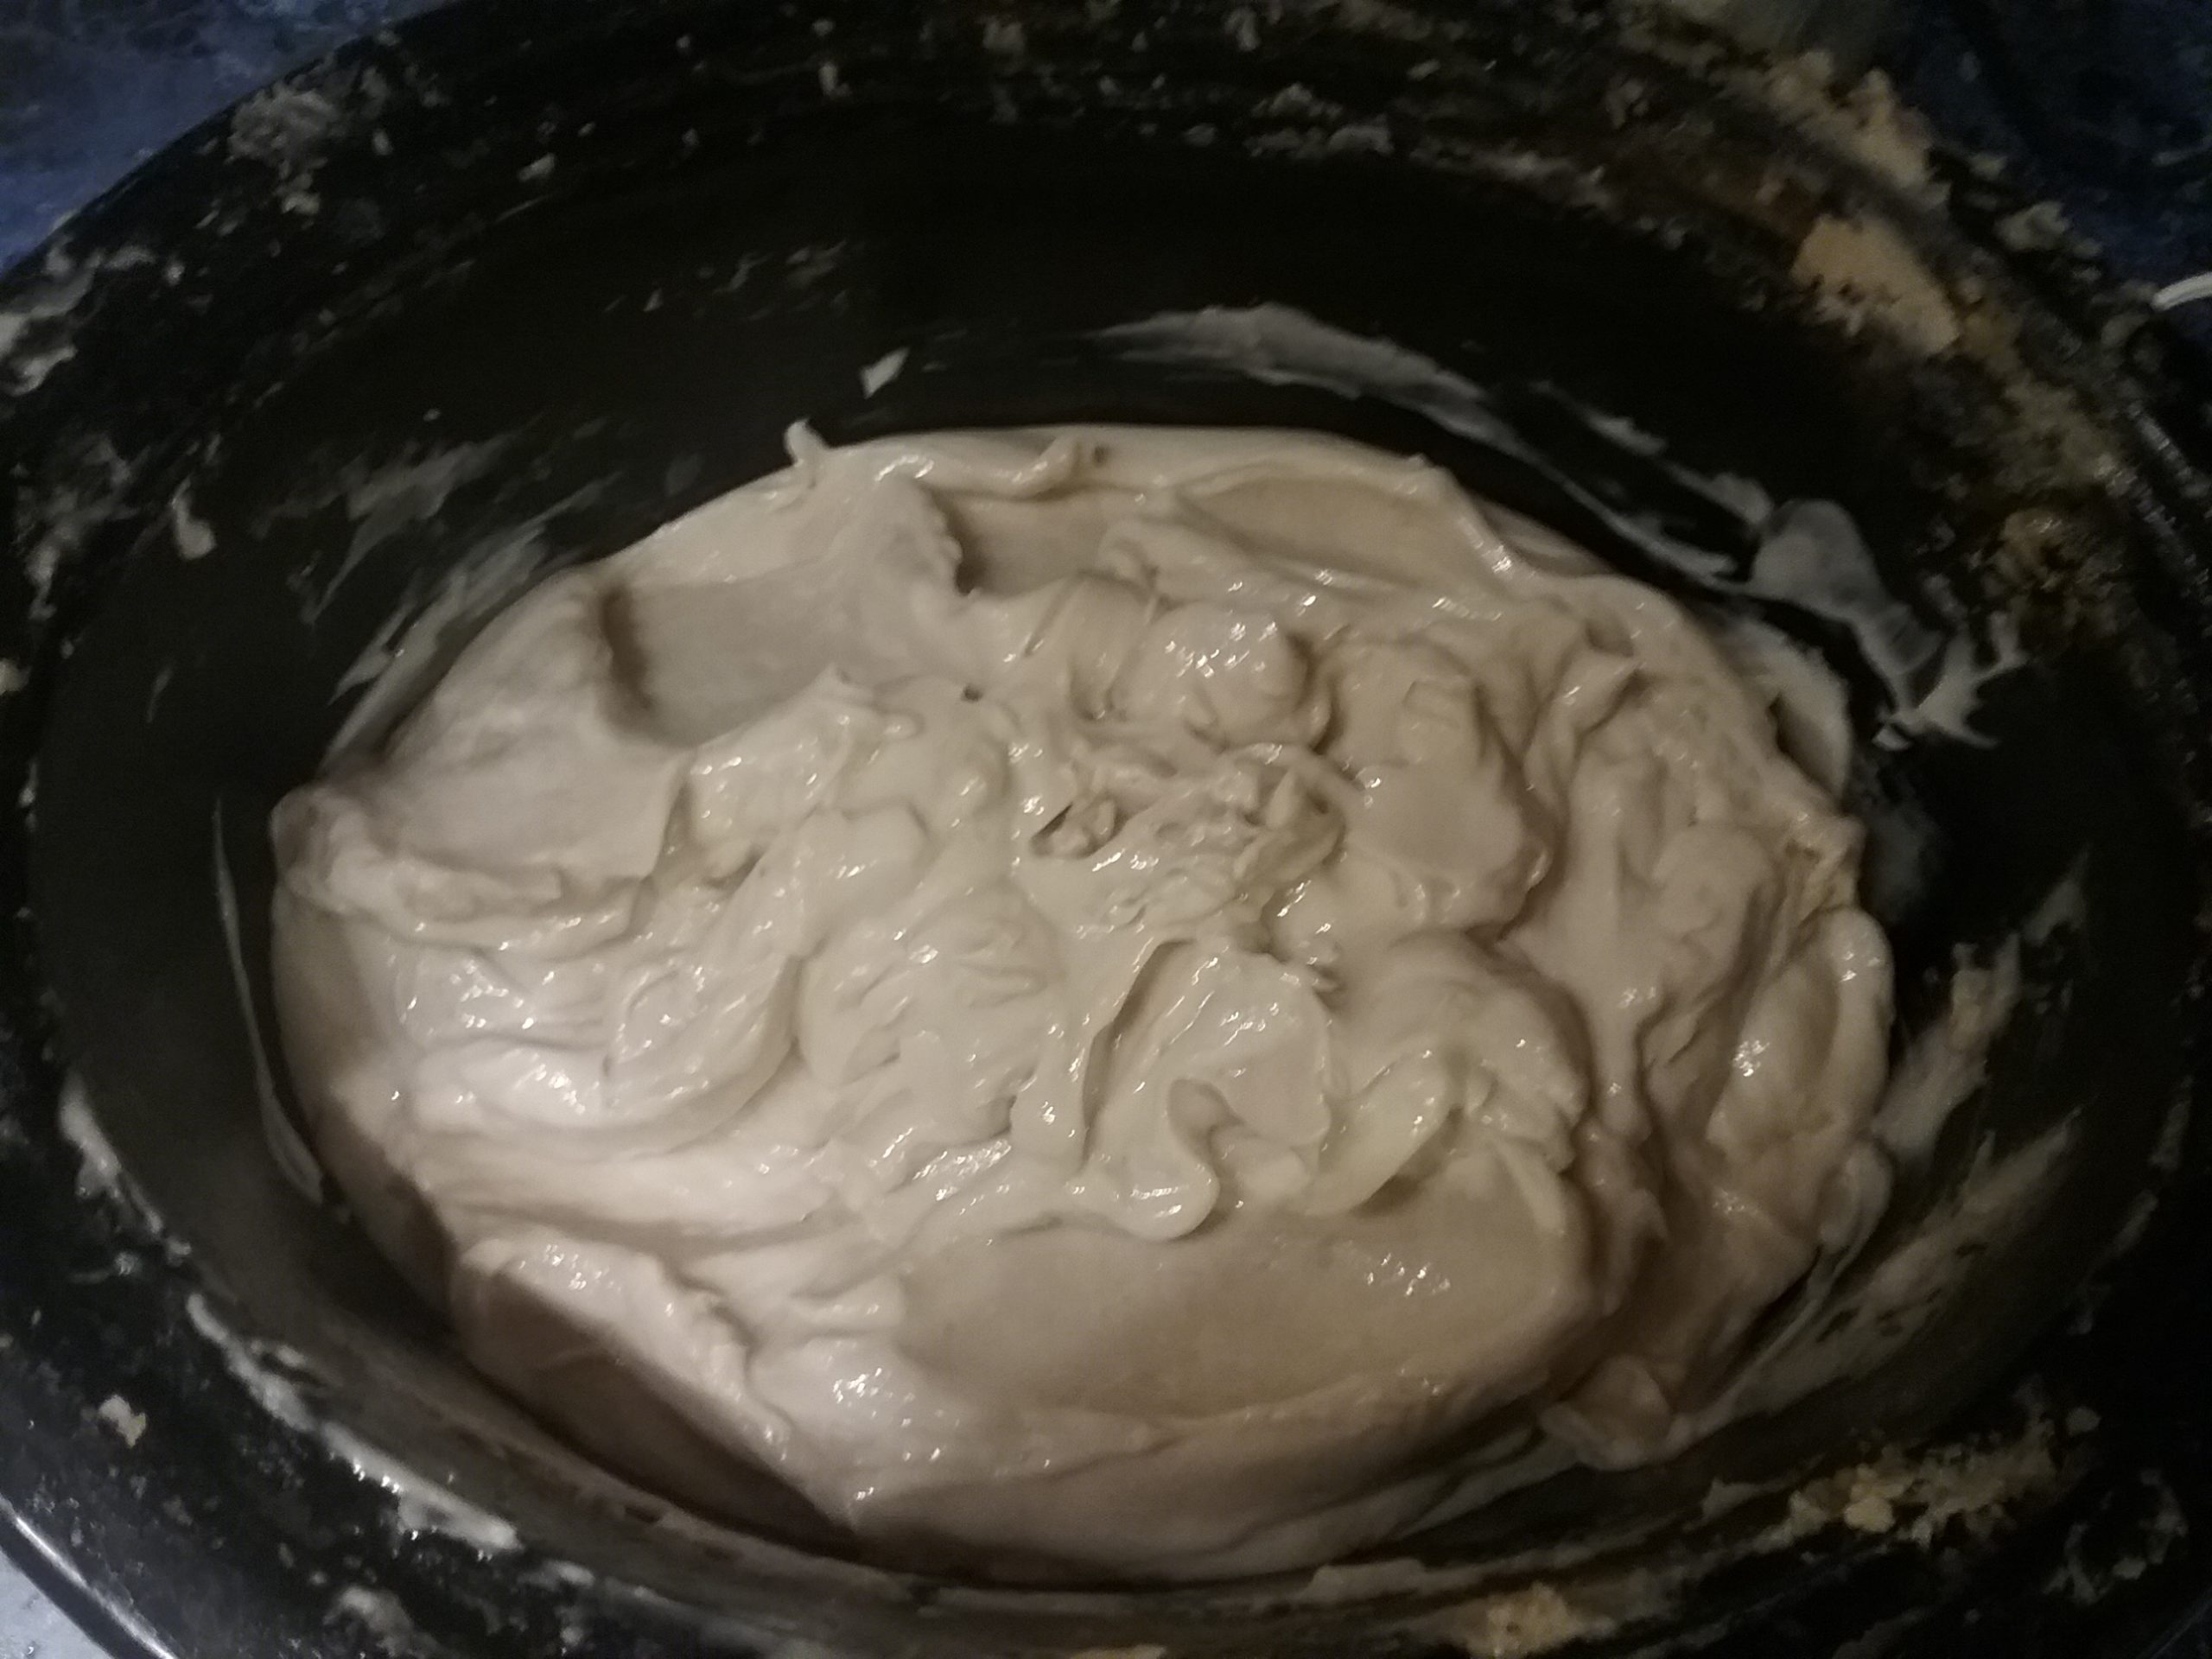
Hot process soap in the crock pot. Made with refined potash and olive oil
Cooking with Wood Ash
Wood ash applications for cooking have a long and rich history among a variety of cultures. Chinese century eggs are prepared with a combination of clay, wood ash, rice hulls, salt and lime. Scandinavian Lutefisk was traditionally made with birch ash. Native Central American cultures treated corn with lime or wood ashes through a process called Nixtamalization.
Nixtamalization is the process of treating dried maize with an alkaline solution prior to grinding. Nixtamal corn tastes better and is easier to grind and form into dough, but it’s also healthier. Problematic aflatoxins are greatly reduced and niacin is made more bioavailable. Historically, this was especially important for cultures that relied exclusively on maize for the prevention of pellagra. Following a harvest of bloody butcher red dent corn at Living Web last fall, I began working with both fresh and old ashes to find the right recipe for at home nixtamal.
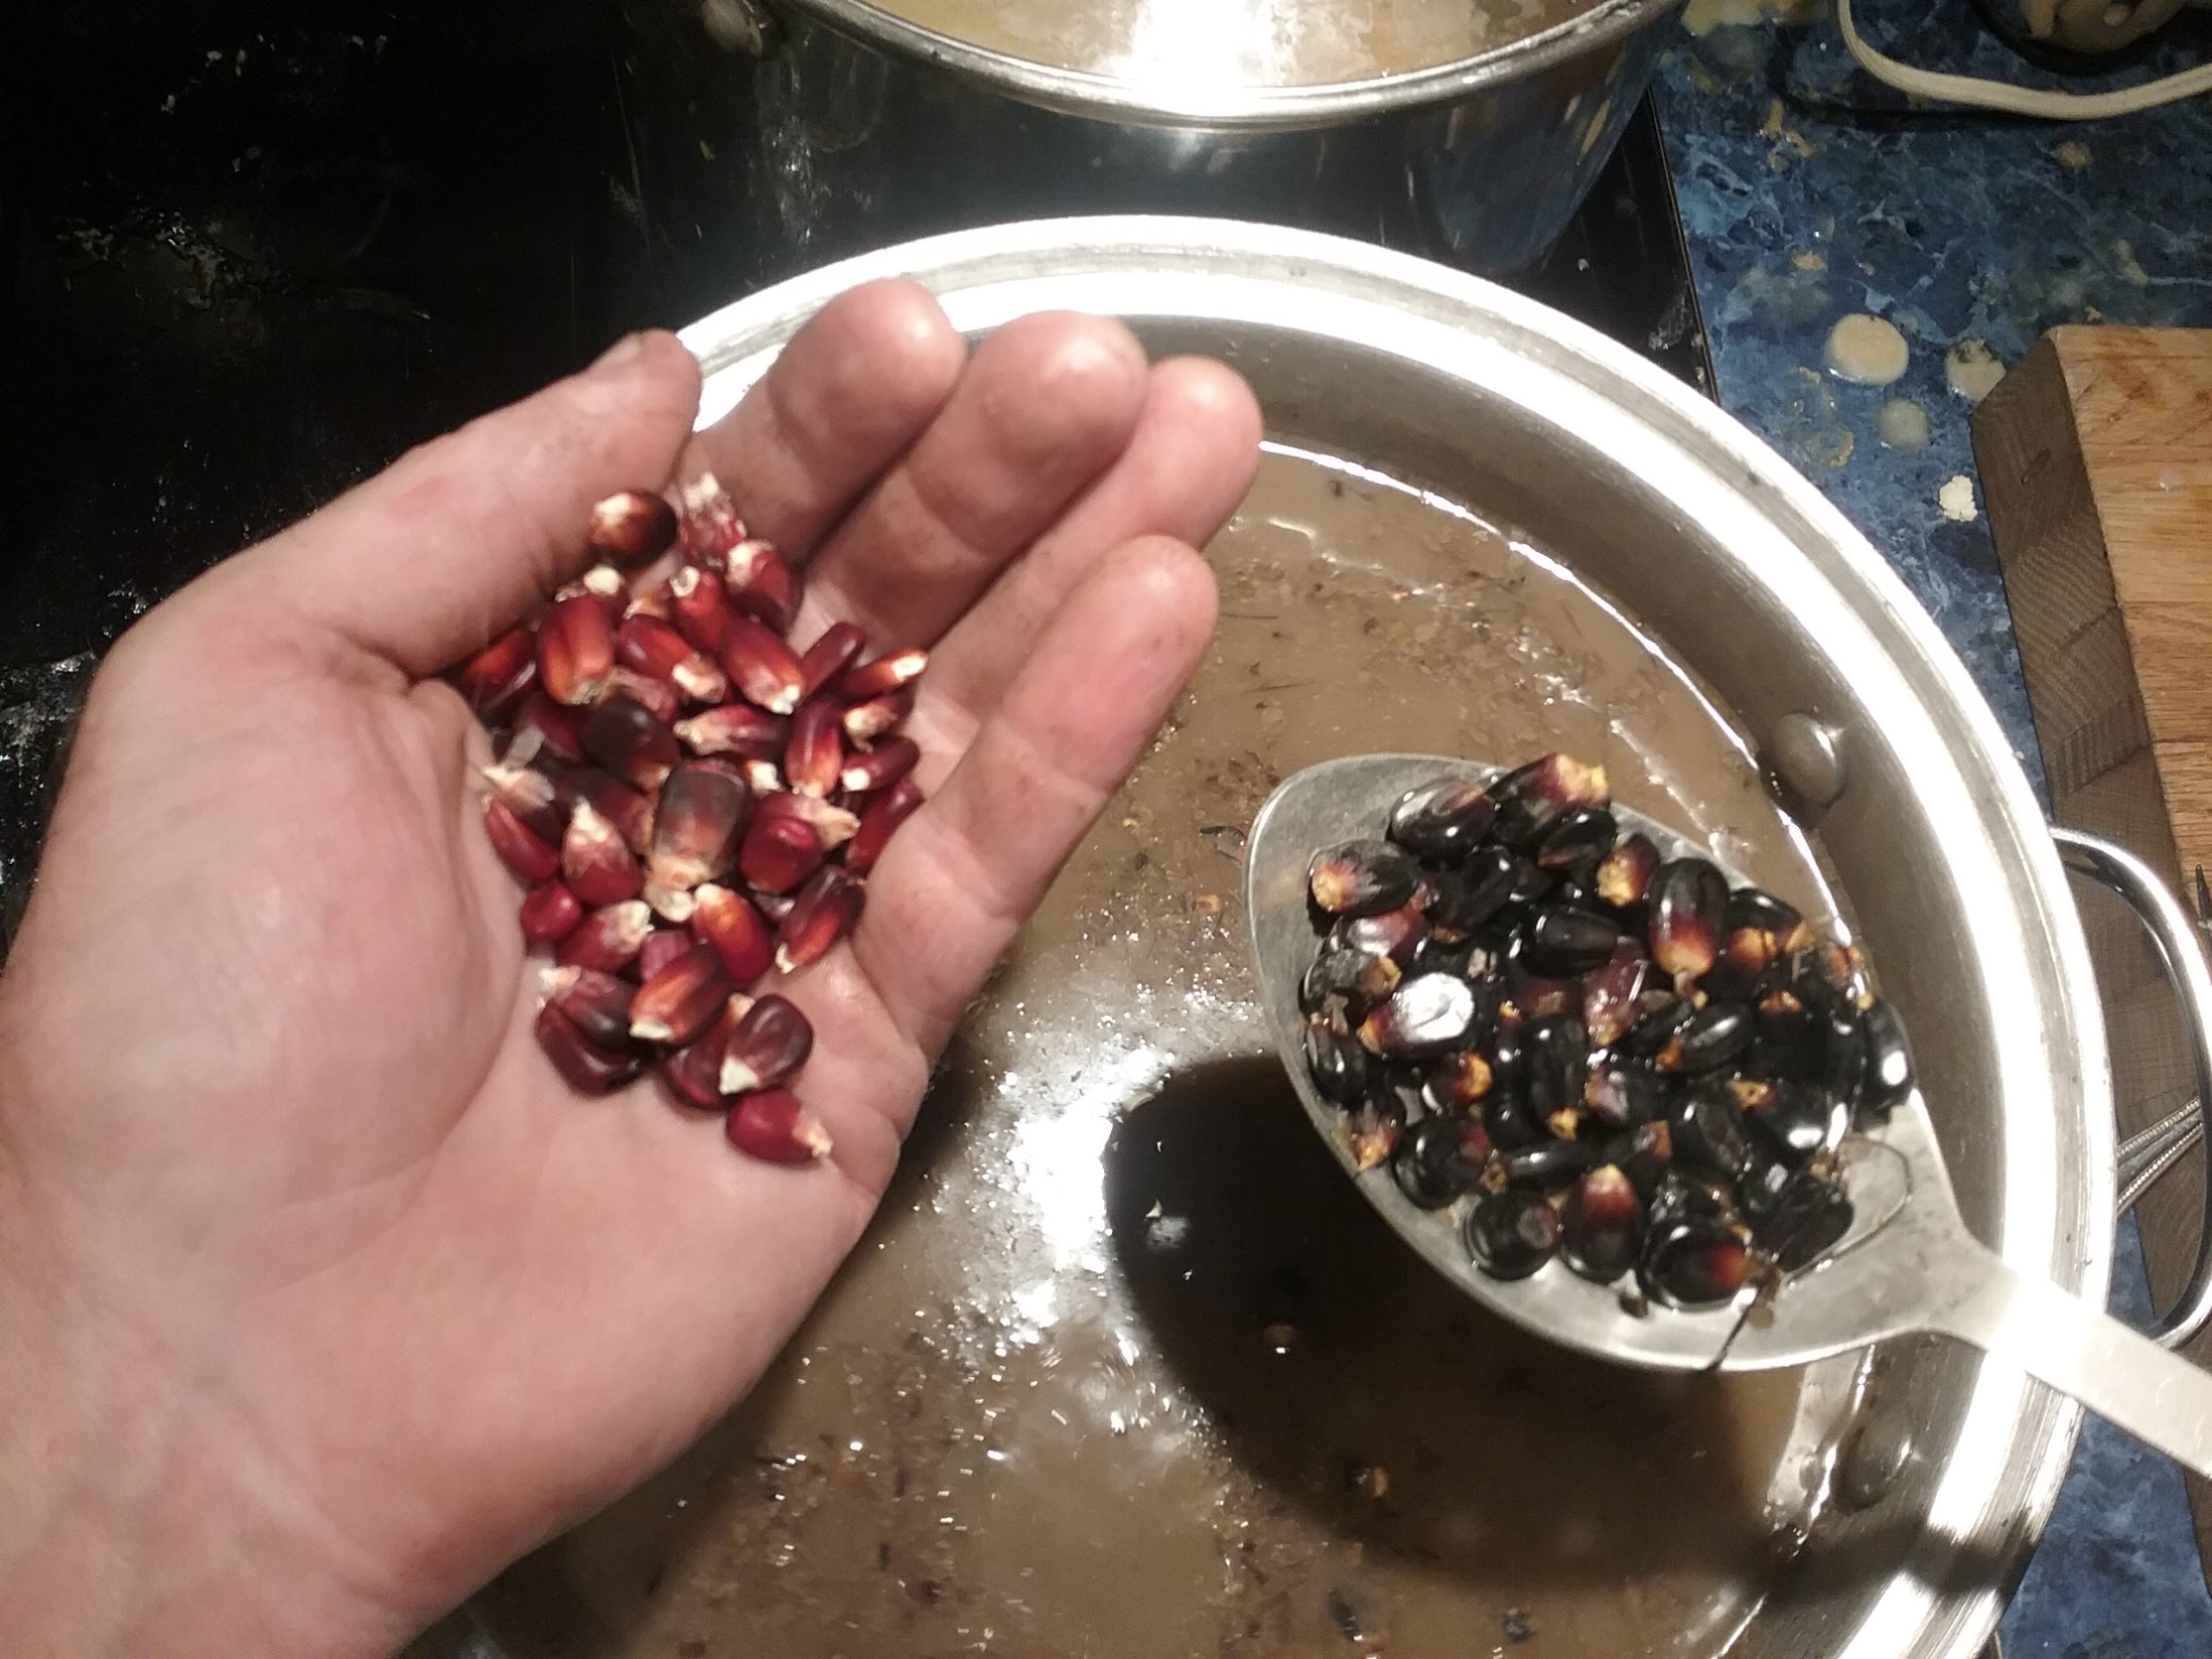
Nixtamal alkali solution is strong enough when maize kernels change color after a few minutes of soak time.
After a few trials I’ve landed on my best nixtamal routine at home. Starting with fresh unleached ashes from a hot fire, I use an 8:1 maize to ash ratio. Hot fires are important here – low heat, smouldering fires will yield ash that produces tarry, smoky flavors. Measure out by volume, add to a large pot and fill with water. Bring to a boil and maintain a low heat overnight. The top of the wood stove works nicely for this.
In my experience, fresh ashes tend to be more alkaline. Assuming my fires are hot enough, this makes sense – hot, oxygen rich fires will create some oxides that when added to water produce hydroxides. We know from soap making now that hydroxides are a much stronger alkali than carbonates. Older ashes however, will have had their oxides reacted with carbon dioxide in the atmosphere, tying up oxides in the form of carbonates. I’ve used older ashes at a ratio of 2:1 with successful results. Both methods require persistent rinsing after the soaking period. You’ll know you were successful when the kernels swell and become soft, where the pericarp can be gently removed, and there is no bitter soapy taste after rinsing.
Pearl Ash
On her website and in her short book on the subject, author Leigh Tate writes about her experience baking with ash water. She tells of the “highly variable” chemical composition of wood ash but nonetheless was able to determine:
“A very satisfactory biscuit with excellent flavor could be made with a solution of two parts water to one part hardwood ash, replacing half the milk called for in the original recipe”
Tate’s book includes 54 vintage recipes for all manner of goods baked with historical leaveners. I’ve now attempted two of these recipes – American Potash Cakes and Molasses Gingerbread. As an absolute novice baker, I knew that for success in either recipe I would need to eliminate variability in my unrefined potash by taking the extra steps to create my own pearl ash.
I set about making pearl ash in January of this year with fresh ashes collected from the fall heating season. A total of 54 lbs of sifted ash were divided into three 5 gallon HDPE plastic buckets. The volume reduced significantly as 3 gallons of heated rainwater was poured into each bucket. After vigorous stirring and overnight soaking, I drilled a series of 1/16” holes in the side, near the bottom of the leaching buckets. Alternatively, I could have pre-drilled the holes by driving a small screw in the bottom of the bucket. Removing the screw would start the dripping process. Over the course of the following few days, ash water would drip out into HDPE buckets staged below.
After dripping stopped, each bucket was filled a second time with just enough hot water to cover the ash and the dripping process was repeated. My trials have found that half of available potash was removed after the first soak. A second soak will put half of what remains in solution for an estimated 75% total yield of available potash. After two soaks, I had roughly 6 gallons of very dilute lye. From there I was able to concentrate the lye by aggressively boiling off excess water using our biochar producing TLUD stoves.
Boiling lye should be done outside in a dedicated stainless steel or cast iron pot. Aluminum reacts strongly to alkali and will absolutely ruin your batch and your pot. Now is the time to wear glasses and gloves. Be prepared with access to running water for eye rinse and hand washing.
The idea here is to completely boil off all of the water. I experienced almost a pleasant vanilla-like smell during most of the boiling process but this can turn quite noxious towards the end if you allow it to burn. Potash will eventually form a hard cake at the bottom of the pot and will require some effort to remove. After chipping and scraping out the raw potash, I weighed 78 oz of the brownish, soft rock-like material. Dependent again upon the temperature of the original burn, raw potash will still contain a large amount of organic carbon compounds that should be removed through calcination. These organic compounds are what give ash water its characteristic amber brown color. Water rinsed through calcined ash or the ash from very hot fires will be clear.

Refined potassium carbonate, also known as pearl ash
78 oz of raw potash was heated to 1200F for 2 hours with LP in a furnace we originally built for our atomizing pyrolysis oil burner. The resulting material changed from tan/brown to a much lighter easily crushable, but still raw potash. Following this step is a series of dissolving, decanting and boiling, taking advantage of the relative solubilities of the mixed salts, that is again, best described by Kevin Dunn in his chapter on the subject of alkali from what has become one of my favorite books. After refinement of calcined potash via recrystallization, carbonate yield was 198 grams, or about 1 cup. Purified potassium carbonate yield was 1,348 grams or 2 ½ pints of fine, deliquescent, white crystalline material we can now call pearl ash.
Pearl ash can be used in baking applications as a replacement for baking soda. 1 teaspoon of pearl ash will replace 1/2 teaspoon of baking soda. As a leavening agent in baking applications pearl ash must be heat activated to release carbon dioxide gas. Some recipes call for addition of an acid ingredient, not for the aid of releasing gas, but for neutralizing any bitter aftertaste. Pearl Ash should be dissolved in liquid prior to addition to the dough.
Upon cooking the potash cakes and gingerbread from recipes found in Tate’s book I found I had no issues with bitter flavors and the dough rose slightly, but not in a way one would expect with modern leavening agents. Size of cakes and temperature of the oven are areas for future experimentation.
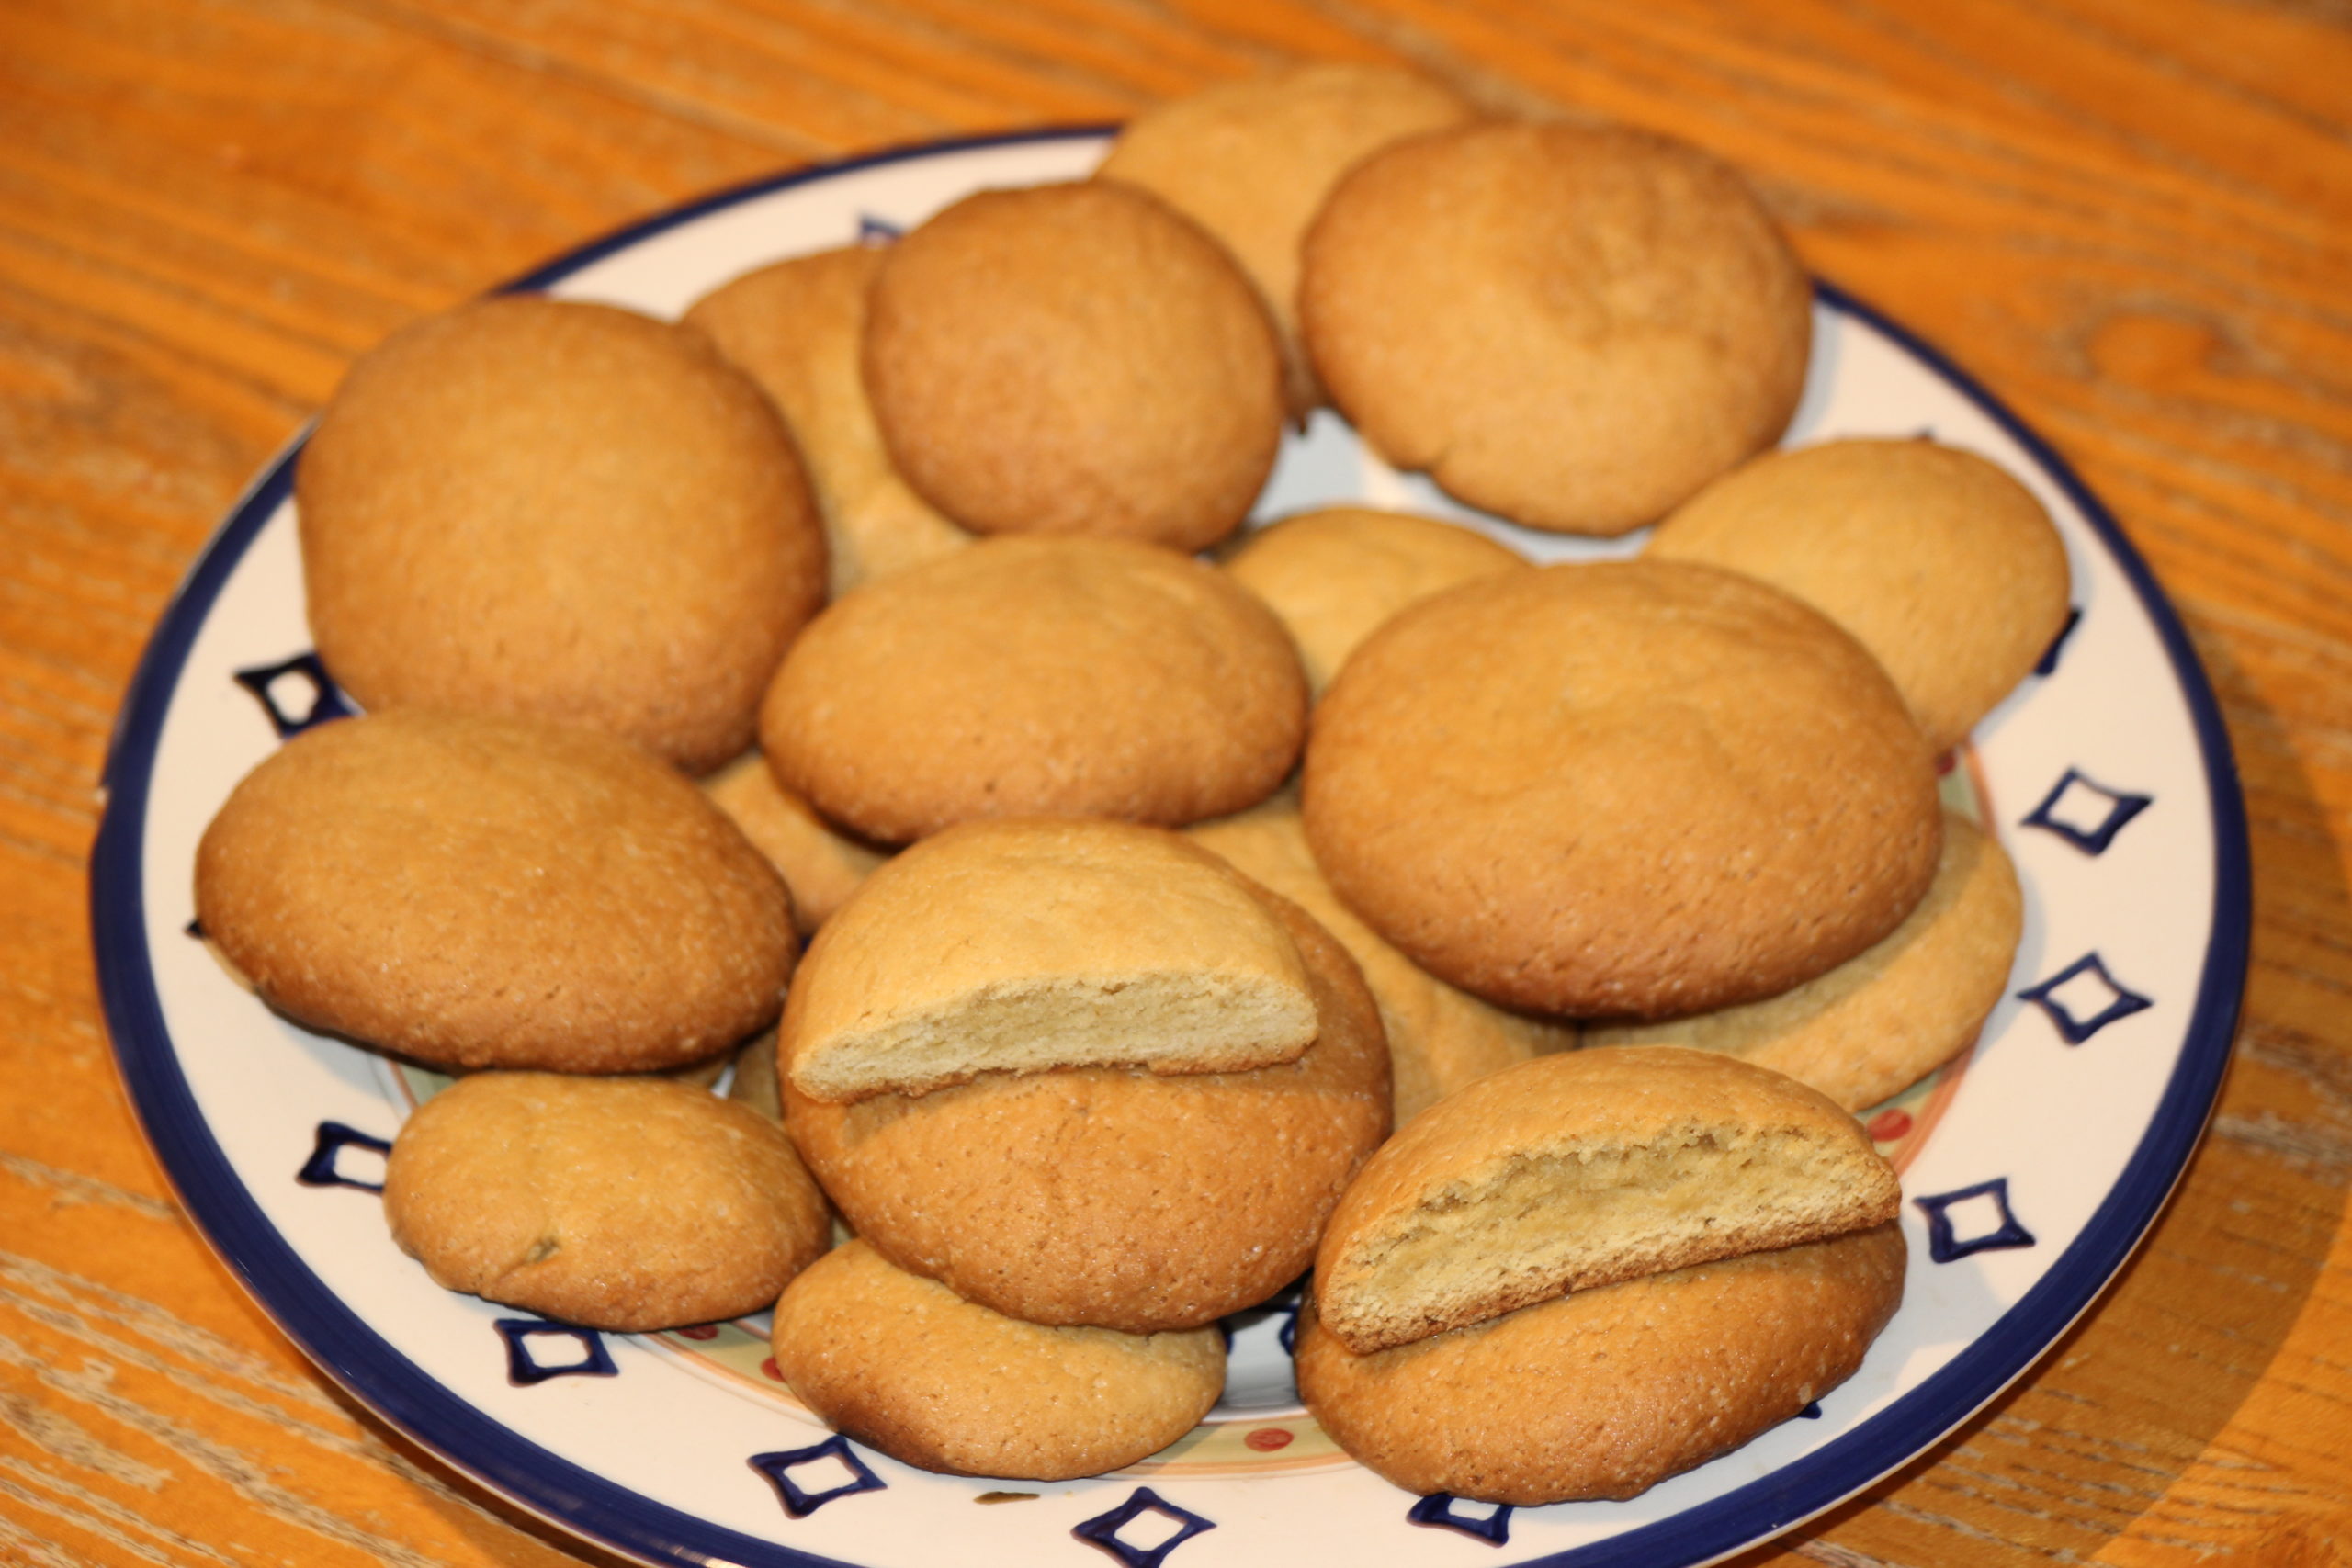
American Potash Cakes
Conclusion
There is a long and rich history of using wood ashes across a massive range of applications – many not even mentioned here. Ashes can be alkaline, powdery and dry, and may contain a wide variety of nutrients, they will likely only be rich in calcium and potassium. Curious experimenters should attempt to explain a mode of action as to why wood ashes work for their application. For example, I would expect the dusty alkaline nature of wood ash pairs well in poultry housing for dusting feathers and managing mites. For this same reason, I would not recommend wood ashes in a thriving worm bin or active compost system.
For those who read this and are overwhelmed with the work involved – there is nothing wrong with storing ash until it is completely cooled off and scattering back on the forest floor. Be absolutely sure there are no hot coals, scatter thin and keep out waterways and drainage areas. For those wanting to build on my experience, here are some quick references to get you started:
- As a liming agent: My ash was about 90% CCE of agricultural Lime.
- For paste soap: Start with 1 ¼ cups ash lye at 1.1 g/mL concentration with 2 cups of rendered fat.
- For nixtamal field corn: Start with 8:1 by volume corn to fresh ash. Use more ash if older.
- For baking applications: Substitute 2 teaspoons of refined potassium carbonate for every 1 teaspoon baking soda.
Please reach out and share your experience if you find yourself inspired to work with wood ash!
Start with dry hardwood ashes. 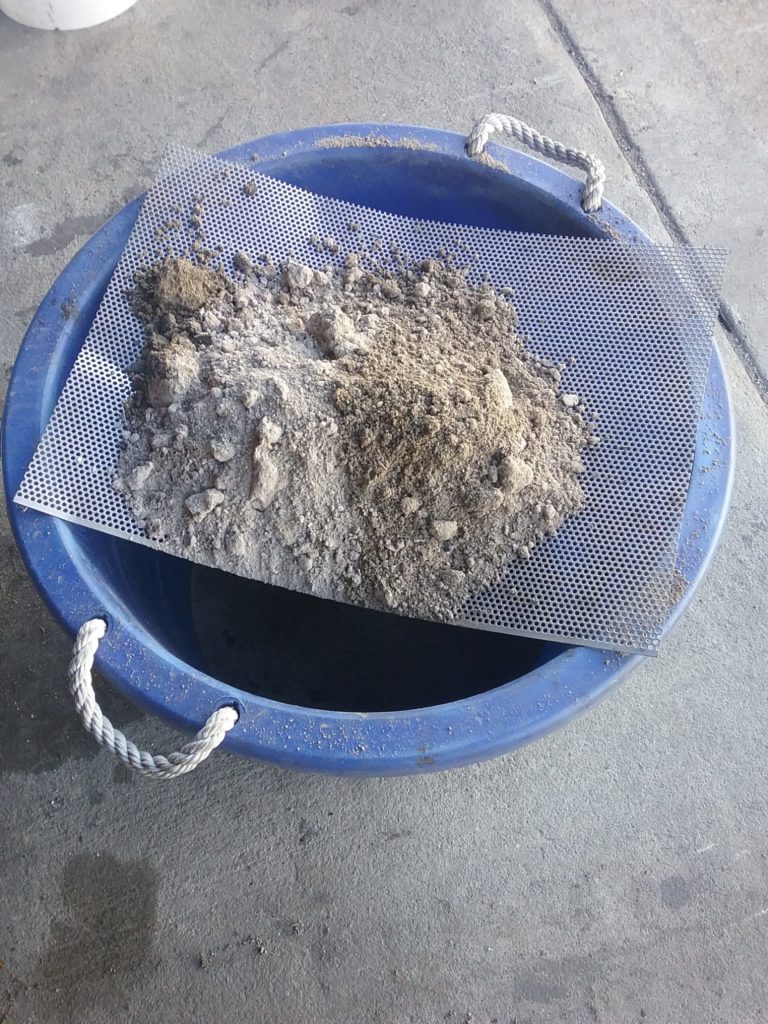
Screen to remove larger charcoal pieces. Wear a dust mask 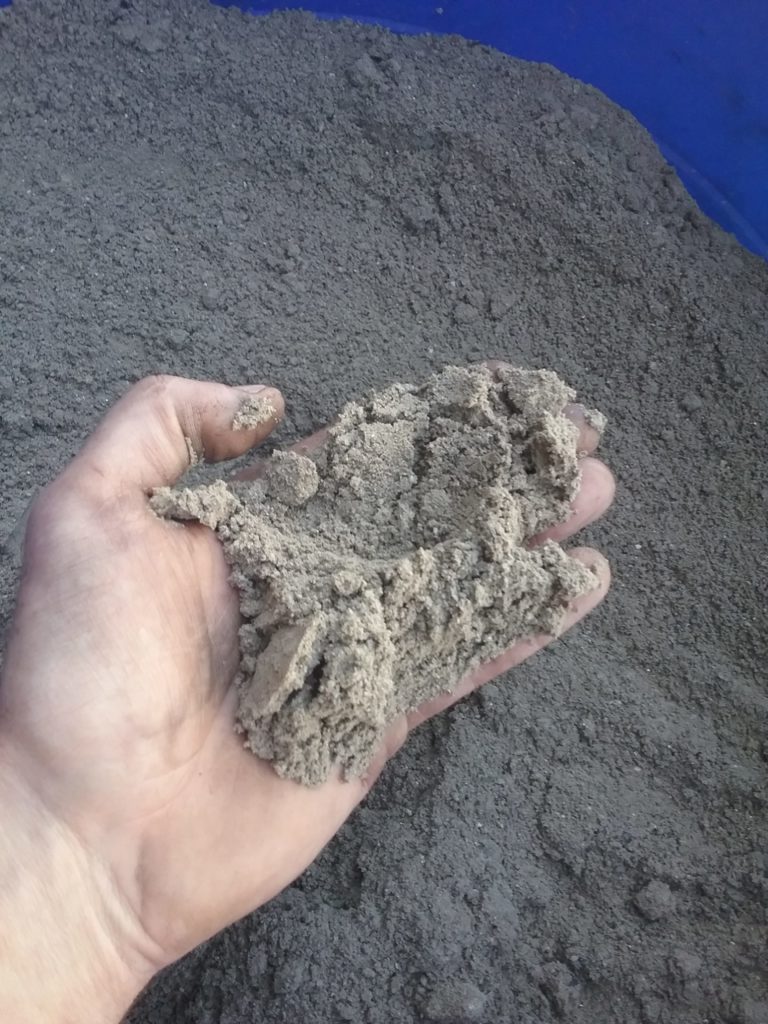
Ready for leaching 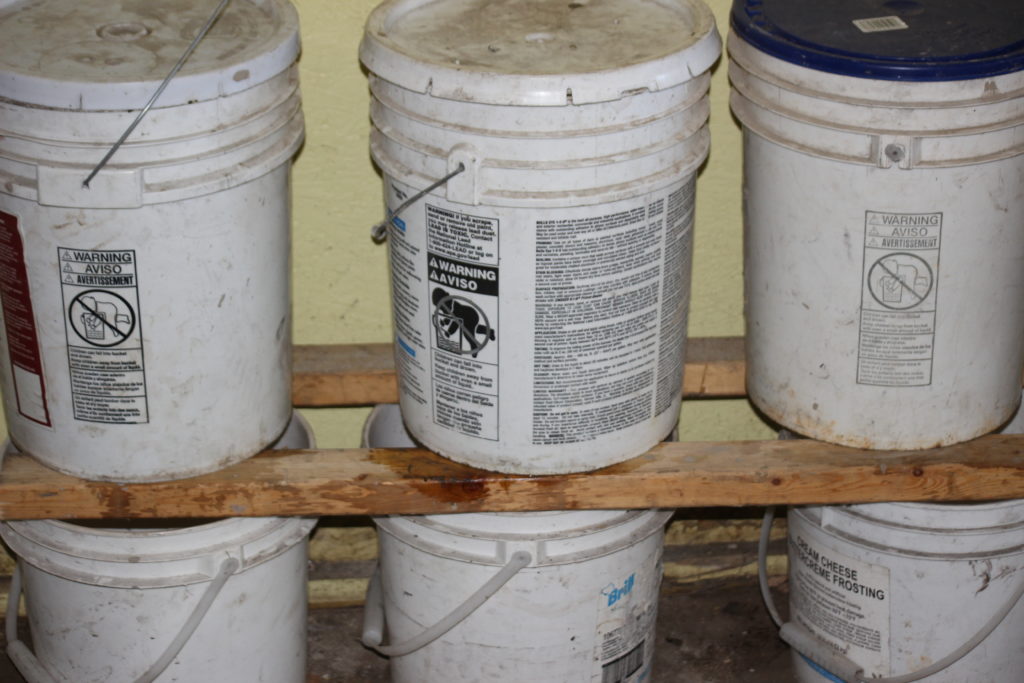
Simple wood ash leaching arrangement with five-gallon buckets 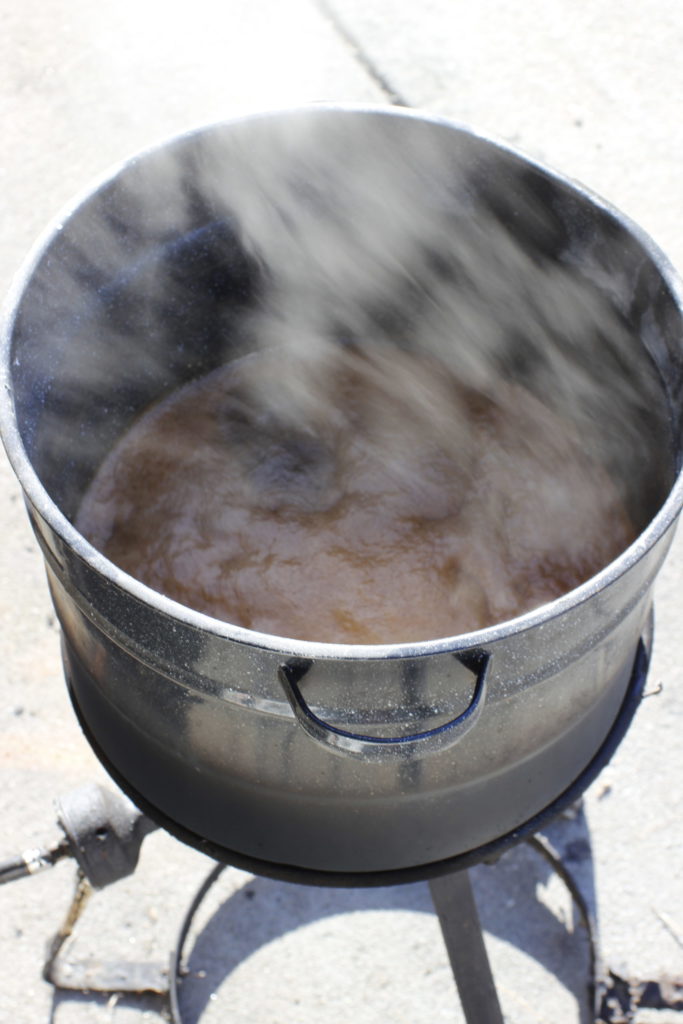
Concentrating dilute wood ash lye 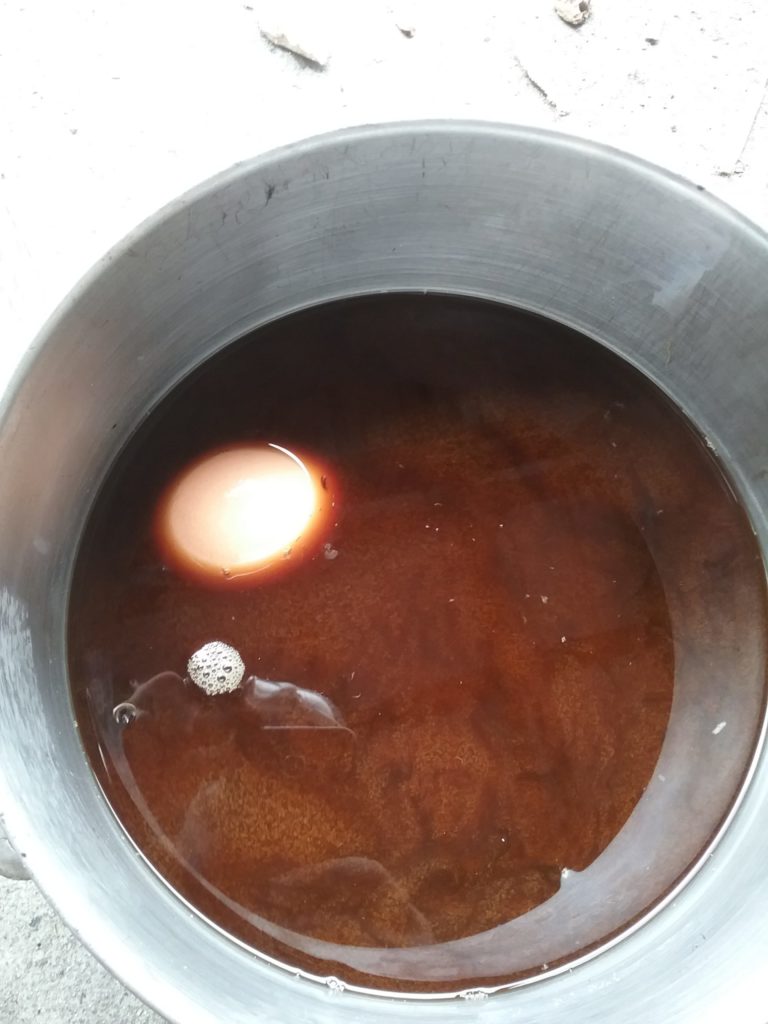
Floating an egg and dissolving a feather 
Soap bars from wood ash lye and lamb tallow 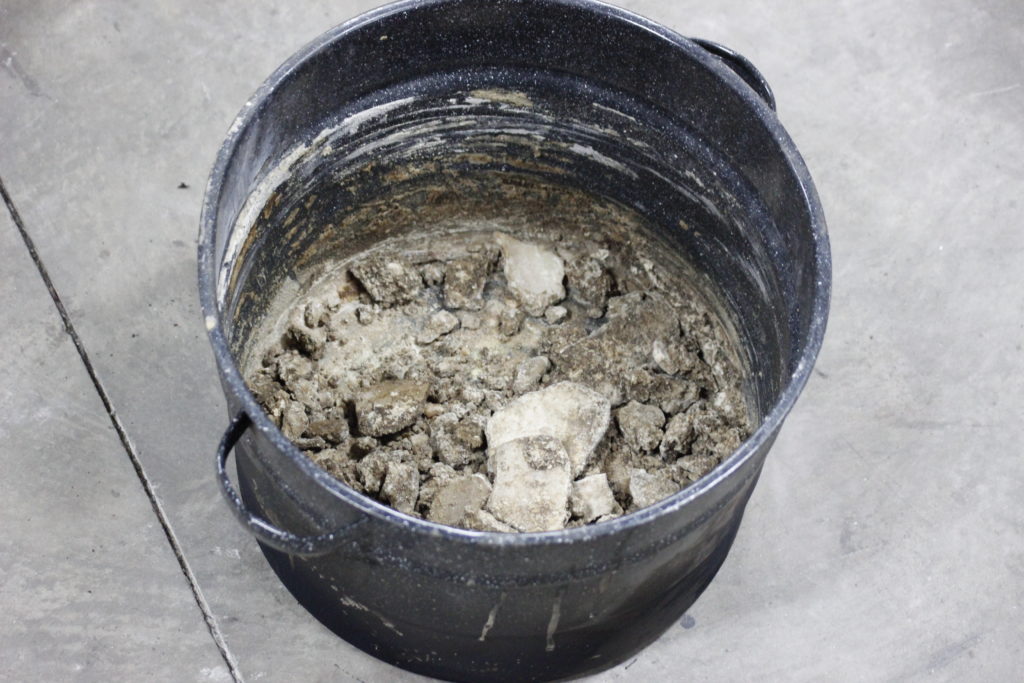
Unrefined potash 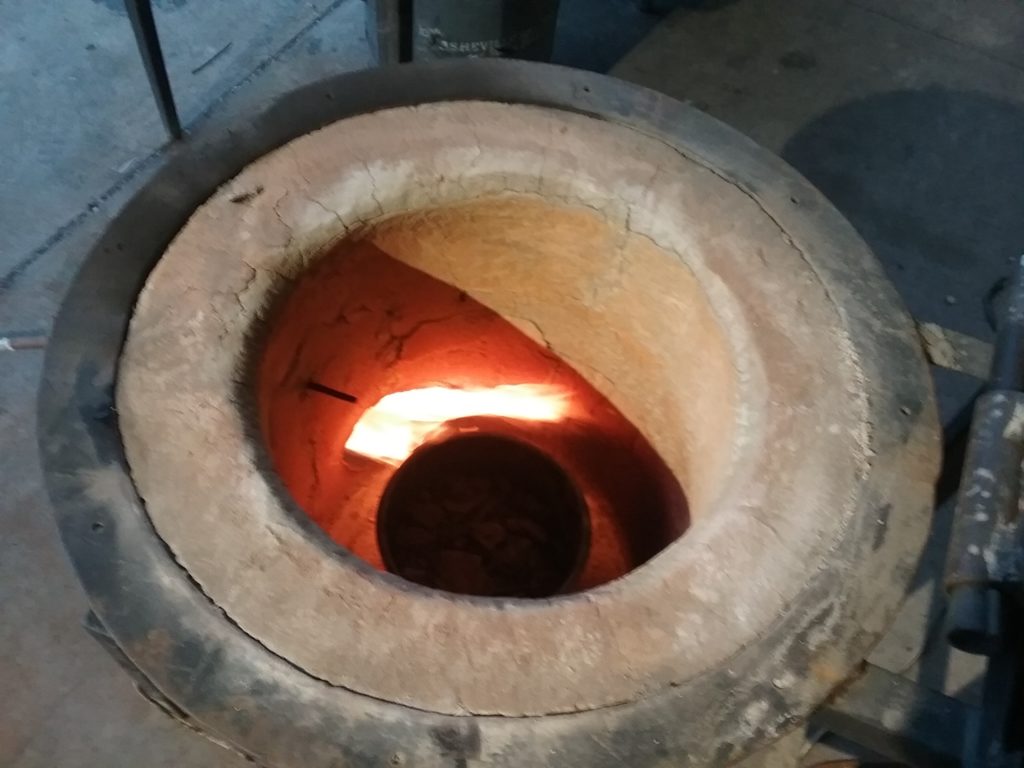
Calcined at 1200F for 2 hours 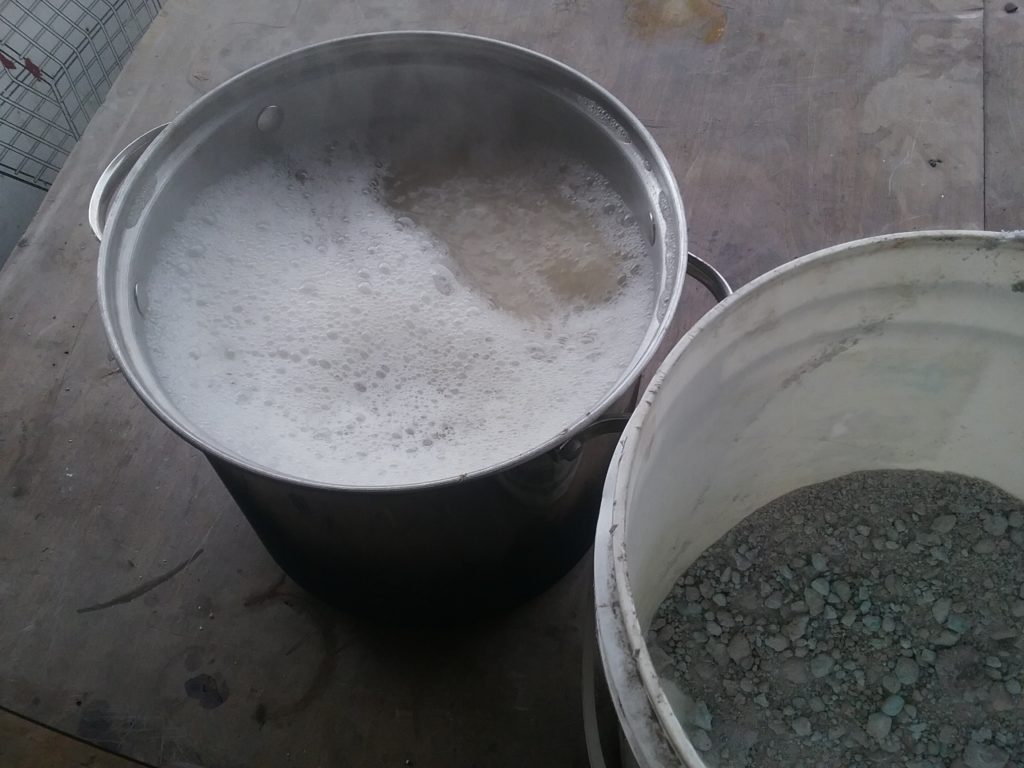
Adding calcined potash back to hot water: Be careful! 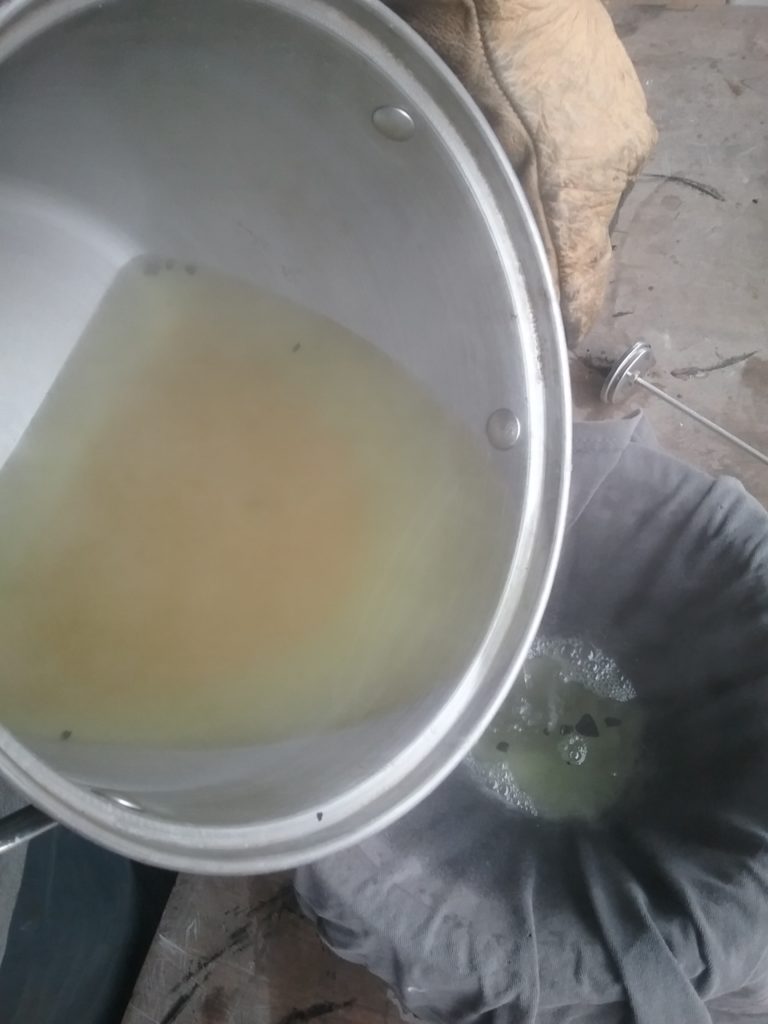
Decant and pour 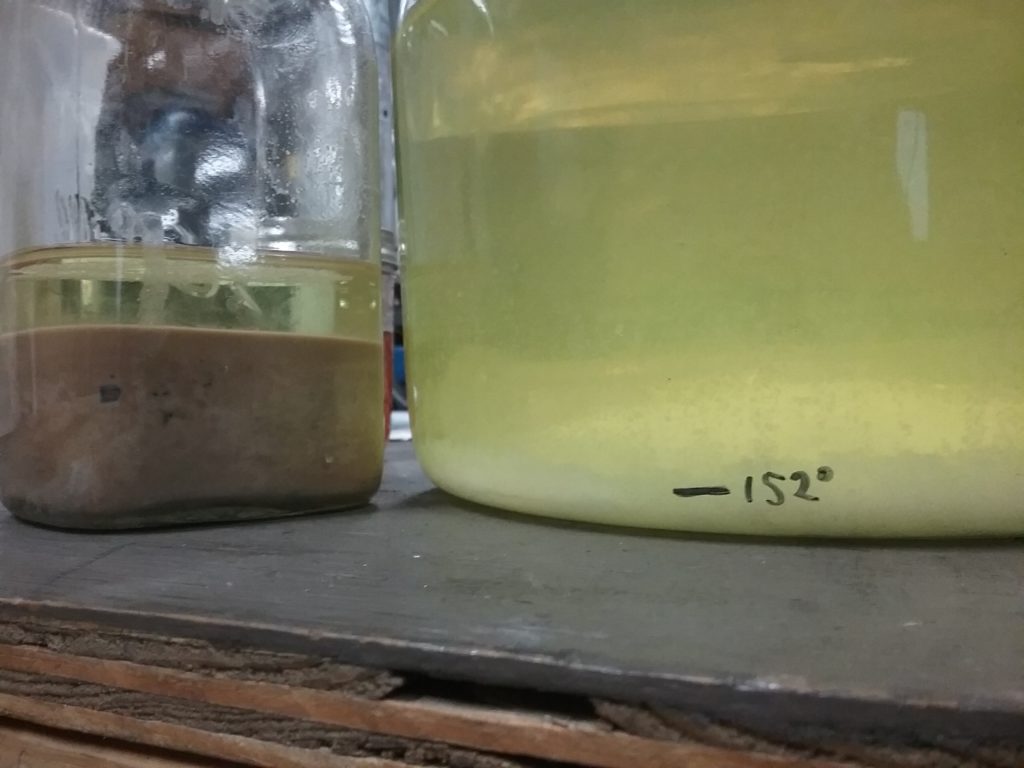
Refining through recrystallization 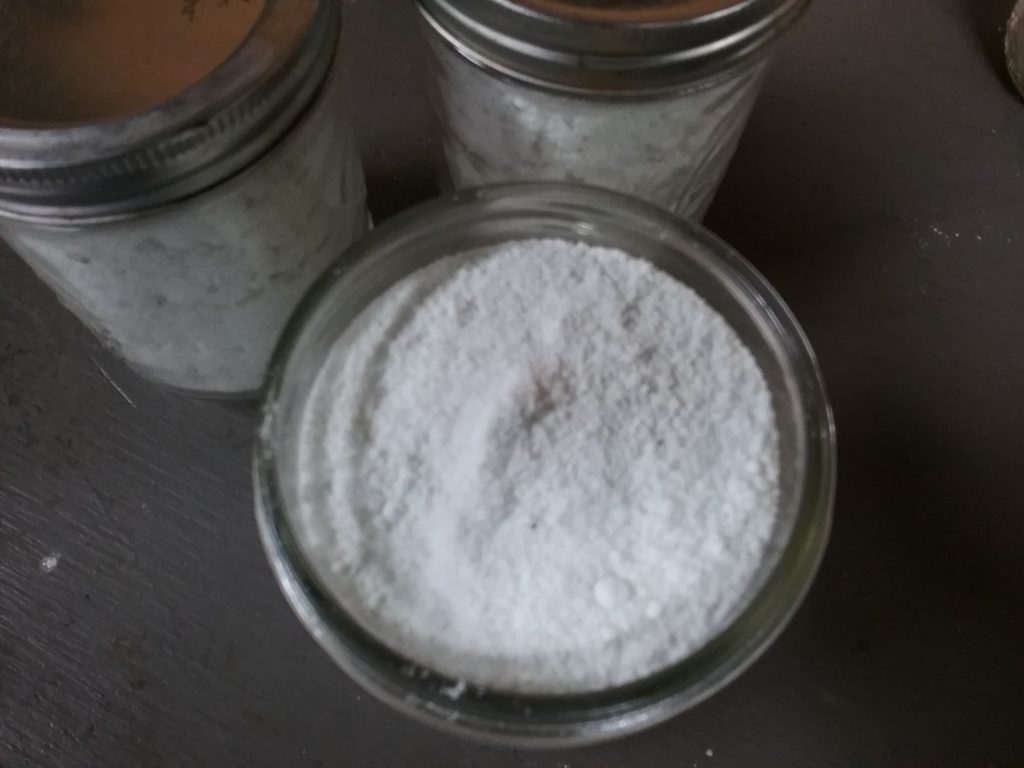
Refined potassium carbonate, also known as pearl ash 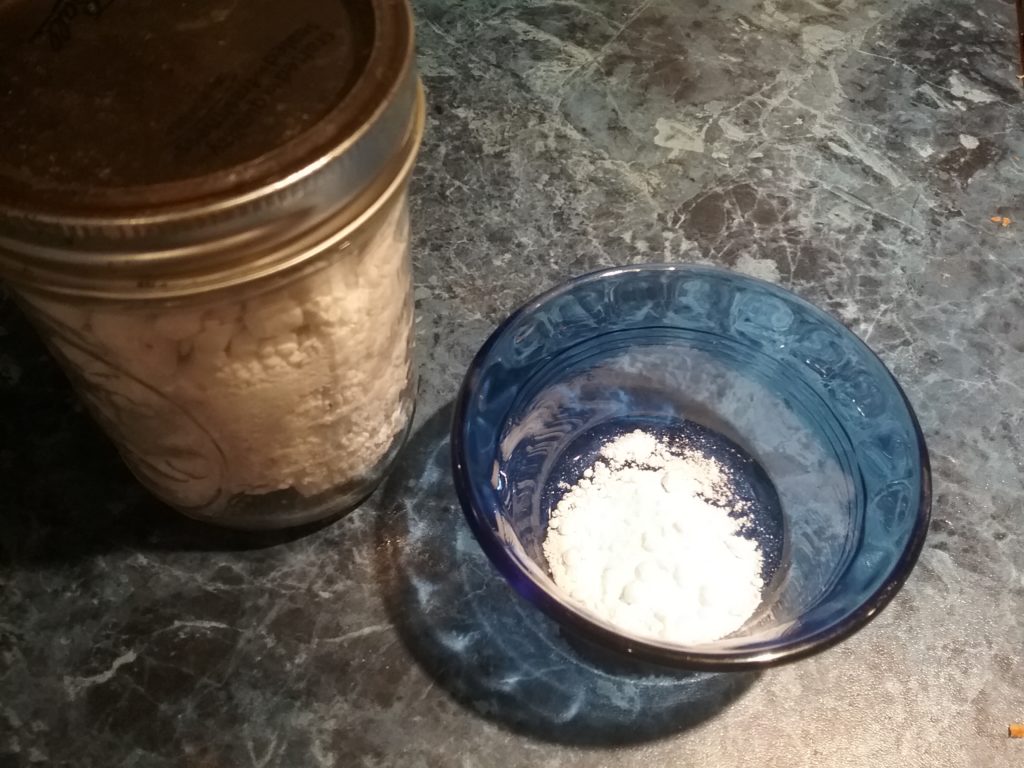
Potash should be dissolved prior to adding to dough 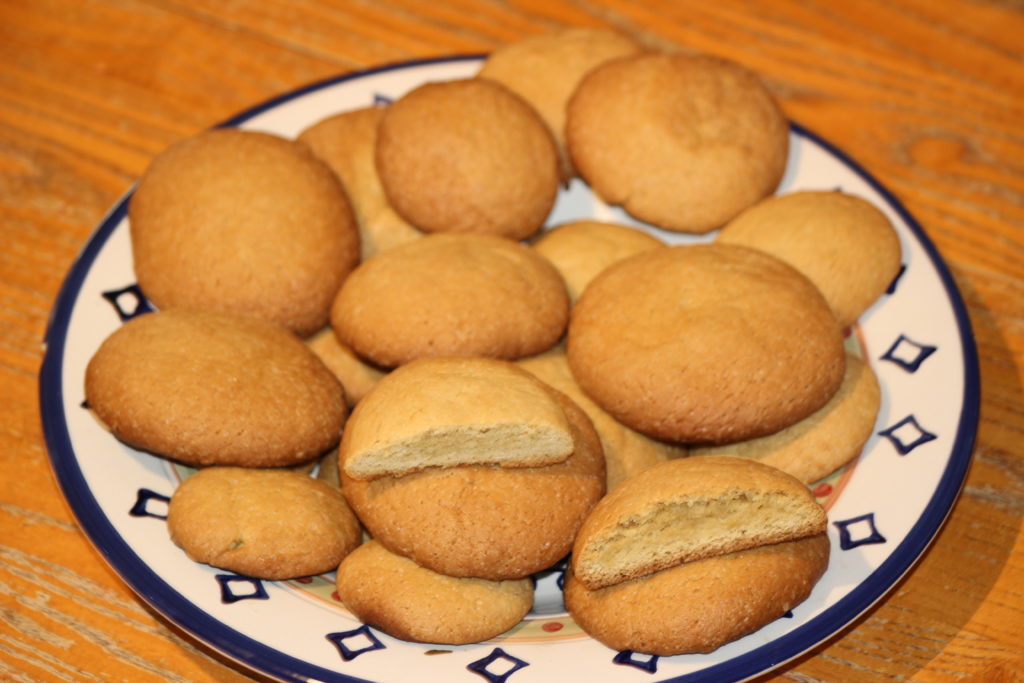
American potash cakes 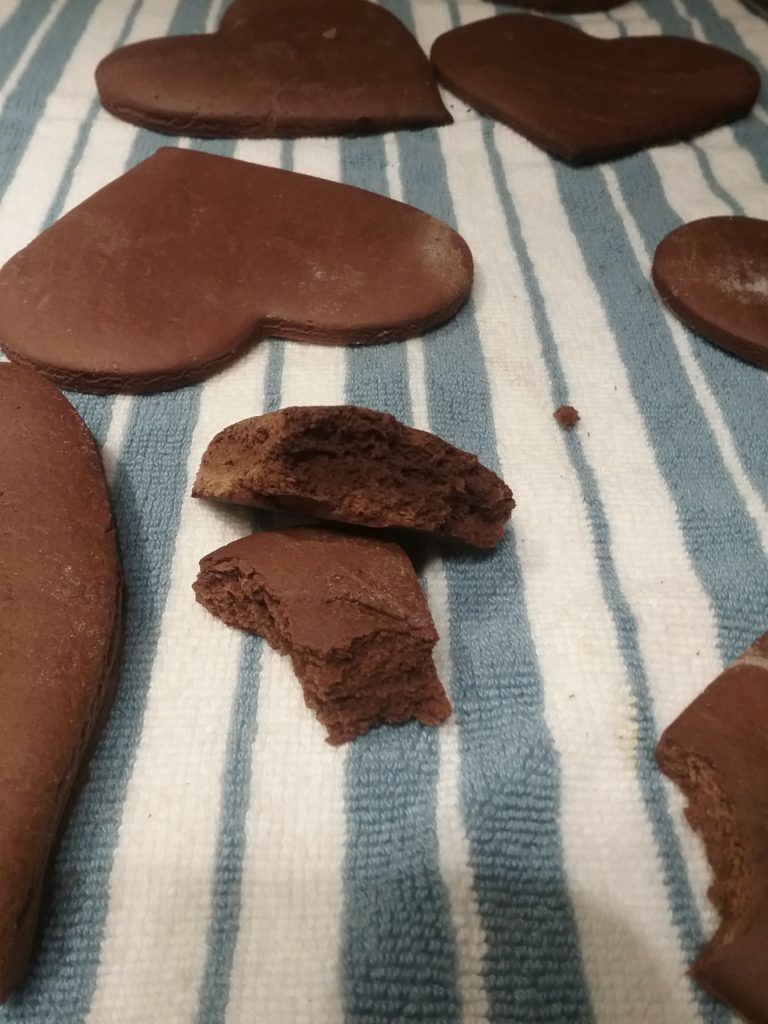
Traditional German Gingerbread 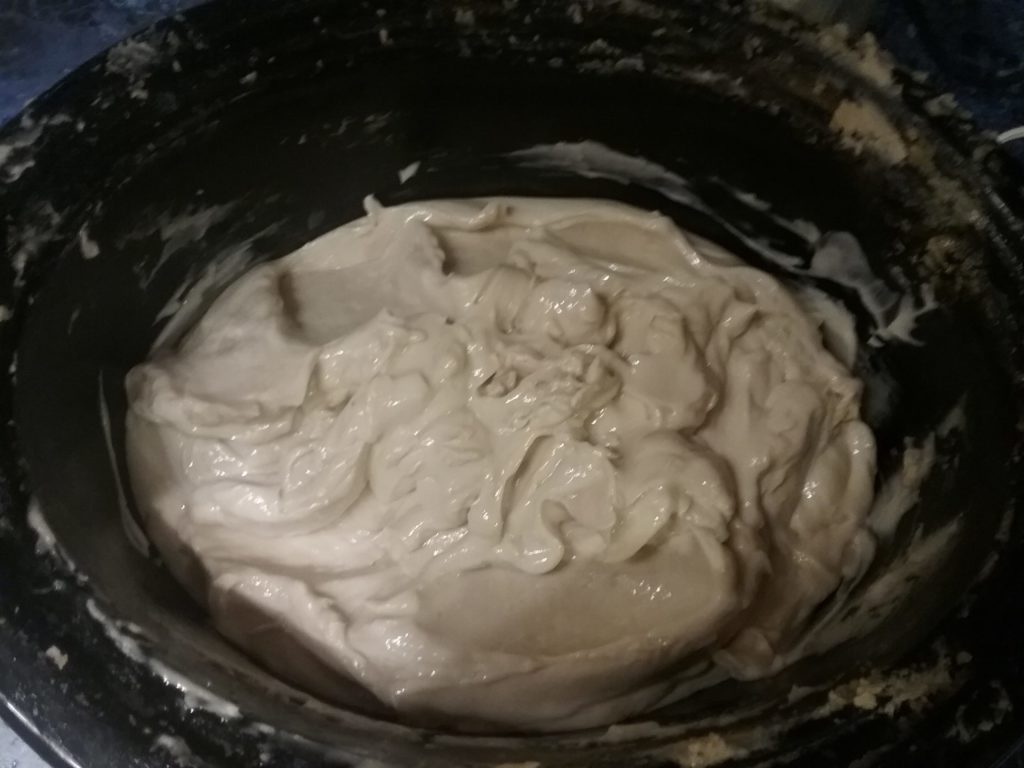
Hot process soap with refined potash and olive oil